Here is my Step by Step guide (with Photo's) on how to remove the factory Headunit from a 2007 Corolla or Auris. I know that this technique is 100% similar to the Hatch and Sedan models (As my Family has Both).
Here we go.
Tools needed.
Screw driver (philips and flat)
Socket set
Fingers
(sorry the pictures dont go in order)
Step 1:
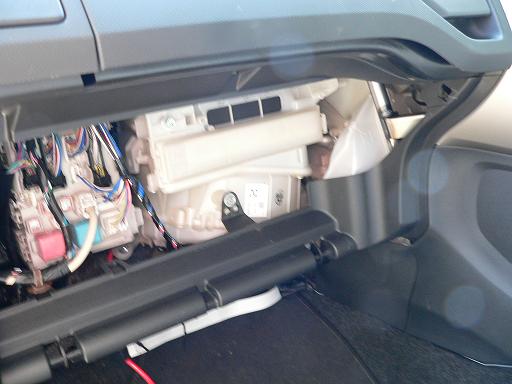
Remove the Glove box (instructions on how to this are in the manual under air Con filter change) See Pic 1
Step 2:
Remove these side panels, gripping from top and use non-brutal force to remove them. see Pic 8
Step 3:
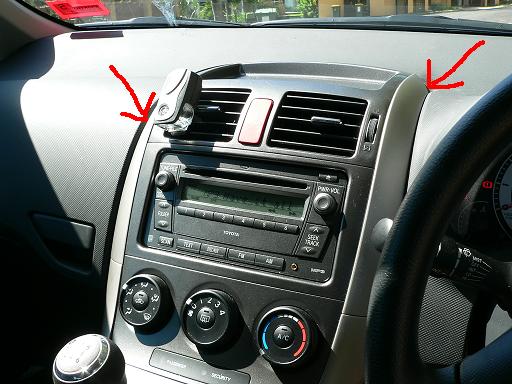
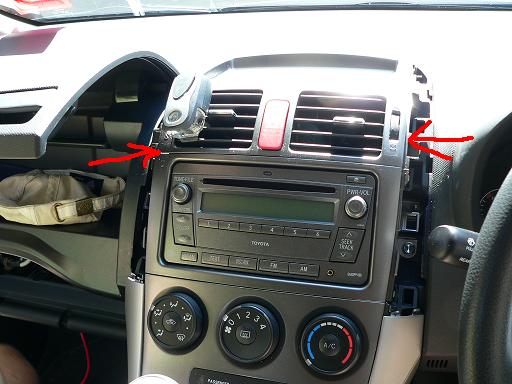
Remove the Dash part which holds the Hazard light and two Air Vents just above the Headunit and place gently on top of dash (pic 2), then remove frame thats surronds headunit. See pic 3
Step 4:
Remove these bolts (simple enough). See pic 2
Step 5:
Carefully remove headunit from housing. See pic 9
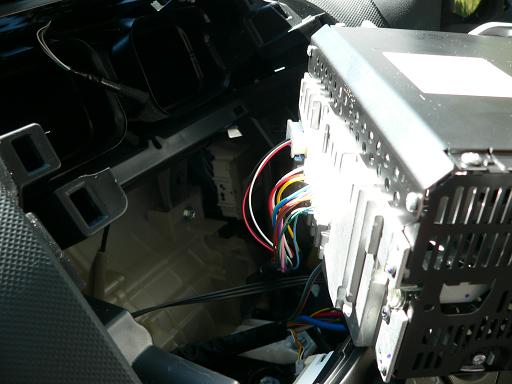
Step 6:
These are your wires. Will post cable colours in a few days. See pic 6
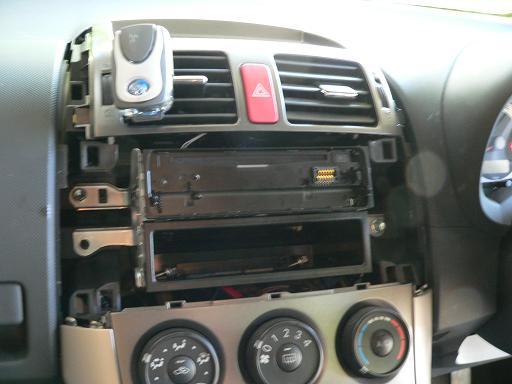
Step 7:
Here is the empty space left after you remove the headunit. See pic 7
Step 8:
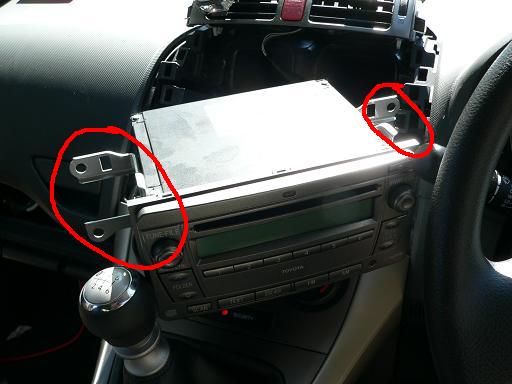
This step involves you putting your new headunit (if thats what your attending to do). Note the metal side parts that connect the headunit to the frame (as circled in Pic 9). They must be removed from factory headunit and place on new one. Pic 5
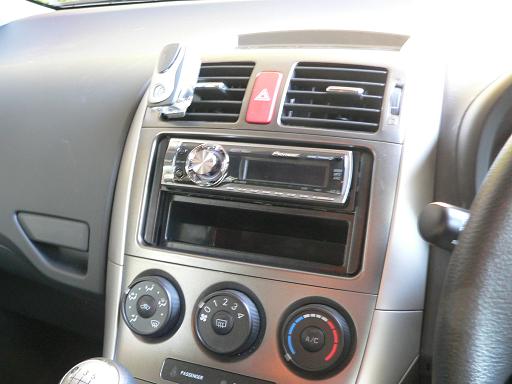
Finished Product:
Here's my finished product :) Pic 4
Hope someone finds this helpful, and if so then my job is done :)
p.s If you have any enquires as to this guide don't hesitate the PM me as I could not put every little process of the removal in this guide.