
Australian Specification (2017) CH-R's do not have a Toyota Original USB Charger Port option and the aftermarket USB Ports do not fit in the blank in front of the gear shift, which is the logical place for the port to be located. I have developed a Plug and Play option that any handy person can do to give your C-HR the missing option.
NOTE: This is a USB charger only and does not connect into the entertainment system.
STEP 1:
-
Buy a suitable aftermarket USB Charging Port.
- I purchased one that has 2x 2.1 amp USB ports and a Blue LED Volt Meter.
-
Buy a Twin mini blade fuse holder.
- These are a piggyback double adapter with a length of wire, usually with a crimp fitting on the end
STEP2:
-
Prepare the USB Port Unit that you purchased.
- This is the scary part and done incorrectly will quickly destroy your USB Port.
-
Cut the back off the USB Port flush with the back plate of the USB Port.
- I used a small high-speed hobby cutting tool with a less than 1mm thickness cutting disk. You may choose to use a fine hand saw. Take care to only just cut through the plastic and not cut into the circuit board or components below. You will also need to cut around the connection pins on the back. Take your time and plan your cuts carefully. Always wear suitable Safety Glasses or goggles and Cut Proof Gloves. Mount the USB Accessory in a vice or clamp as in-hand cutting is dangerous and your blood will damage the circuit board.
-
Depending on the design of your accessory you should now have an exposed circuit board attached to the plate as per the picture below.
- I would highly recommend that you use an epoxy glue to glue the circuit board to the front plate as most designs only have a small tab either side that the board sits in.
- Apply voltage to the power pins on the circuit board to ensure correct alignment if using the voltage meter option.
- Ensure the circuit board is correctly located in the tabs on the body.
- Ensure the glue you use does not flow into the USB ports or again you have wasted your money.
- Wait for the glue to completely set.
- Wrap the circuit board in good quality heat resistant electrical insulation tape to prevent dust settling on the board causing short circuits.
- Congratulations, you now have an ugly circuit board attached to the front plate ready for installation.
STEP3:
-
Remove the Accessory blanking plate from in front of the gear shift.
-
You have two options to do this:
- Use a sharp tool between the edge of the blanking plate and the trim panel (Not Recommended)
-
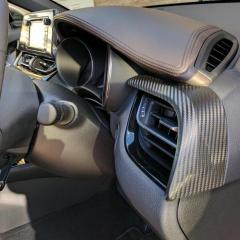
Remove 3 trim panels from your car. This sounds the hardest but in fact, Toyota have made this very easy to do and it exposes some fantastic engineering and opens your eyes to how little wiring is visible in these cars.
- I found the European Spec Hotspot Installation Manual (RHD) - AIM 003 833-0 provides details for removing the trim panels that match the Australian Spec C-HR.
-
You have two options to do this:
-
You should remove:
- the passenger central dash cover,
- the passenger side trim panel on the front of the center console and
- the trim panel that holds the blanking plate
- from the back press the blanking plate out of the trim panel.
-
Remove the fuse panel access cover under the dash on the passenger side.
- The instructions for this are in your manual and the clips are difficult to locate, take your time and you will have no problems with this cover.
- Removing the large plastic cover gives you access to the interior fuse panel which is located on the left side under the dash.
STEP4:
- Connect the wiring.
-
Cut a suitable length of wire to reach from the internal fuse panel and the USB accessory port.
- Connect a female spade connector on one end and
- Connect the wire from the fuse double adapter to the other end.
-
Cut another suitable length of wire to reach from the accessory port to a grounded bolt.
- There is a bolt located on the transmission tunnel that is well located and easily accessible.
- Crimp or solder a suitable terminal ring onto one end of this earth wire and a female spade connector on the other.
- Remove the bolt and place the ring terminal over the bolt retorque appropriately.
- Identify the correct positive and negative lugs on the circuit board
-
Connect the positive and negative spade connectors onto the correct lugs
- Use good quality insulation tape or shrink wrap tube to ensure no shorting across the terminals.
- Tie the positive and negative wires together with tape or shrink wrap near the terminals to support each other.
STEP5:
- Remove the fuse cover
- Locate the 15amp accessory fuse (Blue) in the fuse box and remove it.
-
Attach a new 15amp fuse into the direct line of the piggyback plug and a suitable (5amp) fuse into the takeoff port.
- Note the genuine Toyota fuses do not fit into the piggyback adapter.
- Keep the fuse for future reference and the blanking plate for if you change your mind.
- Connect the piggyback adapter into the place where the original accessory fuse was located.
- Stick cable-tie bases at various locations between the fuse box and the USB Port.
- Attach the cable to the bases with cable ties.
- Apply some cloth tape from one side of the fuse box across the piggyback connector to the other side of the fuse box for added security
STEP6:
-
Replace the trim panel through which the USB Panel and wiring are located.
- Use automotive trim double sided tape to stick the USB ports to the trim panel.
- Wipe the area where the tape will stick with suitable cleaning fluid to remove any wax or product that may affect the tape from sticking.
- Sit back and admire your work. but not for too long.
- You did put the fuse cover into the glove box for potential future reference, didn't you?
- Refit all the other trim panels.
-
Walk around the vehicle to the driver's side.
- Don't forget to let your eyes drift over the great lines of the C-HR as you walk around.
- Seat yourself in the driving position and smile, because you have the coolest car Toyota ever designed.
- Turn the ignition to the accessory position. (Keyless vehicles, press the start switch without depressing the brake pedal.
CONGRATULATIONS ![]()

![]()
If you bought the USB with Volt Meter you will have a lovely new display on your dash.
Connect a USB lead into one or both ports and plug it into your phone or other USB accessory and check that the device is charging.
NOTE: Do Not Connect a cable between this USB charger port and the entertainment system. EVER!
Standard Rider: Do this project at your own risk. I accept no liability for the work of others who follow these instructions.


