

u54mot
-
Posts
879 -
Joined
-
Last visited
-
Days Won
1
Content Type
Profiles
Forums
Events
Gallery
Tutorials
News & Articles
Videos
Posts posted by u54mot
-
-
-
-
T15 and 921 are the same. (10 mm wedge base).
You will be able to fit T10 bulbs in there as well since they T10 and T15 both share a 10mm wedge base.
T15 bulbs are bigger to give out more light.
T5 is different. (5mm wedge base)
-
T15 (W16W) - Wedge Type.
-

Top left wire hanging out of the small hole is the T10 plug for the parkers which activate both the DRLs and angel Lights.
The Black Wedge Plug is for the indicators,
The bottom left plug is the high beam actuator, which is placed in the same position on the new headlight as the old headlight.
The large opening on the headlight is for mounting the ballast of the OEM HID headlights.
-
Wiring of the High Beam Actuator:
The following photos should be self explanatory.
The black plug on the table with black and light blue wire coming out of it, is the plug provided by the headlight to connect to the high beam actuator, this is not a direct fit to the car. It is connected with bullet plugs and sockets. Remove it from the connecting Red and black wire from the headlight. Install some sockets on the old headlight actuator to match the bullets plugs.
Old Plug<---> Headlight
Blue <---> Red
White <---> Black
That is the only bit of wiring needed.
-
Aftermarket DRL LED Head Light Installation:
Parker Lights: they are a T10 (W5W) Male Plug. Direct Fit. No Modification Needed.
Amber Indicator Lights: the Bulb within the HeadLights assembly is a PY21W(1156) with offset pins of 150°. it is then wired and connected to a 7440 Male Plug. Direct Fit. No Modification Needed
HID/Low Beam: No Socket. Just place your old HID/H11 Bulb within the Bulb Holder. No Modification Needed.
High Beam: The Headlight Unit has one projector, and behaves like a BI-Xenon Projector Beam.You will need to do some modification to connect this to the car.
Photo: The High Beam Actuator Socket on old headlight. You may cut this off the old headlight, then wire it to the new headlight, and then it would be a straight plug and play.which is a cleaner install.
OR
You may wire it directly to the car, which would involve you standing next to the car, holding the headlight with one hand, the wires on the headlight with the other hand while balancing the headlight on your knees, then with your third hand holding the corresponding plug on the car, then your fourth hand to connect the the wires to the sockets within the female socket.
-
-
-
-
-
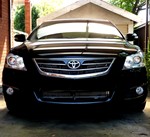
The plates are not sexy, they are ZR 63 XY.
-
-
-
The DVD slot is only for the GPS maps, it will not play any DVDs or CDs.
-
-
-
-
-
Is that gloss black ?
Yes it is.
-
-
2006 ATX:
2010 ATX:
-
DE-54-NT
-
Issue: After connecting the foot well lights to the wires behind the glove box, in the rear, doors closed, when the reading light buttons are depressed, the door courtesy lights also come on.
Do they do that usually? I can not recall, but I don't think so.
Otherwise, as per the first post, the two wires behind the glove box are the correct wires. An inline fuse was added for good measure.


Nitto tires?
in Wheels & Tyres
Posted
How much?