


Toyota Owners Club
-
Posts
636 -
Joined
-
Last visited
-
Days Won
3
Content Type
Profiles
Forums
Events
Gallery
Tutorials
News & Articles
Videos
Everything posted by Toyota Owners Club
-

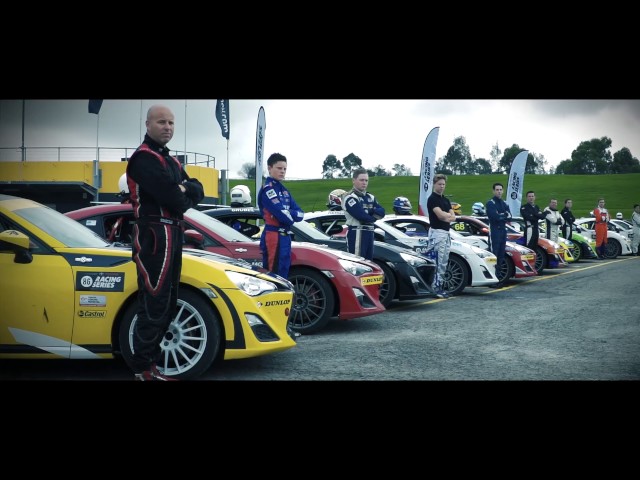 5 big events. 15 intense races. The 2017 Toyota 86 Racing Series is here. Get ready to experience world class coverage of grassroots racing. Get involved at www.toyota.com.au/86/racing-series...
 -
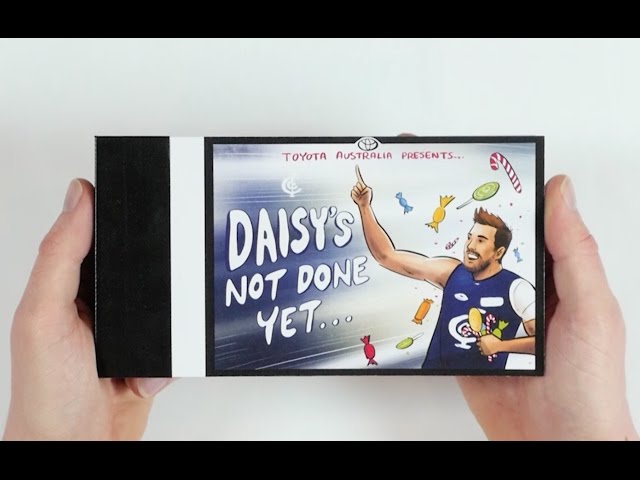 What a day for Daisy Thomas against his former club! The rejuvenated Blue still has a few tricks up his sleeve.
 -
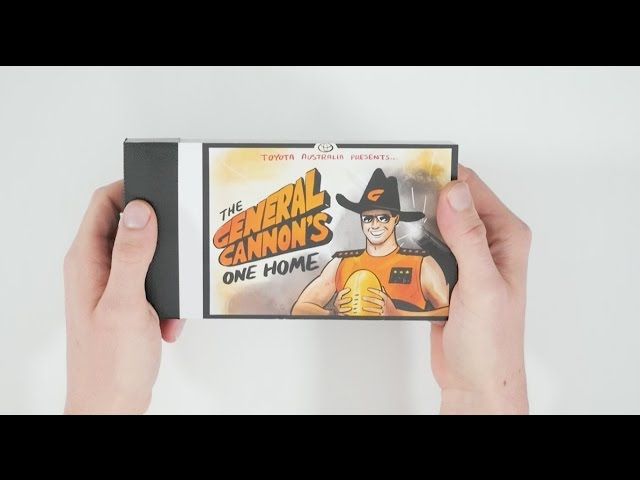 From despair in 2016, to a narrow victory in Canberra. The GWS GIANTS got one back over their new rivals thanks to this Jon Patton cannon.
 -
 When buying your new Toyota we have finance options to suit your needs. So no matter where life takes you, when you choose to finance your car with us you'll receive the same expertise and...
 -
 Throughout 2016 and 2017, we're taking a field trip with some of our 2016 alumni speakers as part of our new TEDxSydney Adventures series, presented by Toyota Prius. TEDxSydney Adventures...
 -
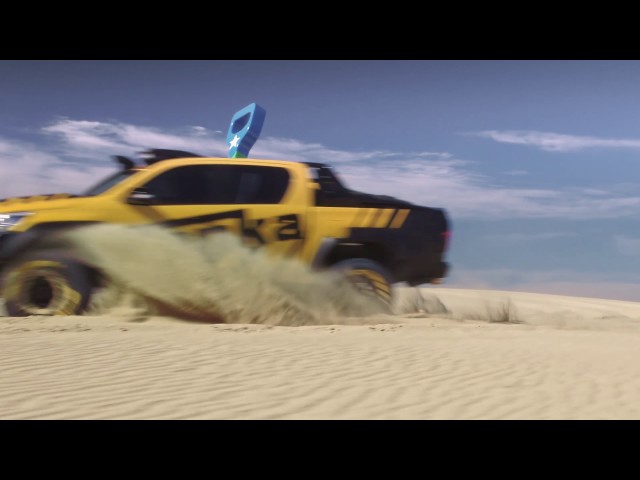 Introducing the HiLux Tonka – a one-of-a-kind concept vehicle from Toyota that shows what can happen when you push the limits of 'unbreakable'. See more at toyota.com.au/hilux-tonka.
 -
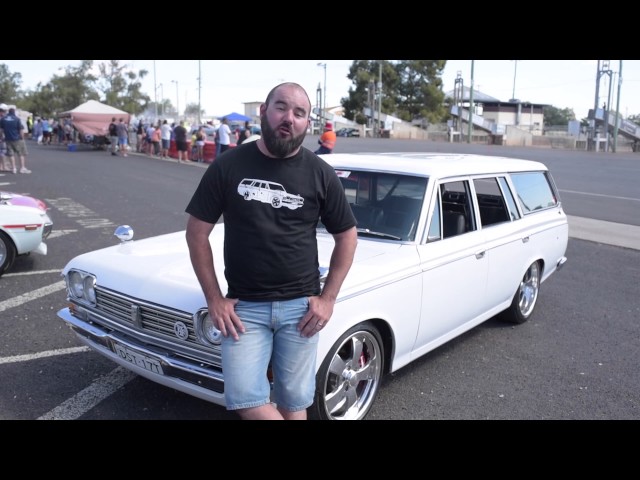 Affectionately nicknamed the “fast fridge”, Luke's modified 1968 Toyota Crown Station Wagon is certainly one of a kind.
 -
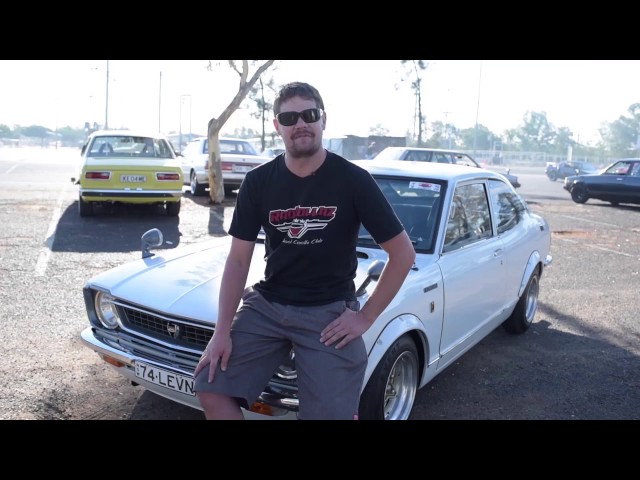 Justin and his prized 1974 KE25 Corolla have become inseparable. This is their story.
 -
 This is the story of Pauline and her much-loved Celica, 'Baby Girl'. Their relationship dates all the way back to 1976 and shows no signs of slowing down.
 -
 This 1967 Toyota Corona was given a second chance at life after David restored it as part of a nostalgic present for his wife. Here is David's Toyota Nationals story.
 -
From its humble beginnings in 1950 as a development project based on the design of the Willys Jeep, the Land Cruiser has taken its rightful place as Toyota's flagship four-wheel drive vehicle. When the Land Cruiser (then named "Model BJ") was first tested in August, 1951, it climbed to the sixth station of Mt. Fuji -- the first motor vehicle to perform this feat. The first orders for the vehicle were from police and forestry departments because of its off-road abilities. In 1954, when the BJ was formally named Land Cruiser, the vehicle officially entered mass-production, rather than being built on a made-to-order basis. The following year, the original 85-horsepower diesel engine was replaced with a 125-horsepower 3.8L gasoline unit. 1958 saw the formal introduction of the Land Cruiser to the U.S., and it was the best selling Toyota vehicle in the U.S. from 1961-1965. During that time the line-up consisted of soft-top, open, and pickup versions. In 1965, Land Cruiser moved toward the mainstream U.S. market with the introduction of the five-door station wagon. The wagon was hailed as a vehicle that was competent enough to drive through the back country, yet was comfortable and powerful enough to drive on any public street. Mid-1967 saw the U.S.-sales introduction of a hardtop version of the two-door, sales of which ceased in 1983 (although production ended in 1979). In 1975, the 3.8L engine was replaced by a larger and more powerful 4.2L version, making the Land Cruiser easier to drive. For the home market (Japan), Land Cruiser has almost always been available with a diesel engine -- originally 3.2L, reintroduced at 3.0L in 1976, and updated to 3.2L again in 1979 -- but it was never officially available in the U.S. Since 1980, the U.S.-spec Land Cruiser has only been available in one body style -- five-door station wagon. It was replaced in 1991 by a larger, more luxurious vehicle that sported full-time four-wheel-drive and a fully independent four-wheel coil-spring suspension. In 1993, Land Cruiser grew up even further. Now sporting a 24-valve, DOHC inline six-cylinder engine displacing 4.5L, Land Cruiser produced 212 horsepower and 275 pound-feet of torque, and was more than capable of pulling Land Cruiser's 5153 pounds of curb weight. The 1993 Land Cruiser was a far cry from the 1951 Model BJ. Sporting optional leather upholstery, available seating for eight, an available compact-disc player, manually locking front and rear, and automatic locking center, differentials, Land Cruiser was now a shadow of its former self. 1994 updates to the Land Cruiser were minimal (changes have only been made to the Land Cruiser when necessary), limited to the addition of CFC-free air-conditioning. In 1995, Land Cruiser took a large step toward additional passenger safety. With more and more consumers using their "sport-utility" vehicles as passenger cars, and those consumers looking for vehicles that offer enhanced safety features, Toyota was ready. Along with a new grille featuring redesigned headlights, the 1995 Land Cruiser included, as standard equipment, both driver- and passenger-side airbags and adjustable shoulder-belt anchors. These additions did nothing to diminish Land Cruiser's off-the-road abilities, though, and it continues on as the most refined, most capable four-wheel-drive vehicle on the market. For 1998, Toyota introduced the fifth-generation Land Cruiser and the first all-new Cruiser since 1991. The new Cruiser was larger, heavier, structurally more solid and substantially more powerful than its predecessor. Yet it delivered improved fuel efficiency, lower emissions and considerably quicker, more responsive acceleration. It also featured the first V8 engine in a Toyota Division vehicle. Its all-new 4.7-liter 32-valve DOHC produced 230 horsepower, 18 more than its predecessor’s inline six-cylinder, and 320 lbs.-ft. of torque, an improvement of 45 over the ’97 model. For 1999 the recently redesigned Land Cruiser featured an independent rear automatic climate control system for added convenience and passenger comfort. In 2000, Toyota again raised the benchmark in SUV performance and refinement by adding active traction control (Active TRAC), vehicle skid control (VSC) and electronic brake force distribution (EBD) systems as standard equipment. The Cruiser also added a six-disc in-dash CD player as standard. For 2001, the legendary Land Cruiser received a few new additions. It featured an available navigation system with a DVD player, standard auto dimming rear view mirror, and integrated compass in the rear view mirror (on models without the navigation system), JBL Premium three-in-one AM/FM/Cassette/CD six-disc in-dash changer with seven speakers with an available Electro Multi-Vision screen with center console six-disc CD player. The Land Cruiser entered 2002 with additional equipment and improved value. Third row seats, automatic rear climate control system and HomeLink® became standard features. The only available factory option was a DVD-based navigation system. Along with an updated front grille, rear bumper, rear turn signals and interior, output by the 2003 Land Cruiser’s 4.7-liter V8 was increased by five horsepower for improved responsiveness. For the first time, Land Cruiser had rear seat audio and steering wheel audio controls as standard equipment, and a DVD rear seat entertainment system and SRS front and second row side curtain airbags became available. The 2004 Land Cruiser introduced an available backup camera with the navigation system. New side privacy glass color was changed from bronze to dark green. For 2005, 18-inch wheels became standard. In 2006, the Land Cruiser received minor changes to the exterior and engine. The 4.7-liter V8 engine became equipped with VVT-i and ETCS-i to produce 275 horsepower and 332 lb.-ft. torque. Land Cruiser also gained LEVII status. Adjustable Height Control and Adaptive Variable Suspension became options, while a Tire Pressure Monitor System became standard. Exterior updates included a new grille, headlights, LED rear combination lamps, a high-gloss finish on the 18-inch wheels and an available rear spoiler. Two new colors included Classic Silver and Pacific Blue. The 2007 Land Cruiser carries over with no exterior changes. Driver and front passenger seat-mounted side airbags and front and second row side curtain airbags become standard.
-
PRIUS 2005 6 LED brake light unit:- For the past 2 years the rear near-side brake light comprising 6 individual LEDs has been dim, but would intermittently become bright again to match the off side one. This intermittent failure and re-correction indicated a poor connection somewhere within the wiring system but it was uncertain if this was a poor earth connection. It was corrected by the Toyota Garage in Bristol by removing the boot trim and disconnecting and reconnecting the white plastic multi-wire connector which comprises male and female components. The Toyota repair lasted for 2-3 months and then failed again. I investigated the white plastic connector myself by disconnecting the plastic male-female plug components. By very slightly twisting each of the 6 blade-like pin terminals with a pair of snipe nosed pliers it was possible to improve the connection contacts within the plug when reassembled. The brake lights instantly became bright again. The female & male components of the connector can be pulled apart by pressing down the projecting end of the plastic arm which lifts a small latch on the underside of the other end of the arm. REMOVE COVER TO REVEAL TAIL LIGHT PULL OUT PLASTIC CONNECTOR AND SEPARATE (Disconnect male & female parts of plug by pressing the left hand end of plastic bar above – then pull apart. 6 FLAT METAL BLADE PINS
-
This is the last job I carried out on my car this weekend. It's really simple and makes a massive difference for some. My brake pedal was really spongy, I only really noticed how bad it was till I had to drive my Dad's Yaris, which brakes are really good. If you press your brake pedal and it travels a long way down before braking or if your brakes feel soft or spongy, this simple fix might help. Before starting, remember that brake fluid is poisonous, flammable and a really effective PAINT STRIPPER. Here the tools you'll need; A jam jar with a lid and hole in it a piece of plastic or rubber tubing which fits tightly over the bleed screw (it needs to be clear so you can see the brake fluid inside) brake fluid DOT 3 or 4 8mm spanner wire brush and a clean rag and an assistant Firstly, locate your master cylinder reservoir in your engine and make sure it is filled up to the MAX line. It will have a warning on it to only use brake fluid. Do not let the level drop below the minimum line when you are bleeding the brakes if you do you will let air into the system and you will have to bleed the whole system again. Next chock the wheels just in case, you'll be under the car so better safe than sorry. Take the rubber caps of the bleed screw and with your wire brush clean the area around the screw, then give it a wipe with a clean cloth. The bleed screw is the little valve that sticks out at the back of each of your brakes. Get your assistant to sit in the car and pump the brakes a few times until it is stiff, then get him/her to push a final time but to hold the pressure on the pedal until you tell them to take it off. Put some new brake fluid into the jar or some oil as i used, this is to stop the old fluid from running out once you take the tubing of the screw. Work through the bleed screws in this order, left back brake, right back brake, left front brake, right front brake. Place your 8mm spanner over the bleed screw then place your tubing over the rest of the end. Now have your assistance depress the brake pedal for the final time and hold it there. Now turn the bleed screw half a turn or so till the brake fluid starts to flow out. Your assistant will feel the brake pedal move down as they keep the pressure on it, make sure they until you when the pedal is near the floor so you can retighten the screw to let them pump the pedal again, DO NOT let them take their foot off the pedal till you have tightened the screw. Keep a look out for air bubbles, once there are no air bubbles you can stop. Move on to you next wheel and do the same thing. Don't forget to put the rubber cover back onto the bleed screw then you're done, and make sure you don't spill any brake fluid onto any paint. Your brakes should now feel a lot stiffer and not travel so much. If is recommended that you change your brake fluid every 2 years. To do this simply use something like a syringe to suck out the old fluid from the reservoir, DO NOT USE YOUR MOUTH TO SUCK IT OUT, IT'S POISONOUS. Refill the reservoir with new fluid then bleed the brakes the same as above till the new fluid starts to come out. Hope this helps someone out there save a bit of cash.
-
We have had hundreds of people coming onto TOC asking about mk4 Supra's. So here is a rundown on the in's and out's of choosing one, looking at one and maintaining one. Before we start lets just clear up that the car only came as non turbo and twin turbo. Any supra which is single turbo must have been converted since. So if i reffer to 'turbo' i mean twin turbo and not a single turbo version. We will not be going into details on single turbo conversions. So first off lets have a look at the Models and the Specs. Between 1993-1996 the Supra mk4 (JZA80) was sold here in the UK. It was available in Twin Turbo guise only and came with 326bhp as standard. The car was available with either a 6 Speed Manual Transmission or 4 Speed Automatic with Manual Override. Straight out of the showroom the car was capable of around 180mph but was electronicly restricted to 155mph. Leather was standard, as was traction control, electric windows, electric/heated mirrors, ABS, Power Steering, Airbags Etc - Typical Equipment for a Luxury GT Cruiser. Approx only 600 UK Supra's were made and the colours were Red, Dark Blue, White, Black and Silver. Red, Blue came with Beige Leather interior and the others came with a Black one. Between 1993-2002 the JZA80 was sold in japan and the majority of Supra's you find on the roads today are Grey Imports. Just like the UK car it was available with the 6 speed manual or 4 speed auto, but also there was a 5 Speed manual which was only available on the Non Turbo variant of the car - but we will come back to that one in a minute. So the import Turbo comes in 3 models - RZ - Basic Turbo, equipement is pretty random on imports so best to check what the car has as the japanese got lots of optional extras etc RZ-S - Later version of above, again check the equipment. Later versions got VVTI. GZ - Top of the Range Import with Leather and the optional Aerotop removable roof. Available in AUTO ONLY. Now there is also the non turbo models. SZ - 225bhp non turbo with 5 speed manual or 4 speed auto. Like the RZ equipment could be anything. Aerotop was optional. SZ-R - Later model which had optional 6 speed gearbox as well as the two others. The JDM (Import Version) Supra was rated at 280bhp. Now i know this is 46bhp less than the UK car but in the real world when JDM Supra's are Dyno'd over here in the uk they usually produce around 300bhp. The reason for the power difference is the ceramic turbo chargers, smaller injectors and different cams compared to the UK car which generally got bigger everything and steel turbos. There are other differences between UK are JDM but those are the biggest. Because of the ceramic turbos which actually spin up faster than the heavier uk steel ones, the JDM supra has more torque and is pretty much just as fast 0-60 as the uk car which is approx 4.8secs for the manual and 5.3 for the auto. Imports are all limited to 120mph but it is simple to delimit these completely. Imports came in same colours as UK car but with a few extra which are - Royal Blue, Gunmetal Grey, Bronze Brown, Yellow, Green. There may be a few more but these are the only ones i can think of at the moment. Ok now onto Inside and Outside Easiest way to tell a UK car from an import is the Bonnet Vent, the Horns (Headlight sprayers) and the big brakes. These can be added to an import easily and i have seen it in the past so dont assume that just because a car has these things that its a UK car. Always check the car out and get proof. The UK car got 17" wheels and bigger brakes - 4 pot front and 2 pot rear. The Import also had these as an optional extra but as standard the imports all come with 2 pot fronts and 1 pot rears with smaller discs and 16" alloys. Imports sometimes dont have spoilers, was a deletable option. Imports sometimes have whats called the Aerokit - dont confuse this with the removable roof. The Aerokit is a set of side skirts and rear spats simply for styling only. This can be fitted to UK cars and i had them fitted to both my UK car and my import. But you cannot buy them brand new from Toyota as they stopped making them years ago. You will need to track down a used set. From the back the UK car has different rear clusters as it has a fog light built in. UK cars have the clear reverse lights second along from the centre, imports the clear reverse lights are in the centre of the boot. Imports have plastic headlights, uk cars have glass ones. These are interchangable. UK cars got the Active Spoiler (electronic spoiler that drops down under the nose of the car at high speed) as standard, was optional on imports. Imports got electric folding door mirrors, not available on UK cars but im sure could be retrofitted. Under the Bonnet Right from here on it gets technical guys, so pay attention. UK Supra Engine is the same as a JDM engine except for the following - Steel Turbo internals vs jdm ceramic 550cc Injectors vs jdm 440cc Different duration cams - 233deg duration & 8.25mm lift vs jdm 224deg duration & 7.8mm EGR - Exhaust Gas Recirculation - Fitted on all UK cars to bring emissions down, pumps hot gases back into engine - bad bad bad and once again bad. Better to remove this system from your UK car. Did it to mine. Bigger downpipe and cats, these are not interchangable between uk and jdm. Additional gearbox oil cooler. Different ECU Better Traction Control Auto Vs Manual Lets be honest here - Manual will give you all the control and will ultimatly be more fun. Auto is just as good a box but is better for commuting to and from work with the minimum of fuss. Manual is a little hard and agricultural and the auto is smooth and silky but at the end of the day they are pretty much the same 0-60 and top speed. Manual UK cars are very hard to get hold of in good condition. Aerotop Only available in RHD Auto Turbo or RHD Auto Non Turbo. In the US LHD cars had the option of manual aerotops. With the roof out it makes the chassis bendy and not much good for driving hard. With the roof in they drive identically to a normal car. Modifying First thing is first, get a better exhaust system - standard ones is rubbish. HKS Super Dragger and Blitz Nur Spec R are the most common. I personally went for the Tanabe Super Racing Medallion because the pipe was 3.5" vs the others which are about 3" also sounded meaty and cost less. Once you have the exhaust done then move onto removing one or both of the catalitic convertors. I went for the Megan Racing one as it was only £60 and was also 3.5" which matched the exhaust. Be aware that removing the cats means that the car will not pass its MOT so you will need to put them back in for the MOT and then remove them again. The other option is to remove only one and use a smaller downpipe. The car will still pass the MOT on one cat and you will be able to run higher boost. Not as much obviously as removing both cats but its a good trade off. This is the route i am taking with my Aristo (same engine as the supra). Note - The JDM supras will hit fuel cut (engine safety feature) with no cats in as the wastegates aren't that good. A 2.5" restrictor plate can be fitted to combat this. Ok so now we have a supra with a performance exhaust and one or no cats. So lets improve breathing, this can be done via either a performance panel filter from TRD/BLITZ/APEXI/HKS etc or via an induction kit from the same kind of makes. The standard airbox can flow up to 500bhp so unless you are going to go above this an induction kit is a waste of time. Next you need to fit a Fuel Cut Defender - Thor's TRL FCD is by far the best at around £60. This device overrides the ECU's max safe boost limit so you can push up the power. Look into this yourself and do this only at YOUR OWN RISK as done incorrectly it could destroy your engine. Fit a boost controller, either mechanical or electronic. Mechanicals are cheaper. Electronic ones are safer and overall better. This is the basics and from here on out you'd better speak to a tuning company to plot out the route you are going to take to bigger power. Envy Performance, Fensport, Prolex, Whiftbits, TDI are amoung the best. There is another company which has a big presence on the mk4 websites who i shall not name but i would advise you to ONLY go to these 5 places above as the place i have not mentioned is run by cowboys. You know who you are! Tyres I'd recommend either Goodyear Eagle F1's or Toyo Proxies - dont go for cheap tyres on a supra or the supra will kill you plain and simple Insurance Because most Supra's are over 10years old they can be insured as Classic/Cherished Cars which costs a lot less. Also try Sky Insurance who will give you a discount if you are a club member. I personally go with Elephant myself as they have always been the cheapest for me. Looking at one Firstly, dont be put off by high mileage. As long as they are properly maintained the 2JZ engine will last forever. Check for accident damage, knocking sounds from suspension/engine. Check for uneven tyre wear. Tyre wear on the inside is normal for a supra but if its on the outside then something is up. Get to start the car up from cold and check for smoke. If you see any then the valve stem seals are worn but this is common and to be honest something you dont really have to worry about as long as the smoke is only there for a short time when cold. When normal temp there should be no smoke. Take the car out for a spin, make sure the car doesnt pull to one side and also give it a boot and check in the mirror for smoke. If you see any the turbos may be on their way out. First turbo comes on boost from about 1500rpm and second if i can remember correctly about 4000rpm. Listen for a loud whining sound, if you hear it the 2nd turbo may be dead/dying. All you should hear is the faint whistling of the turbos. Boost should be smooth and progressive. Slam on the brakes at about 60mph and make sure it doesnt pull to one side. Also lightly press them at 60mph and check for juddering - if this happens the discs are most likely warped and need changing. Check oil levels and look under the rad cap and oil cap for a creamy mayonnaise type stuff. If you see this then the car may have a dodgy headgasket but its not really heard of on the mk4 - more a mk3 thing. Generally make sure its straight and neat and goes as it should. Check the engine light comes on and goes out, this is orange and looks like a gearbox/engine. As far as maintaining one is concerned you'd be best doing an oil/filter change every 3k miles. Tyres last between 6-12k. Brake pads approx 6k and discs 80k. If anyone has any other information they would like to add to this thread then please feel free but please keep it factual
-
Solution - Rav4 (4.2) Speedometer Failure
Toyota Owners Club posted a tutorial in Toyota Rav4 Guides
I thought I'd post this solution here, in case it's of use to other folk on the forum. Recently, the speedometer on my 2002 Rav4 (4.2) VVTi 1998cc Petrol, failed. To begin with, I was driving down the motorway, and the needle went nuts, dropping to 0 MPH then coming back up to my cruising speed, on and off in quick succession. After about 5 minutes of the speedometer needle bouncing up and down, it finally stopped altogether. After about 20 minutes of further driving, the Engine-Management light came on too, indicating a trouble code (no doubt due to the loss of vehicle speed input). Most of the research I did on the internet pointed towards the fault being with the vehicle speed sensor, which is located in the gearbox (close to the firewall, towards the right hand side of the gearbox). However, whilst trying to troubleshoot the issue, I inadvertently came across an article that suggested the problem could lie with water getting into a connector block, inside the vehicle. The connector block in question lives behind the driver's side kick panel, just to the right of the accelerator pedal: Indeed, when I removed the kick-panel, and unplugged the very bottom white connector block, I found evidence of corrosion (green build-up visible in pic), and the cable was wet: I believe in my case, the water is entering from the sunroof, and making it's way down the driver's side windscreen pillar, and down the wiring loom until it reaches this lowest point. A squirt of WD40 into the connector, and some cleaning up of the contacts restored my speedometer back to full operational status. I was very glad I found the real issue before I spent considerable money on a new VSS!! -
Posted by Giddlepin HINTS AND TIPS ON THIS PAGE ARE NOT NECESSARILY USING THE RECOMMENDED METHODS AND ARE UNDERTAKEN AT YOUR OWN RISK KEY PROGRAMMING AUTO DATA PM GIDDLEPIN for any information needed that is in the highlighted fields. WORKSHOP INFORMATION From curriedb SOFT TOP CARE REPLACING FRONT DISCS & PADS REPLACING REAR DISCS & PADS MAF SENSOR CLEANING BLOCKED DRAINS SOFT TOP EARS SOFT TOP REPAIR SIDE WINDOW WATER LEAK OXYGEN SENSOR REPLACEMENT HANDBRAKE ADJUSTMENT REPLACING DOOR CARD MATERIAL VERY USEFUL LINK TO VARIOUS HINTS & TIPS ;) FITTING A CHE HEADER PDF PARTS GUIDE jameswhit
-
REMOTE ALARM/CENTRAL LOCKING
-
Here are a couple of bits of preventative maintenance that will save a soggy interior and seized filler cap hinge. The MkIII Roadster is prone to waterlogged interiors due to the clogging up of the two drain valves located behind the side engine vents. You can check if these are clear by pulling the hood about half way back and looking down between the hood and body side near the engine intakes, if it looks dry then all is well but if you see a pool of water then likely as not the drain valves are blocked. The side vent covers are easily removed with a little care and clearing the blockage is very easy. While the nearside cover is off it is possible to access the filler cap hinge behind, this can then be lubricated which will prevent the inconvenience of not being able to fill up. Here are the photographs I took while doing my car. Hope it will be of help to some of you
-
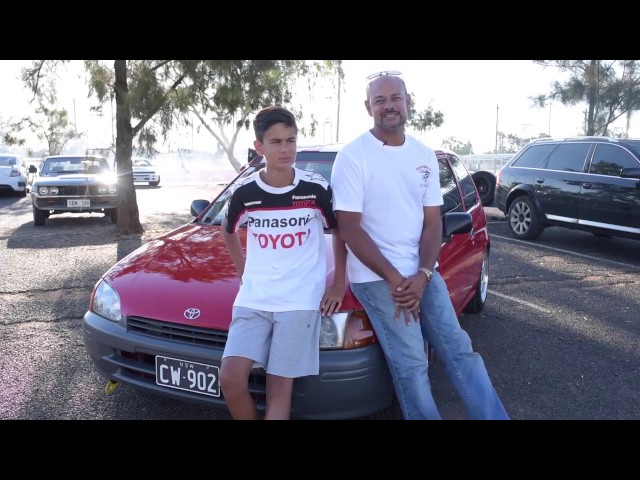 Meet Gavin and Callum – the passionate father/son duo who love their 1996 Starlet. Hear what they had to say at the 2016 Toyota Nationals. #MyToyota.
 -
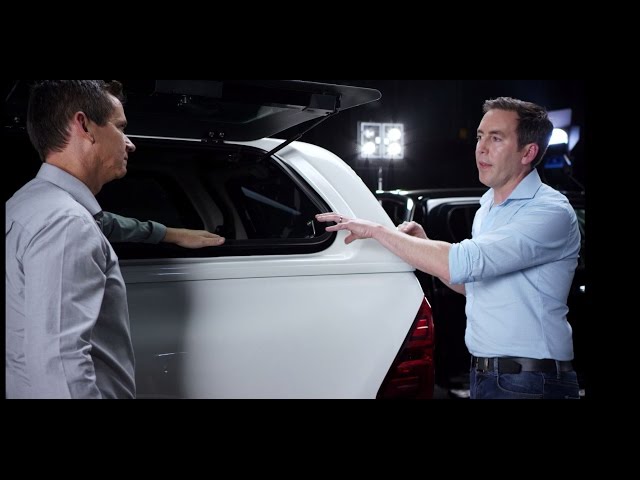 Tested in some of the most rugged conditions right here in Australia, the range of Canopies and Tonneau Covers offer ideal additional storage whether you're on a worksite or going camping....
 -
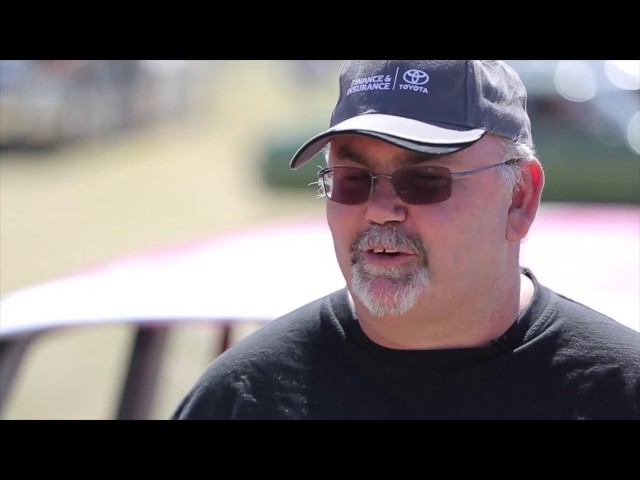
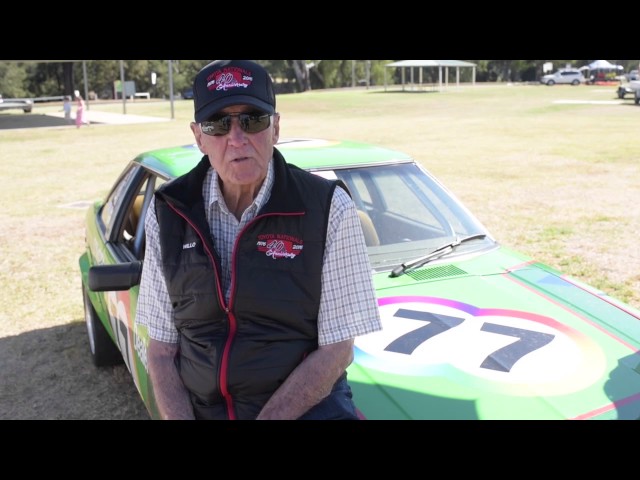 We'll never forget the late, great Peter Williamson and his iconic GT. We caught up with the motorsport legend at Toyota Nationals in 2016.
 -
 When a community falls on tough times, cricket can be an amazing outlet to bring people together – This is the story of the West Whyalla Cricket Club.
 -
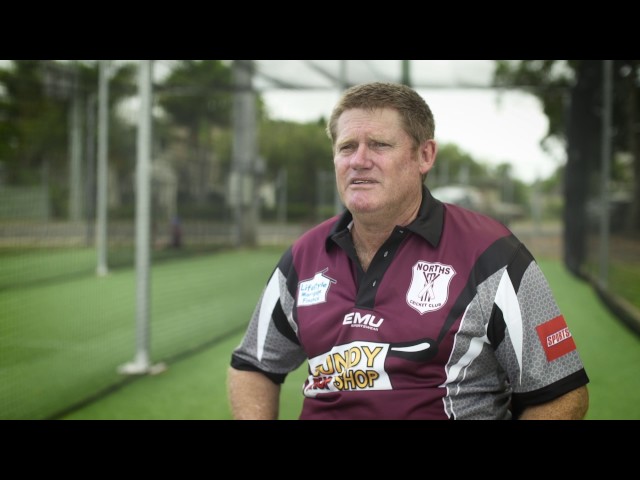 After devastating floods hit in 2013, the North Bundaberg Cricket Club had to rebuild from scratch but it has only made their community stronger.
 -
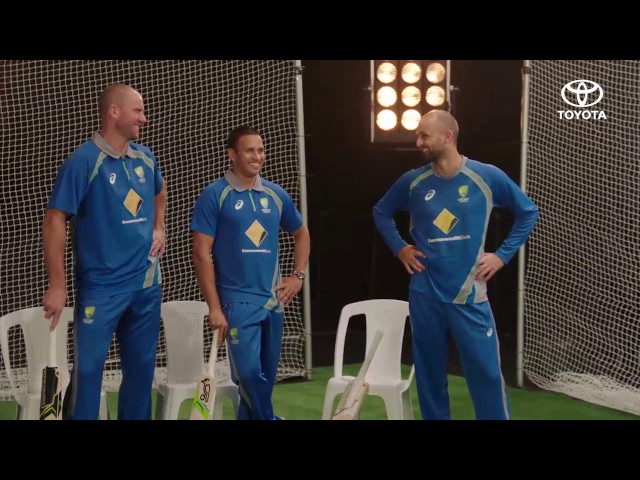 The Lyon King is hungry for some wickets and he'll be ready to celebrate in style thanks to some help from Steve and Dave.


