

rentaspace
-
Posts
241 -
Joined
-
Last visited
-
Days Won
12
Content Type
Profiles
Forums
Events
Gallery
Tutorials
News & Articles
Videos
Posts posted by rentaspace
-
-
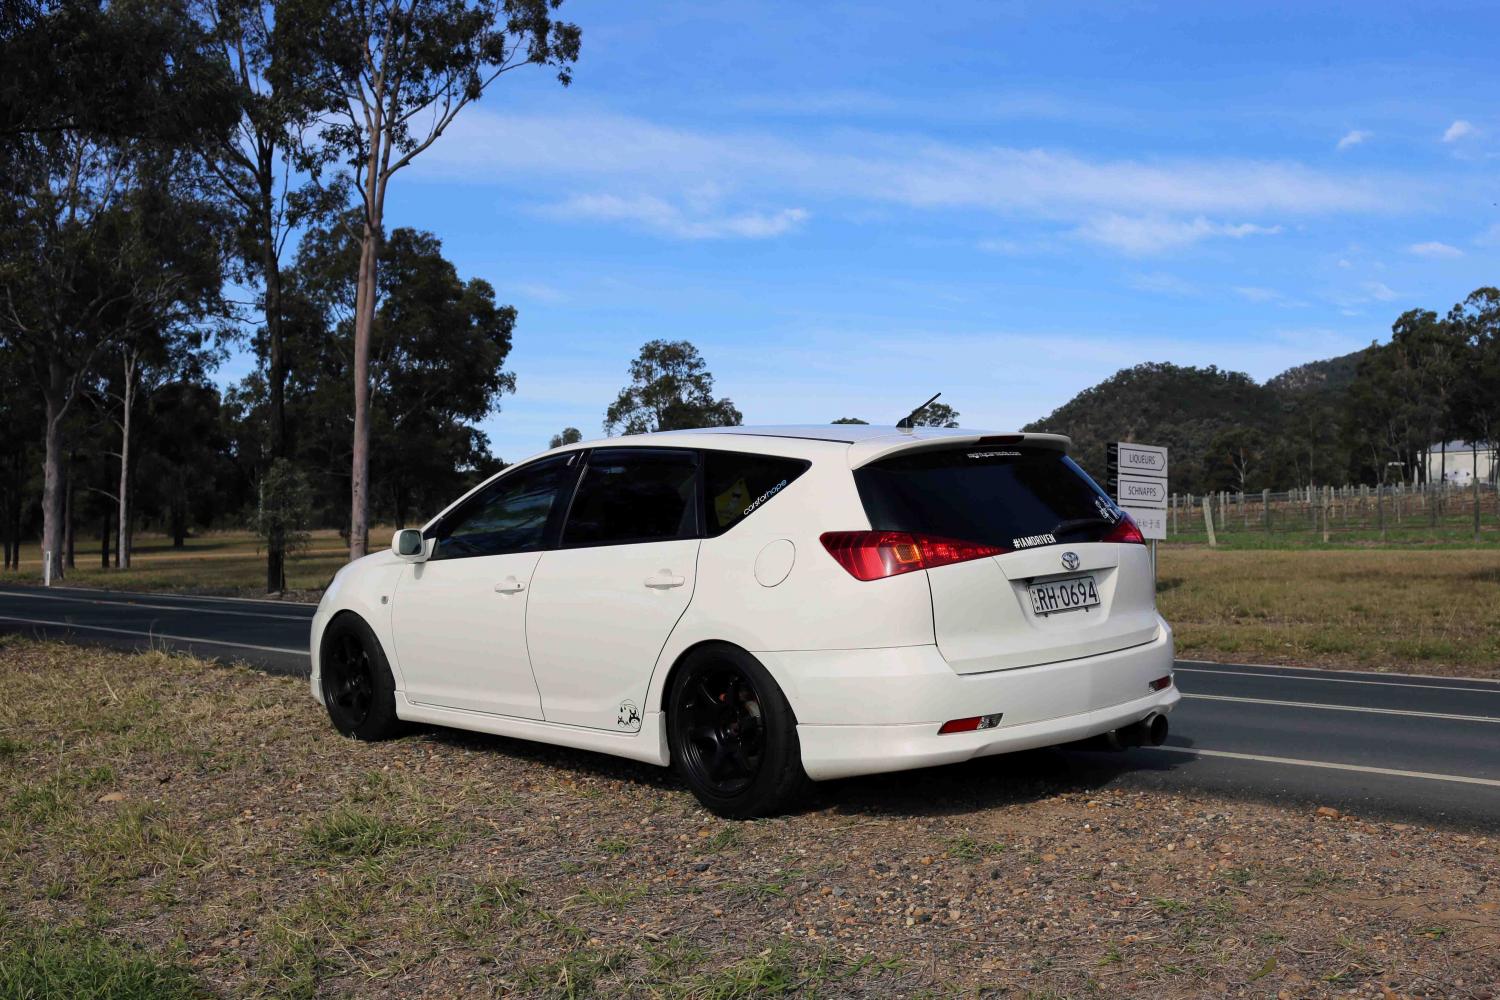
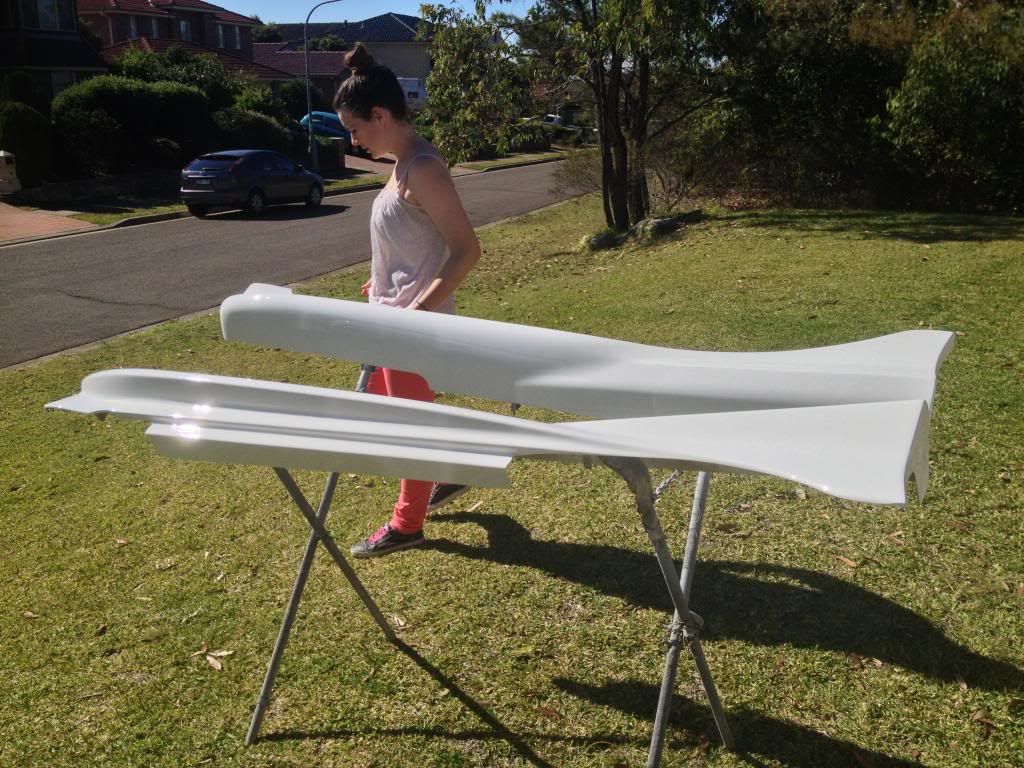
Side Skirts:
So basically, it began a month or two before installation, when I was
searching eBay a came across a guy in South Australia selling the
Veilside/Invader front bar, side-skirts and rear bar. I am not a fan of
the Veilside front or rear (It makes the car look bulky and I just don't
like it). So I offered the guy $120 for the skirts and he accepted. Now
came the fun of getting them shipped from South Australia to New South
Wales, I found a low-cost company that would ship them to Villawood Depo
for $60 including $300 transit coverage. So $180 delivered to my door
(almost):
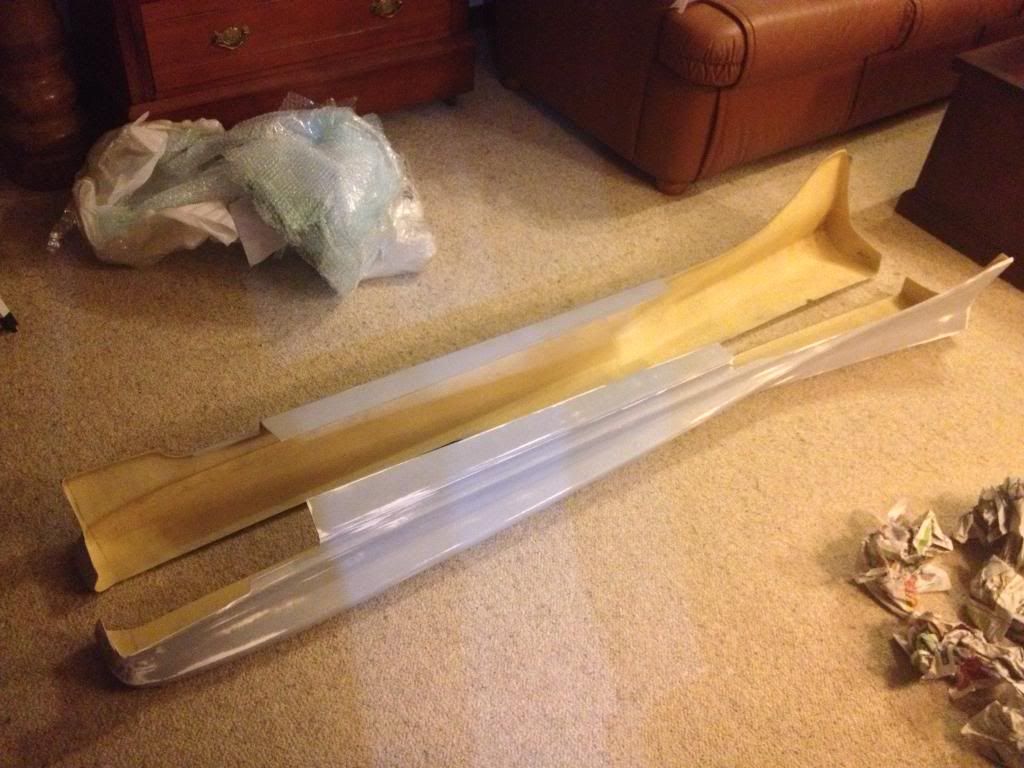
Now, the manufacturers primer was shotty at best... and I rang around
finding out prices to paint the skirts.. I got varying number from $250 -
$1000+ (JUST to paint)... After scraping that idea, I approached one of
my mates who worked for a smash repairs locally. His work agreed to
supply the paint at-cost ($90 for a liter of two-pack) and my mate
agreed to spray them for me at his house. Before going over, I decided
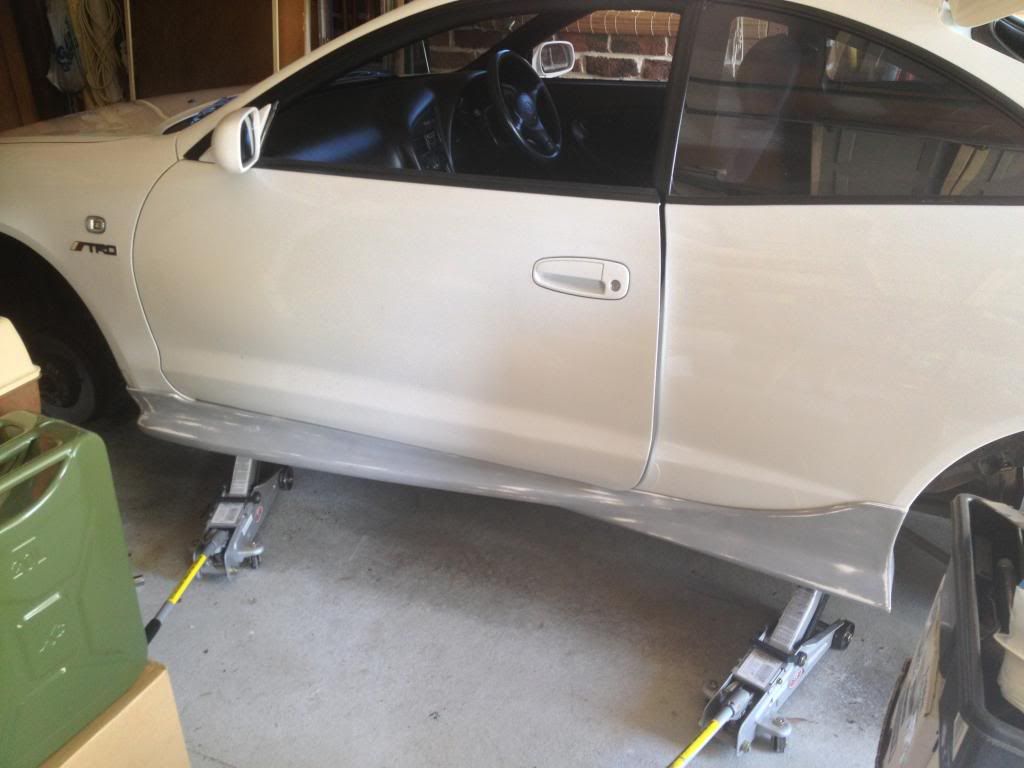
to install the skirts on the car in a dry run to make sure they fitted:
The fitment was alright, some small minor imperfections were on the skirts (But that was to be expected).
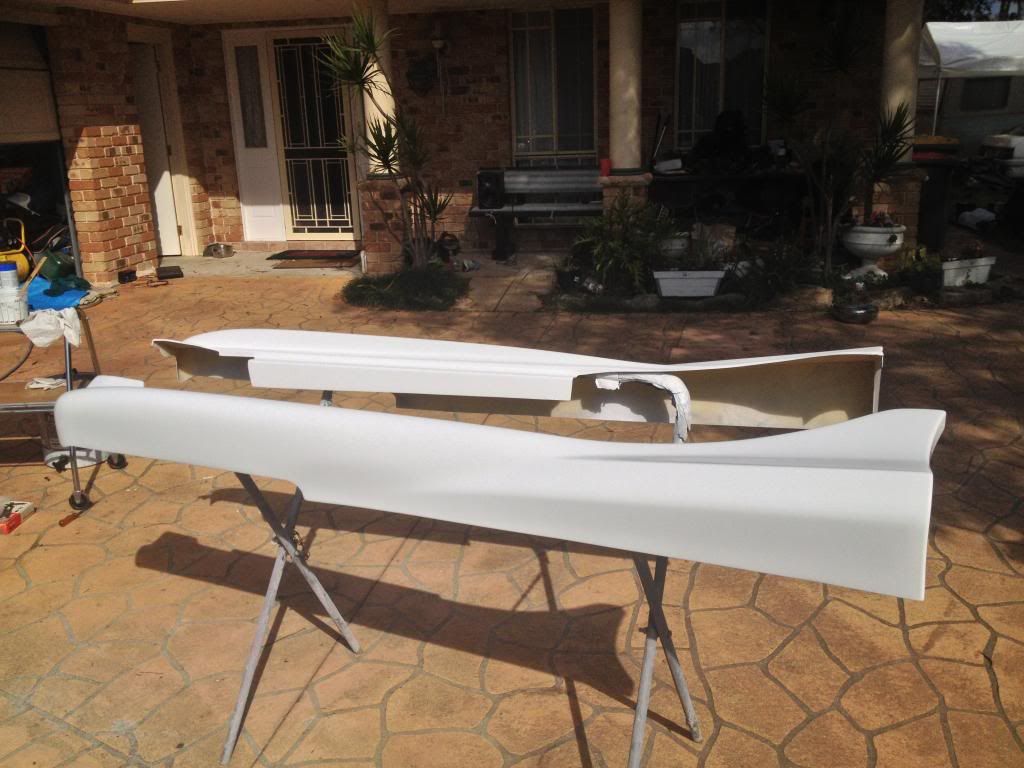
I then took the skirts to my mates place and we got four layers of primer onto them:
Giving a much better finish then the crappy manufacturers stuff...
After a week of crappy weather and me ending up in hospital (long story
short I drank to much), We finally got the skirts painted and cleared:
Drying the clear in the sun
The next day, (Mothers day), we went to install the skirts only to find
that the door trim was being blocked... So after marking out the area
that needed to be cut, I had to leave to go to my girlfriends for lunch
and then my grandparents. I got these photos of the installed (But not
held on) skirts:
Later that night, using 4 screws, double sided tape and Sikaflex we
installed the skirts properly (I don't think they will be moving anytime
soon...)
There is some small imperfections in the paint and the skirts
themselves, but nothing that detracts from the appearance (Some need to
be fixed later on this week when the clear coat is fully cured)
Overall I am very happy with the final product, and a big thanks goes to
My mates and girlfriend that helped a lot through the whole process -
A few months later, I found a cheap set of Side Skirts from Adelaide, and I bought them ($180 Shipped, Painted and Installed).
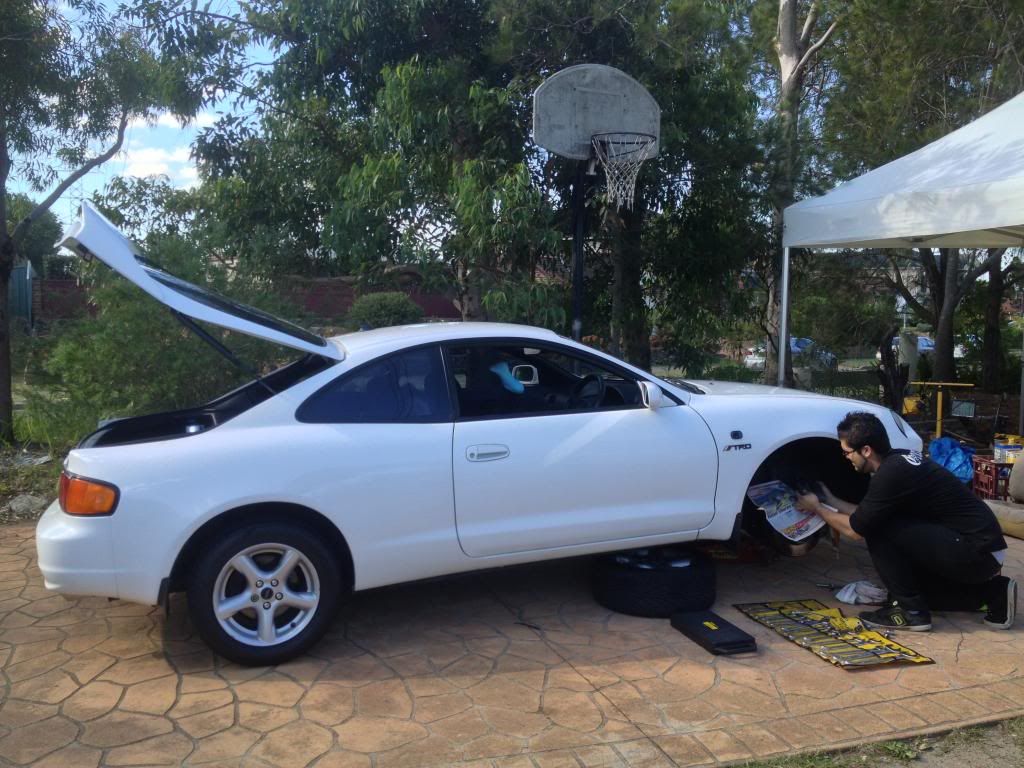
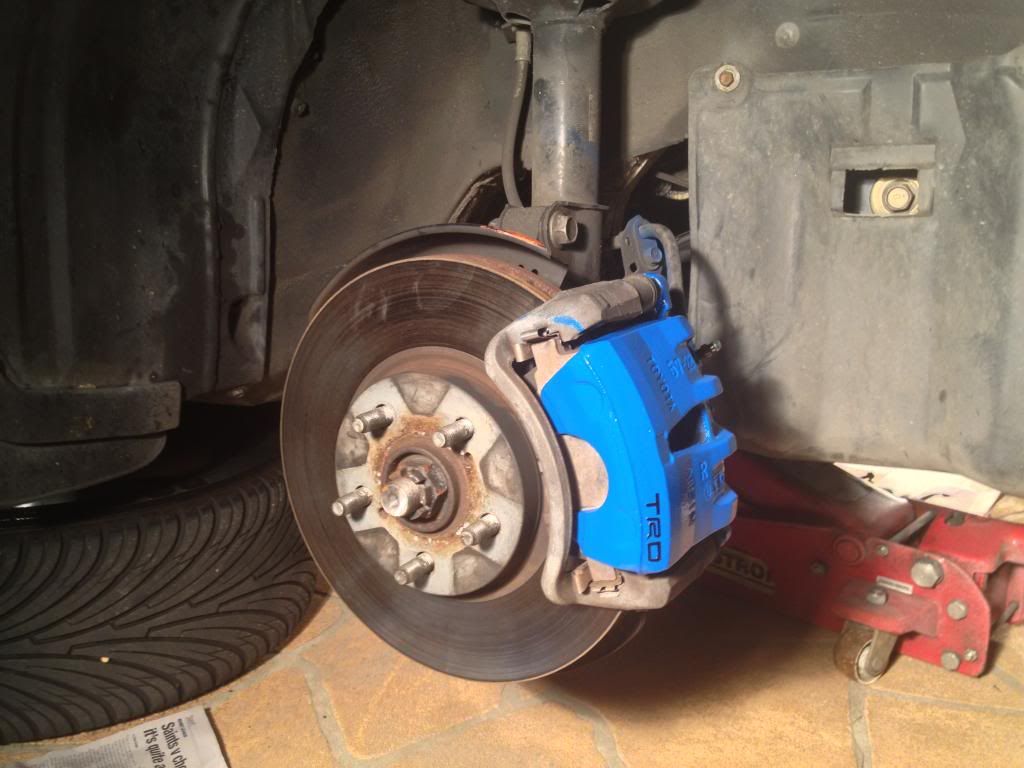
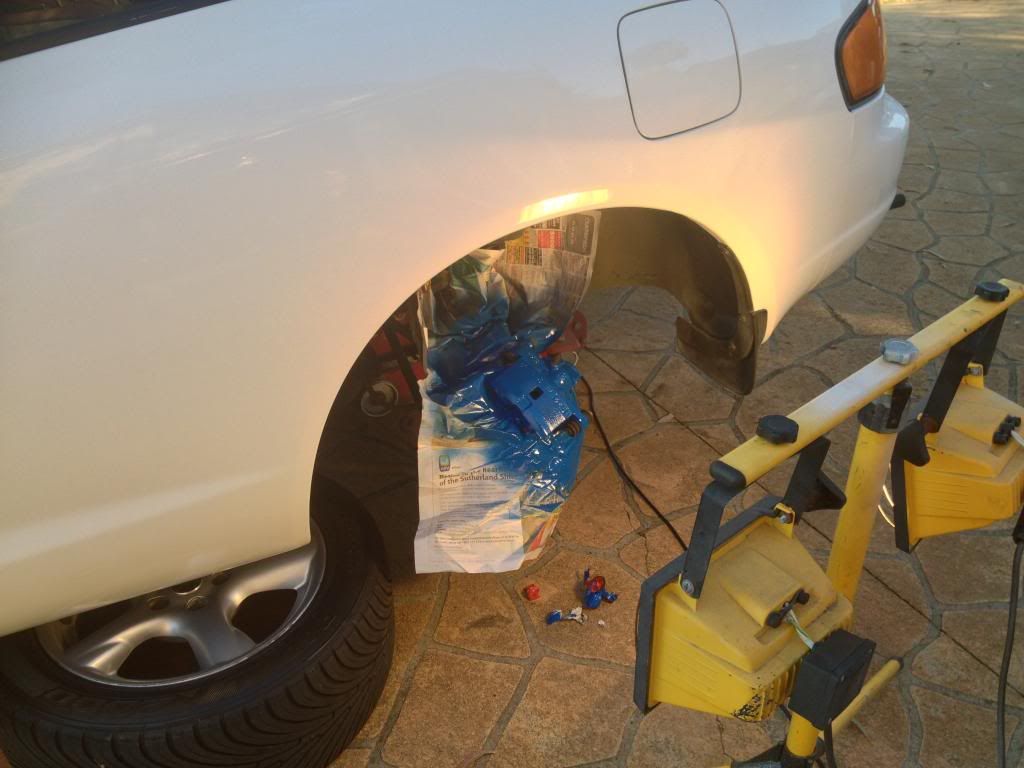
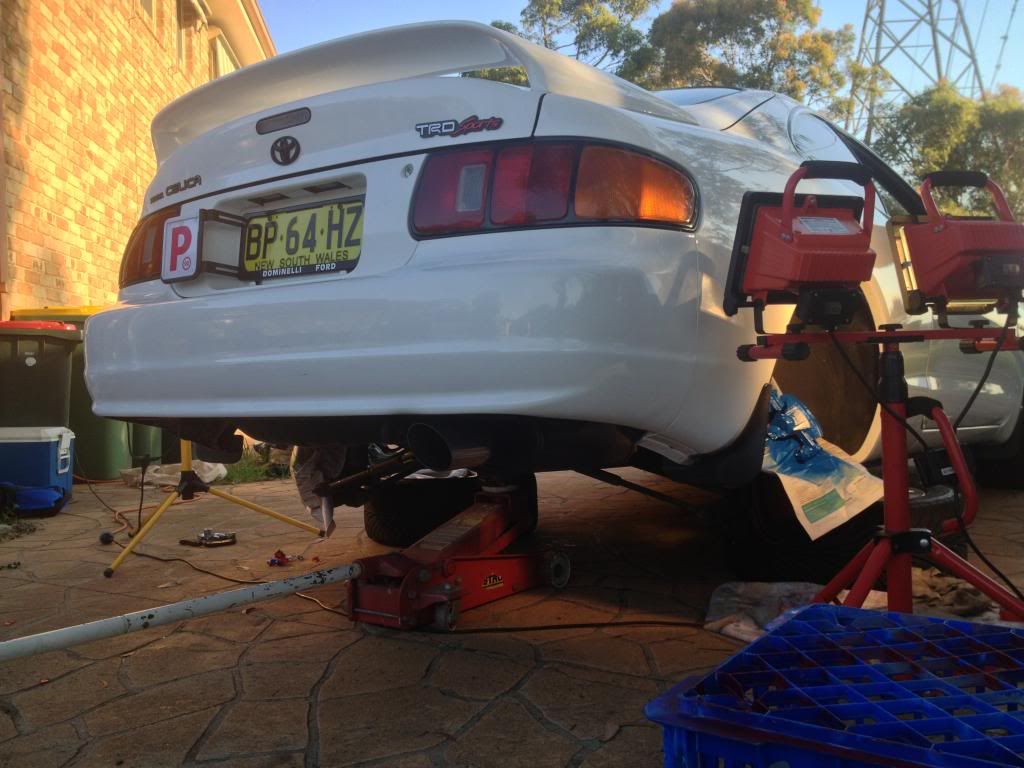
I went around to my mates house to start prepping and painting my side skirts. I arrived at 10am to find his AE70 Corolla pulled apart on the front driveway with the gearbox removed and dismantled...
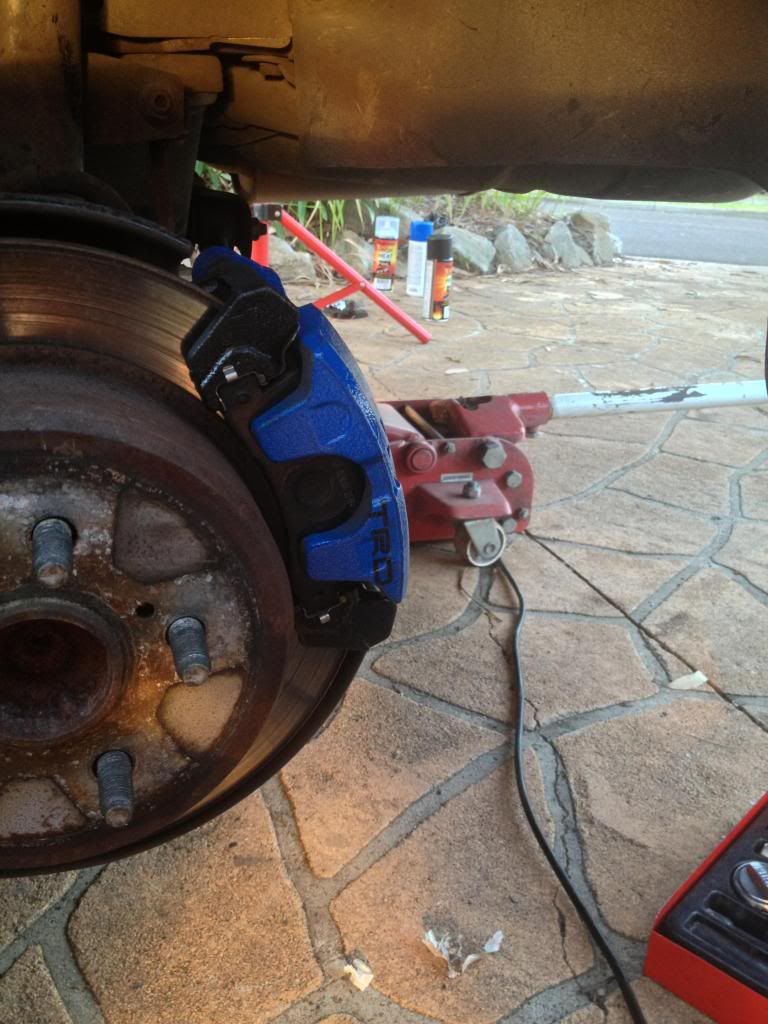
After a few hours of watching I decided to start painting my Calipers,
since I had the paint in the car and my mate had the wax and grease
remover.
Took about 40mins to clean the calipers of 18years of crap, and after
letting them dry for a further hour we started with the painting... I am
the most retarded painter there is, so I left this up to my other
mate...
My Mate Cleaning and Masking the Calipers:
After applying a few coats of paint we let them dry for an hour or two
and then applied a few more coats. We then applied the 'TRD' decal and
clear coated over the top. By the time the clear cot went on, it was
starting to go dark... >.<
My Mates Corolla visible in the background
Due to the rapid cooling of the autumn night, the clear coat wouldn't
dry... So, After 2 hours we got some heat lamps and set them onto the
calipers... At 10pm, almost 5 hours after clear coating, they were still
wet... Luckily they were dry enough to put onto the car:
We then put the wheel back on and I drove home
Meanwhile as we tackled with the calipers, My mate prepped the side skirts and applied a few coats of primer:
Higher Res Photos:The next day I finished off the calipers (sort of) by doing the rears.
-
Right after my HSC, I had nothing to do for a good 3 months. So I
applied for Tafe (I am way to Lazy for Uni xD) and bought the parts
needed to replace the annoyances on my car.
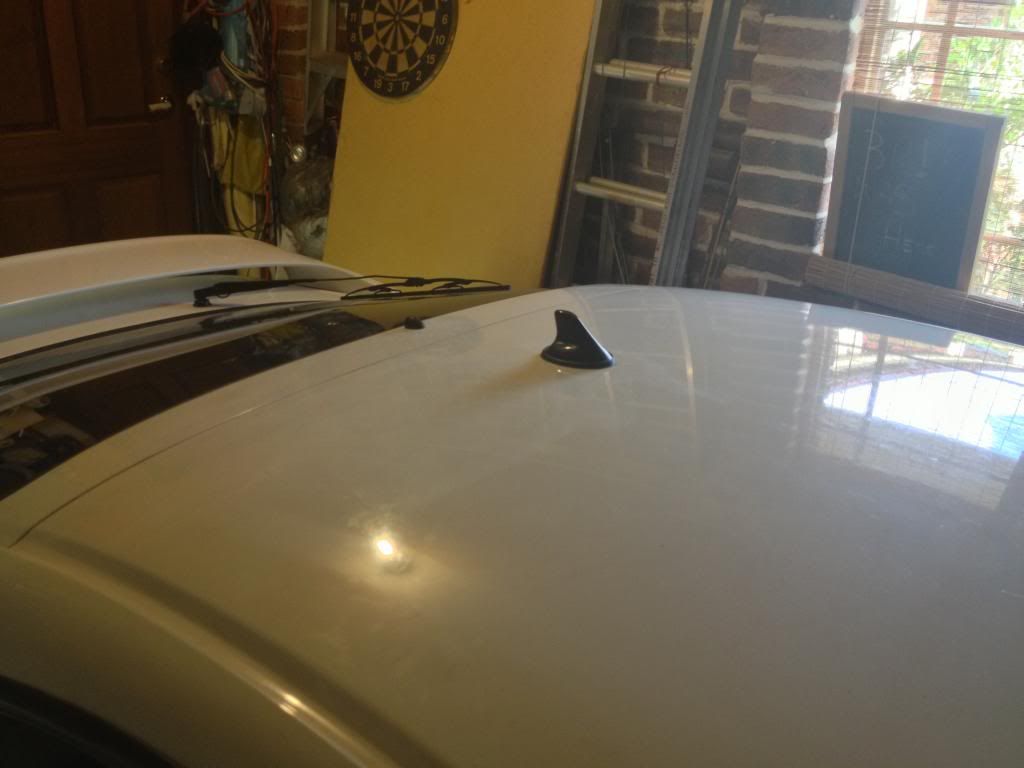
Next was the antenna (Was VERY sick of looking like an RC car),
I bought a 'shark-fin' antenna from Great Britain for $18AUD shipped
(again not expecting much but was pleasantly surprised). This was the
first major mod to the chassis and I was quite nervous drilling into the
roof >.< but all went smoothly and the antenna went on with no
water leaks
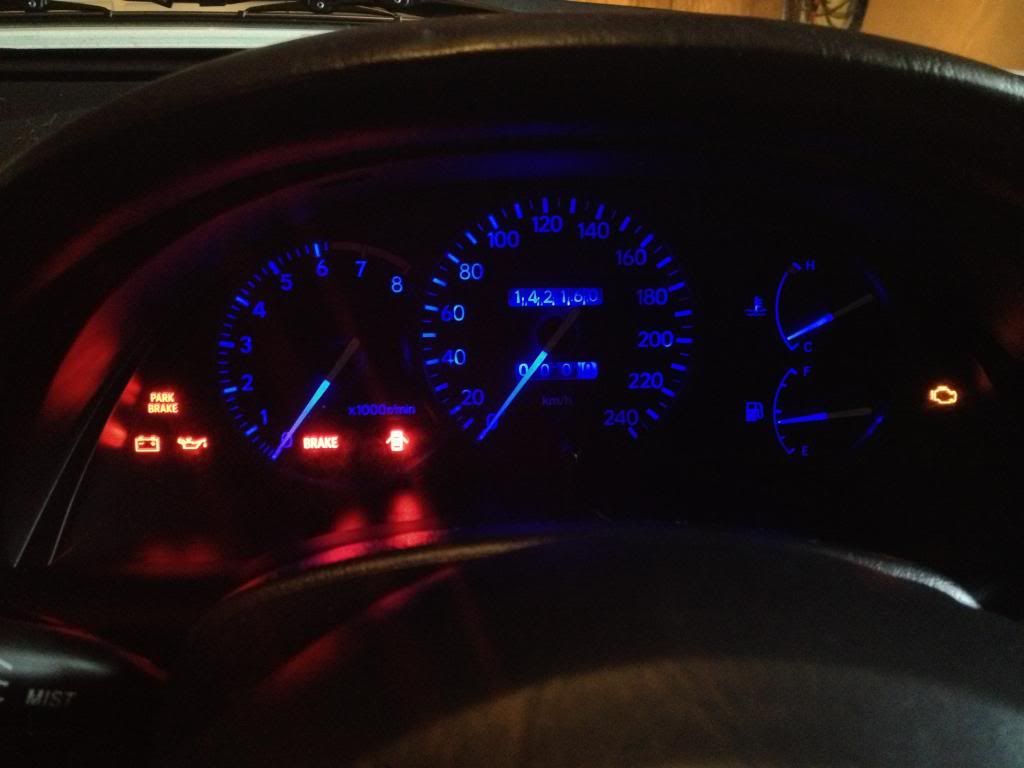
I also got the Blue LED dash kit delivered from eBay which cost $7 for
all the needed LEDs. I also bought a set of 10x 3mm Wedge LEDs to
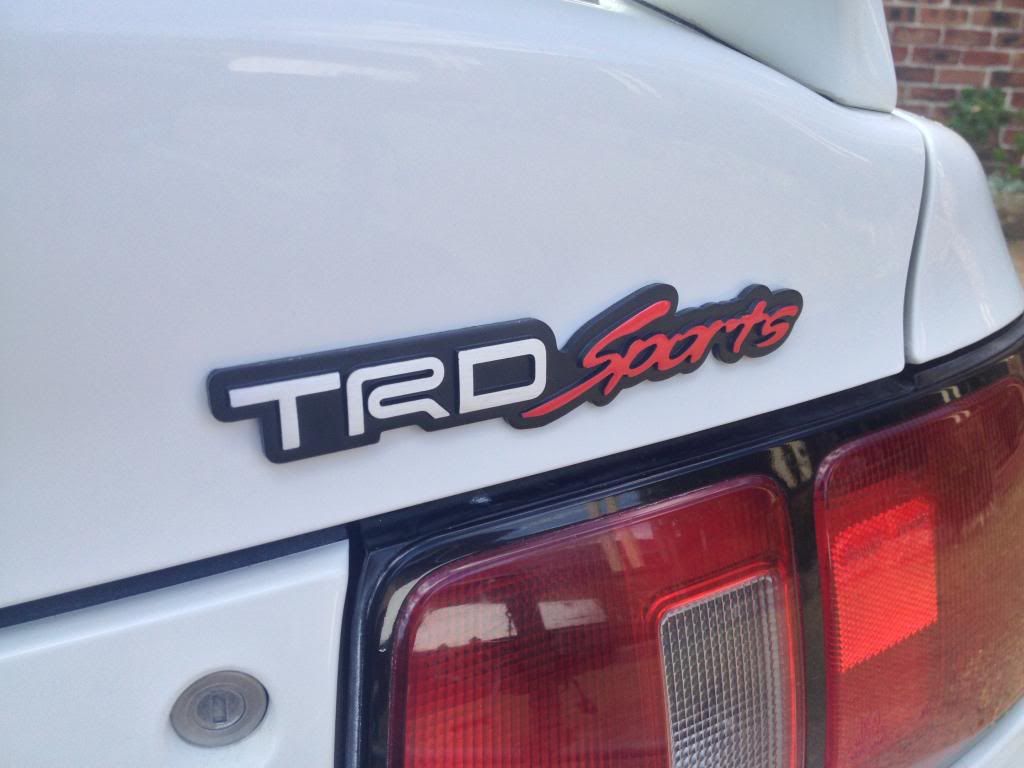
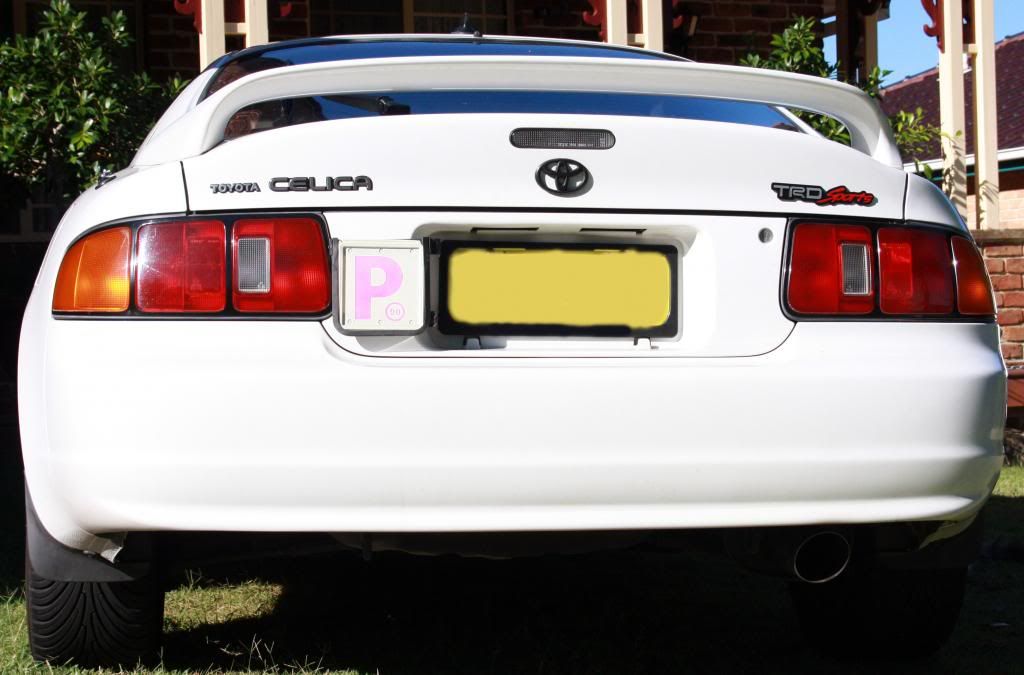
replace the power window switch light. I also decided to remove that
stupid 'SX' sticker and replace it with a 'TRDSport' badge. I got it off
eBay from the United Arab Emirates (of all places) for like $12AUD
delivered. I am actually very happy with it, the adhesive was 3m and the
build quality was good tooAs Christmas approached, I decided I wanted a better Headeck. The Sanyo I
was using was okay, but the AUX jacks had started playing up and that
meant that my iPhone could no longer connect to the unit
I searched for a bit and persuaded my father to purchase a Sony Headdeck with bluetooth
It works great and we just jeryy-rigged the connection off of the
Sanyo's lol... So when you look behind my Head deck there are 3 seperate
head deck connections xD
In NSW, it's illegal for P platers to even have a phone turned on while
they are driving, so the bluetooth allows me to listen to my music with
the phone hidden either in the glovebox or my pocket It also auto answers any calls so I can then talk to people too It's illegal for me but meh
I also (after some persuasion by girlfriend) changed the clock, ashtray,
cigarette lighter ring and glove-box lights to pink LEDs. So my theme
is now Blue and Pink. I don't mind it actually and it's different
I also added an LED (Not pictured) in the storage space under the head
deck, but this has since started flickering and flashing and is going to
go as did the cigarette lighter. I am currently waiting on Spree LED to
get my replacements
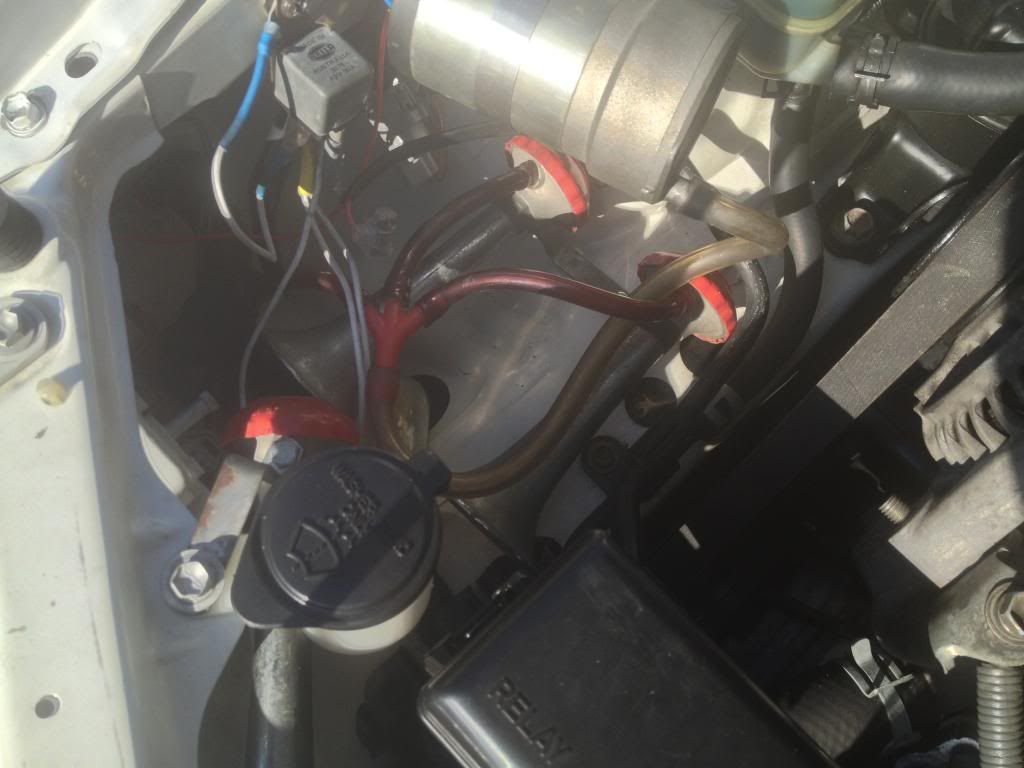
We then approached another problem one afternoon when I started the car,
she stalled... that's right, my automatic stalled... After popping the
hood, the reason for my stall and a few other problems in the past (low
idle etc...) became clear; The PCV valve had a massive crack all the way
through it and when I touched it, it sheered straight off... We called
the dealer and they booked the car in again for repairs, but how were we
going to get her there?
My dad and I searched the garage and found some 'quick gasket repair'
crap, and used that to at least hold the valve in place... Amazingly she
started and ran, so with dad in the chase car, we set off to the
dealer... I got there
They replaced the PCV valve and the rear boot seal (it has snapped off)
and the next day I got her back. It was luck that she decided to die in
the driveway, and not on the road
and that she managed to drive back to the dealer with gasket crap as
the PCV valve LOL... The mechanic gave us the weirdest look when he saw
it xD
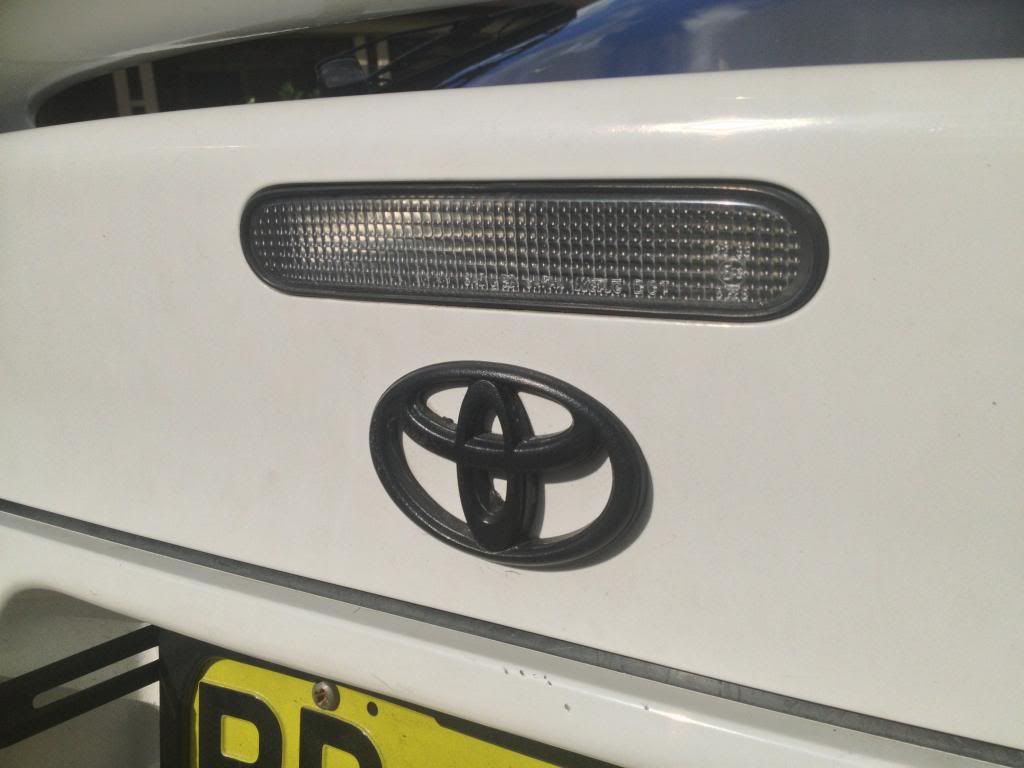
I also decided that I hated a few more things:
- The amber indicators on the front and side of the car
- The red courtesy lights in the car
- The red third brake light
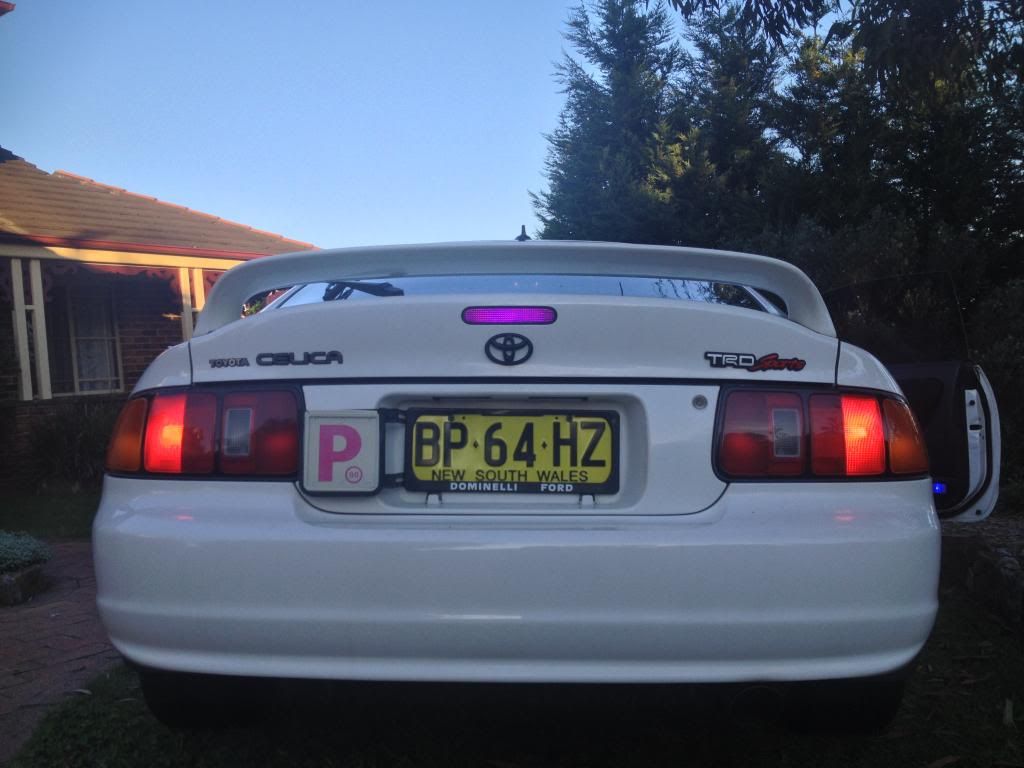
So after some research I found that Wolfie on 6GC made the clear third
brake light, and could get his hands on the clear courtesy lights from
the Tundra that fit perfectly. (Toyota Australia fought me saying I was
'making it up' and that they couldn't special order the part for me,
complete bs if you ask me). So I got Wolfie to send them to me and they
arrived and installed with no problems whatsoever
Unfortunately, by the time I found out about Wolfie, I had already
purchased some crystal front and side indicators, but this doesn't
bother me as I like their style and they match the side markers.
The final fitment of Wolfie's 3rd brake is spot-on, he does a fantastic job and big props to him:
Even up close, his detail is amazing:
As I as installing the light I decided to screw around a bit with a pink LED:
Wish this was actually legal haha -
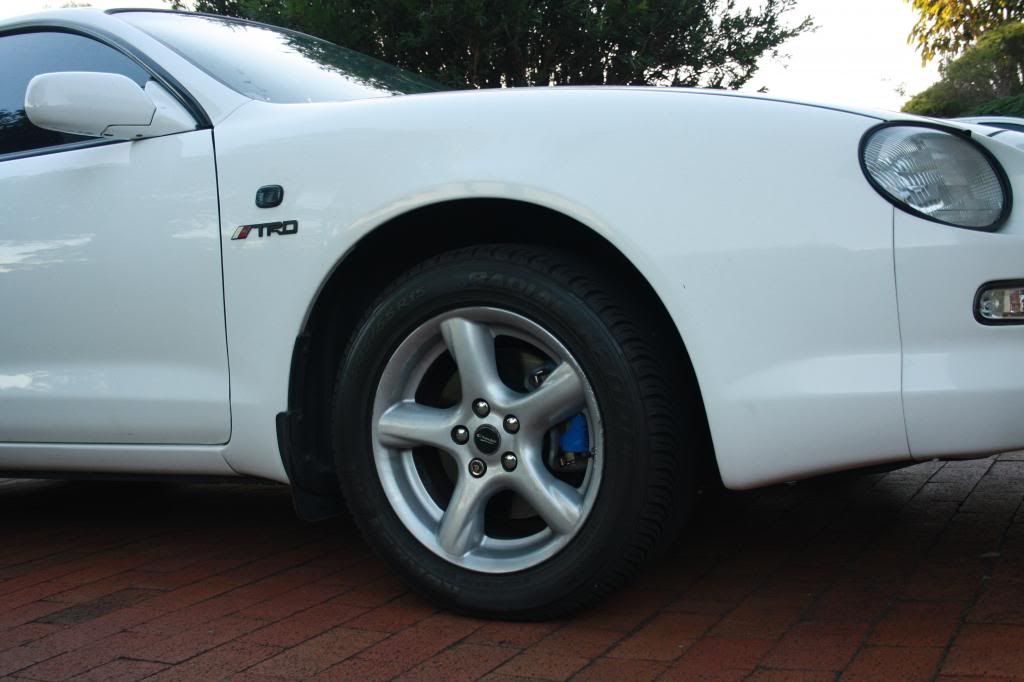
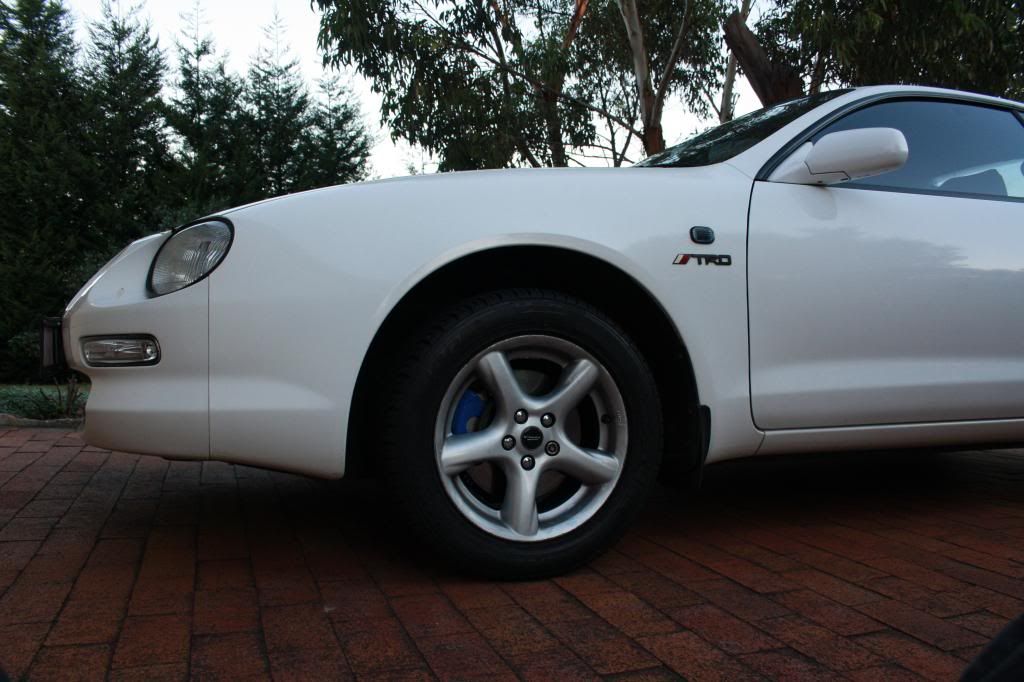
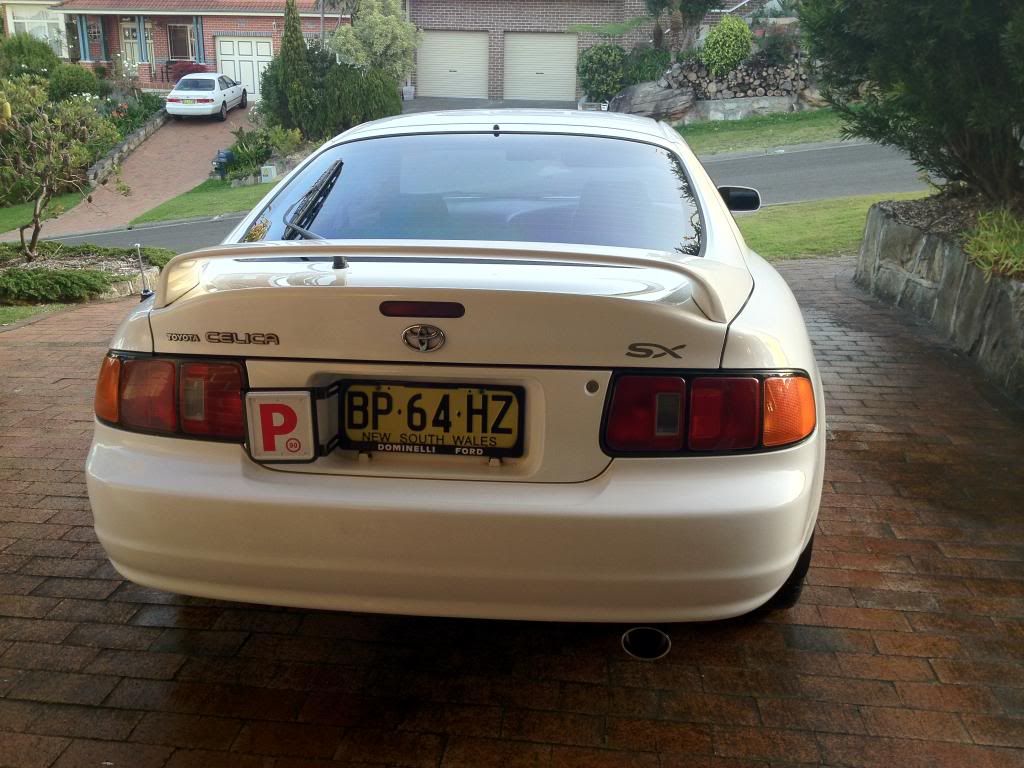
My next mod was my first and only 'performance' mod so far, The
exhaust... (I put this in quote marks because the 5S-FE is no powerhouse
engine )
Now I wanted something that sounded beefier, but not so loud that it
could be heard 4 blocks away. So I took it to a local shop (Kirrawee Mufflers) which had
done a good job on my mates Lancer.
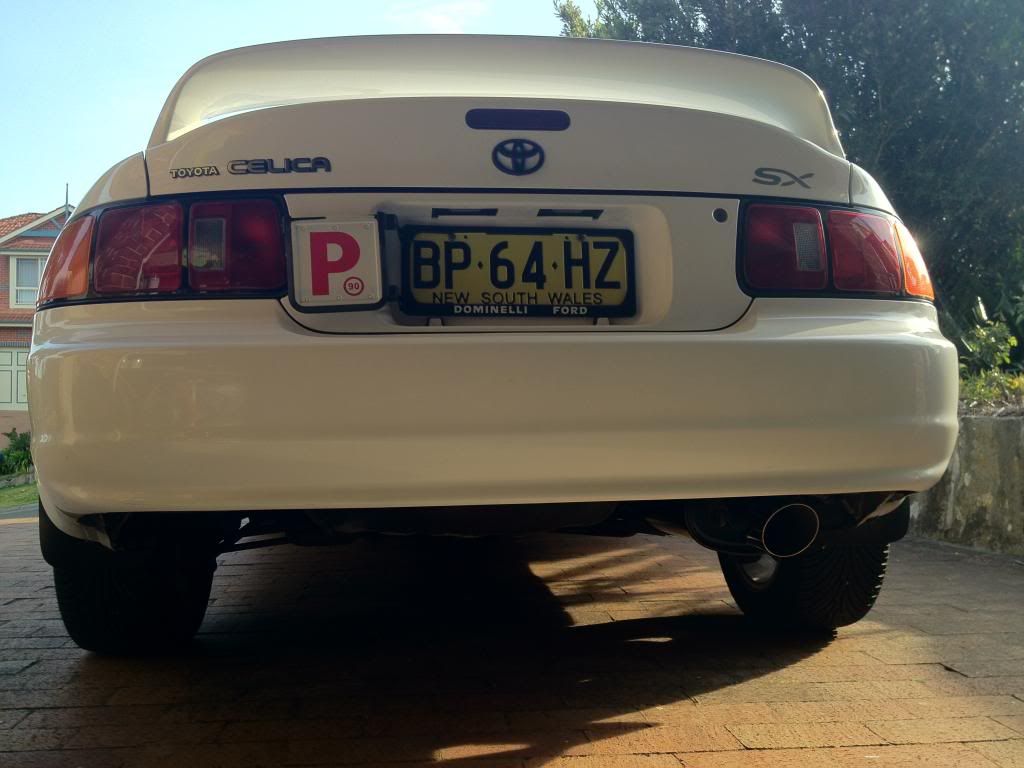
They installed a 2.25" Catback exhaust, including silencer and muffler (I believe). Overall it cost me $250 for piping, muffler, Tip and installation which was not bad at all.
I also like the look of this tip way better than the cover that was on the stock tip. It also sound's a lot better
Before:
After:
I was also starting to get real sick of a few other things on the car:
- The Ugly Green Gauge colour
- The Length of the stock antenna
- The faded 'SX' sticker on the rear.
So I started researching what I should get to replace what I was hating on.
At the same time My dad had some old air horns from his Holden Panel
Van in the garage, and I decided to use them. (By Old I mean, 1970's
LOL). It sounds... funny... But meh, louder than the 2 stock electronic
pieces of crap.
After installing the air horns, I decided to 'test' them repeatedly
(and annoy the neighbors who had partied the whole previous night
keeping me awake). The stock fuse held out, and everything was going
well... So I thought...
Two days later, I had to go up to the local shops, thanks to a mistake
by the guy behind the counter giving me a blank case with no game in it
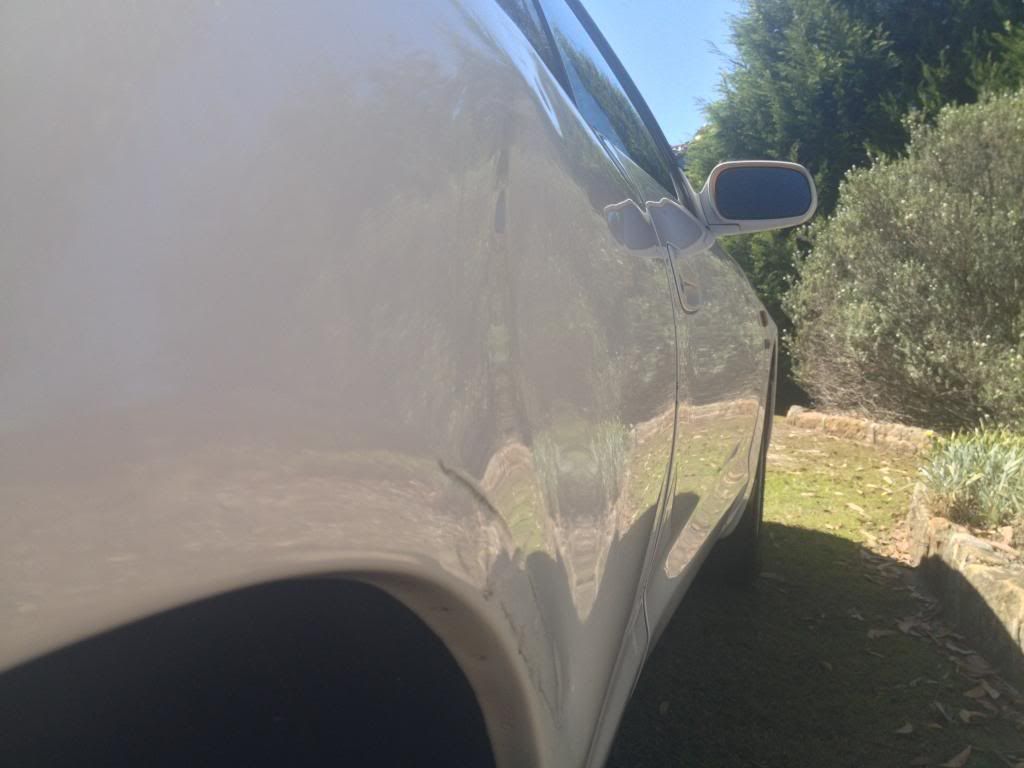
Anyway, when leaving I got reversed into, causing some pretty bad damage
to my fender above the rear wheel... I saw the guy coming, and hit my
horn and as luck would have it; the horn fuse blew... YAY!
Luckily, they reversed into me, (And I had already shifted into Drive) so their insurance covered me... But,
what I found hilarious is that I was reversed into by a guy in a repair shops loner car... xD
Damage:
The photo doesn't really show the damage much... But it was pretty deep and about 30-40cm in diameter
The same people that fixed the car for the dealer did the work, and we were told that was another $1500 worth of dent pulling and painting (Not a cent was paid by me though ) They also fixed all the damage that had been on the car since the beginning.
The timing was just perfect; 1 week before my HSC testing.. (Final
testing for school in NSW). So I had no car for 3 days of HSC testing
But hey at least the damage was just cosmetic -
The Mods Begin:
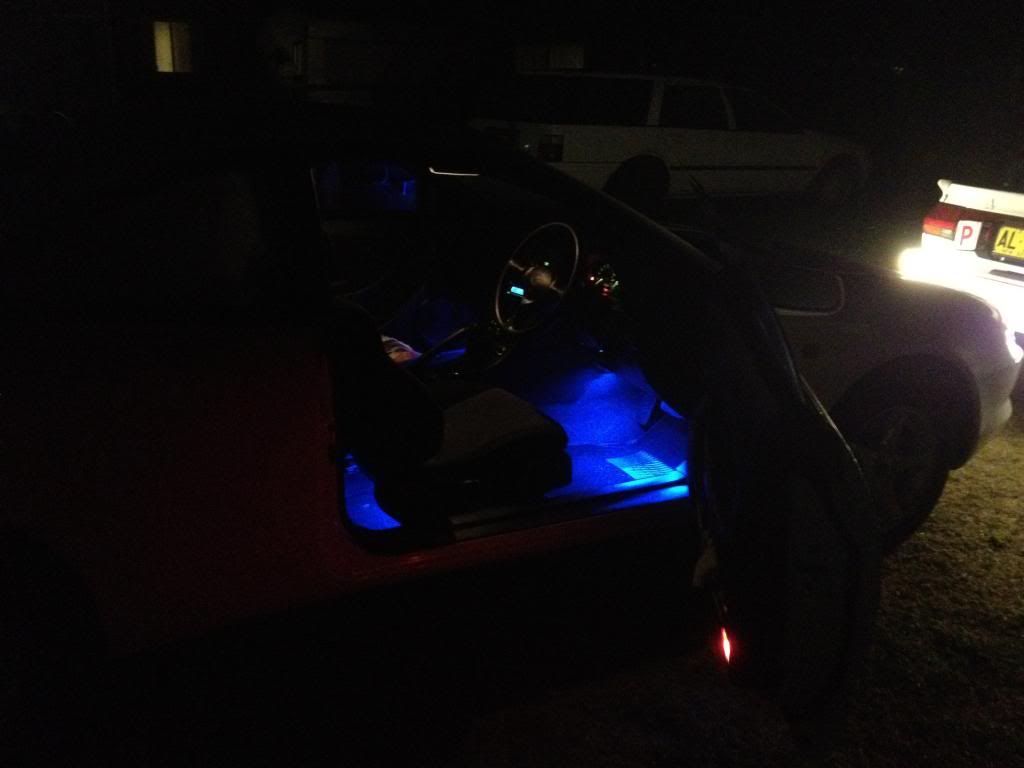
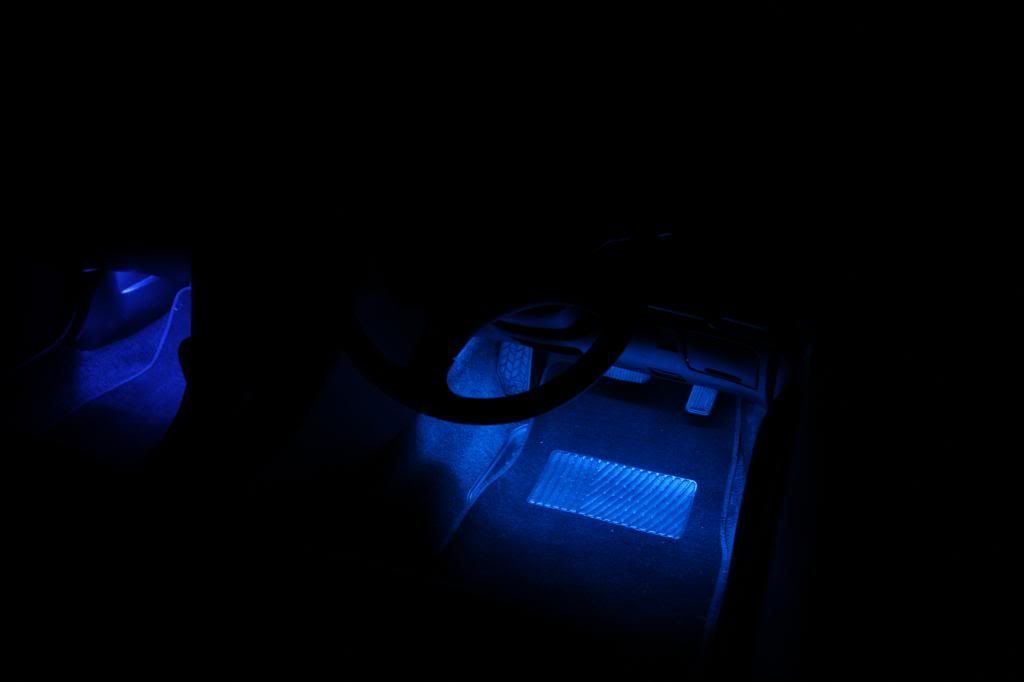
Skipping over adding iPod connectivity to the car, the mod that got me
started was adding my foot well LED's. Now initially, I had planned just
to have them installed for extra light at my feet when the door was
opened and then off when closed. Simple enough...
But, after thinking more and more, I decided this was the time to start
my theme... So to be different from the hype, I chose a blue theme (all
my mates were going with Red as a theme)
So I got off onto eBay and ordered my first lot of LED strips for the
foot well LEDs. To mix it up, I put a double throw switch in, so I could
now turn them on and off myself manually (when Police pull me over:
P.S. This hasn't happened yet as of 29/05/13) and also have them
controlled by the doors. (Why go simple on your first mod eh? )
The first attempt wasn't all that great, some of the LEDs were a
different colour to others, and I used this as a learning curve. I
contacted the eBayer and they refunded me for the LEDs, and I bought
another set which turned out to be great
iPhone Photo:
SLR Photo:
At the same time, we did my mates Lancer and my other mates Corolla.
After this; I was hooked... I went back to my house to think of more
mods to do
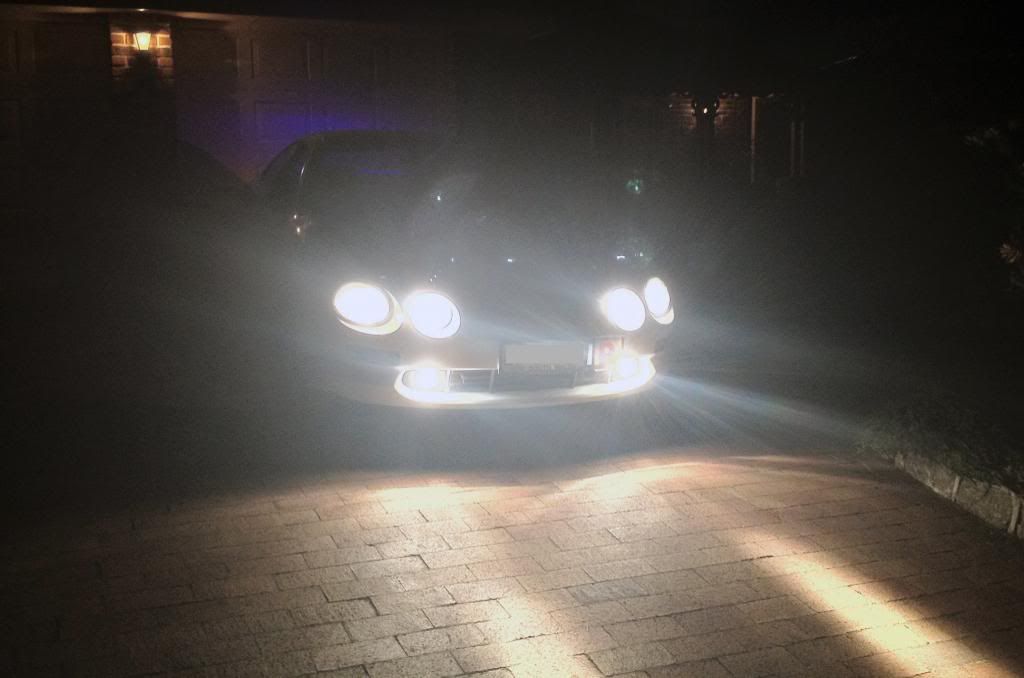
The next mod was driving lights...
After looking at other Celicas in the area, I found the front looked
better with driving/fog lights. Now, I didn't want the standard OEM ones
(because I like to be different like that). So I started researching
lights and prices, I couldn't be bothered getting anything fancy, so I
just went to Super Cheap Auto and bought some of their house brand
driving lights. I wasn't exspecting much from them, but amazingly they
are actually good... Haven't had any issues with them and I actually
like them better than the OEM Toyota ones...
Before:
After:
Day:
Night:
I then heard of this stuff called PlastiDip, and decided to check it out
at changing my badge colour to black. I was going to paint my rims with
it, but it's so expensive here in Australia... ($33 a can...) So I
threw that Idea out and decided to just wait for the funds and get new
rims
The badges came out alright, its no paint job... But it was good enough for me. It has also lasted, justunderover a year now -
So, I thought it was about time that I finally started a progression thread on TOC, a lot of this info will be taken from 6GC.net and OzCelica.com :)
I will also break this up into a few posts to make it easier to read...
First A bit about myself;
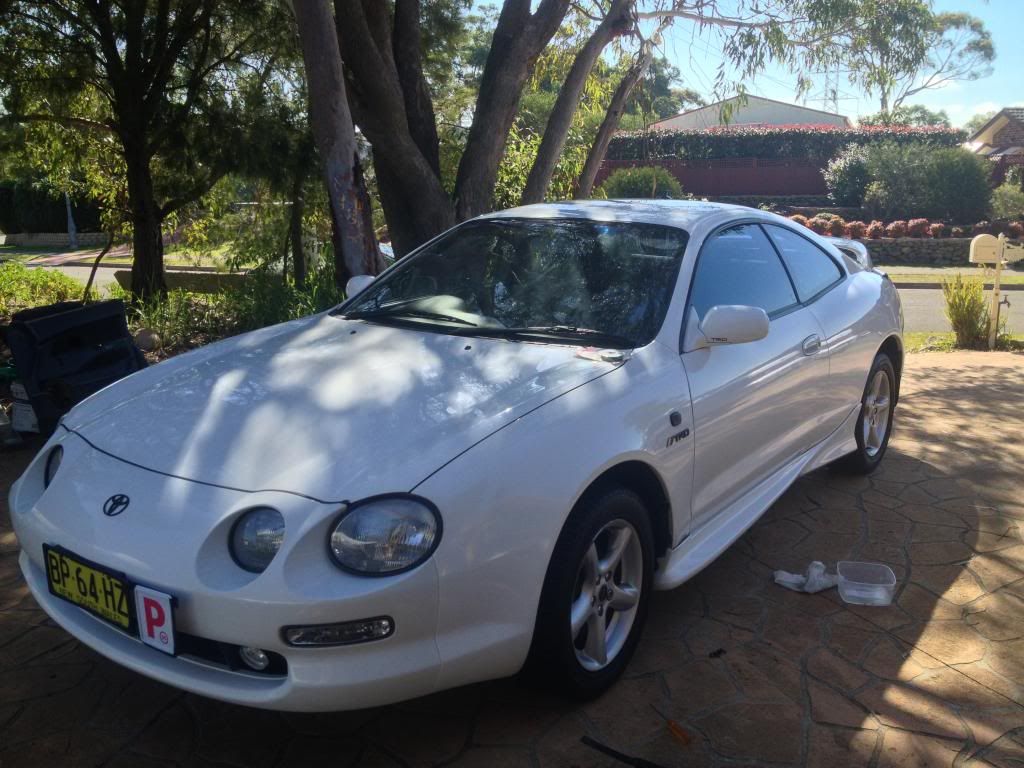
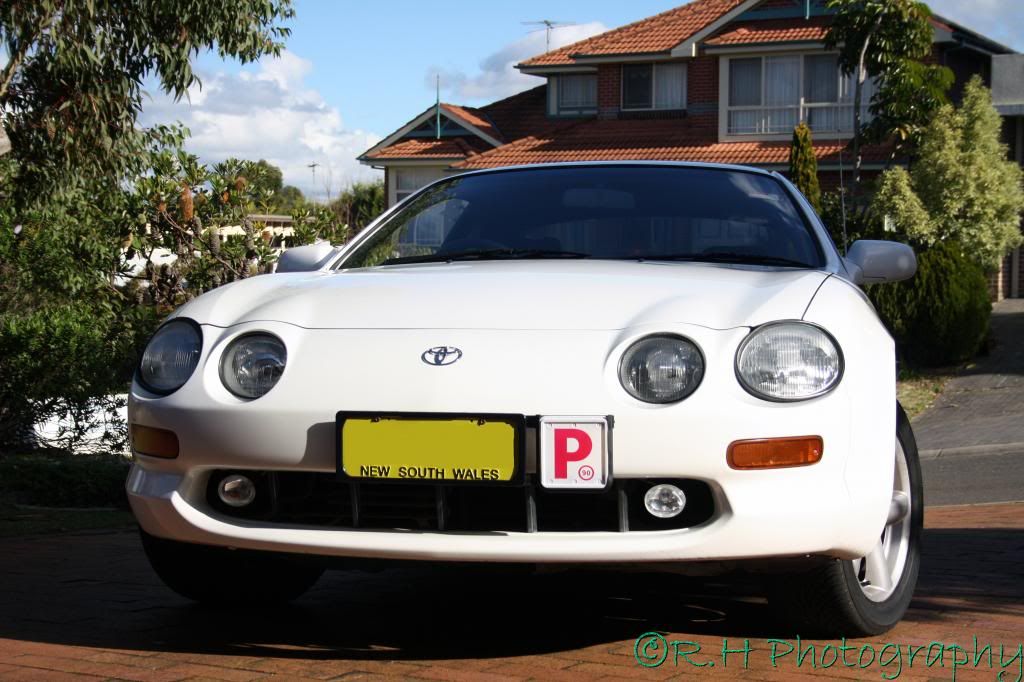
I am a 19 Year Old attending Tafe and Casual Work, I live in South Sydney in the Shire. I work in Lidcombe, so people may spot me around Birnie Avenue/Paramatta Road.
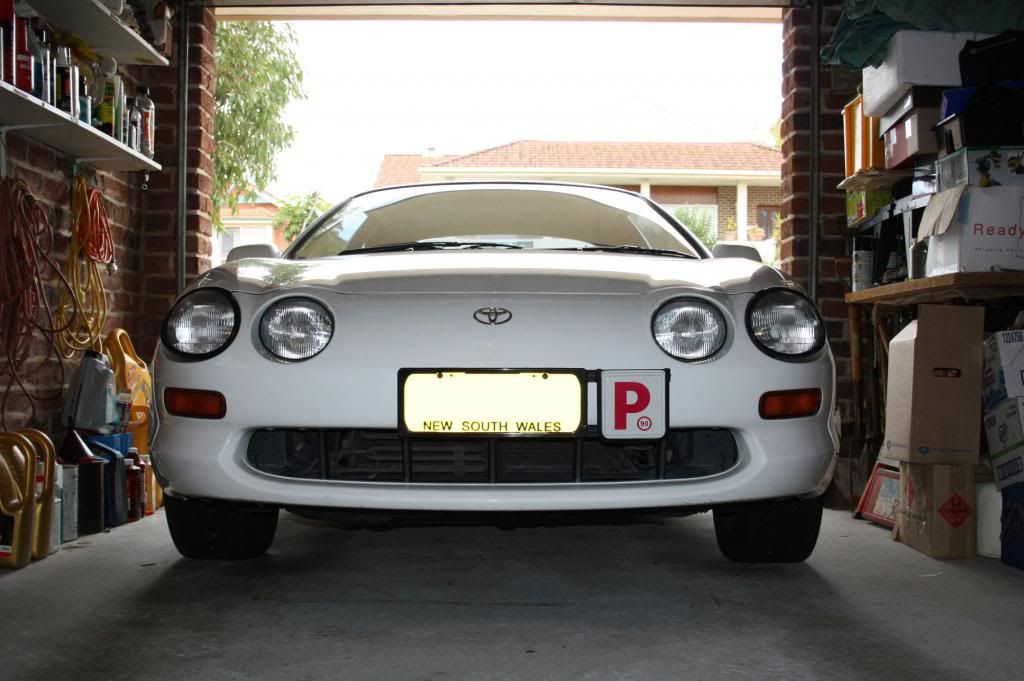
My Car is a 1994/5 (Made Dec 94, Complied Jan 95) Model ST204 Celica. She is an Auto (Yes I know, I couldn't get a Manual since my dad's car was damaged when I was going for red P's).
History of my car:
Before I owned the car, it was owned by some guy from Bonnet Bay in the Shire. The previous owner looked after her to some degree, the engine and mechanics where good, but the body was in 'ok' condition at best. The rear passenger quarter panel was scratched, the bonnet had a decent dent, the drivers side had a few dents and the roof had x2 perfect fist marks in it.
As part of the deal, the dealer removed all the dents and gave us a 12 month warranty.
Here she was, right after out test drive:
A few weeks later, some minor problems began as she started showing her age. Oil began leaking over the driveway, after a call to the dealership, she was booked in for her first warranty
inspection... They re-did all engine gaskets and replaced all seals in
the engine... When we got her back, she was still leaking... We took her
back again and were told that the transmission seals were shot, they
were replaced and the engine was flushed out; the leaking stopped... for
now...
Over all, the work would of cost ($1800 by the dealer, if not for the warranty). -
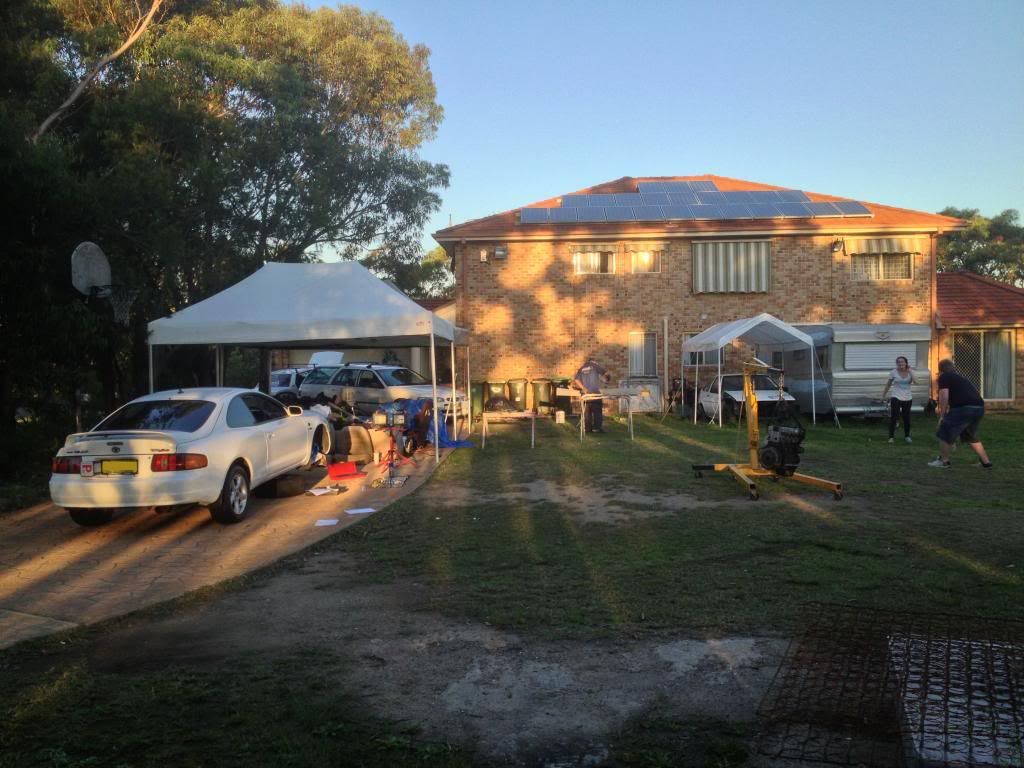
List of Attendees
1) 69.NIX
2) Jaay (50/50)
3) WY
4) ChrisZRE
5) rentaspace + x4 other cars (x3 Corollas and a second 6th gen Celica joining in from Wollombi) -
Where are the photos ???????
Haven't seen or heard from them since the cruise...
I was really looking forward to the photos too :(
-
The pub doesn't help me eitherm:p being on p's and allDoes the tavern allow under 18?
Not allowed in the pub, but can order food
-
Does the tavern allow under 18?
-
Anyone know what happened to the photos that were taken of the annual meet?
I Still have some but they're huge thanks to the resolution they came out it :( I resized them for posting on this forum to 800x600
Theyre the ones above yeah?
I know heaps more were taken by other people, just have no idea if they have uploaded them as yet or not >.<
-
Anyone know what happened to the photos that were taken of the annual meet?
-
That was hilarious hahaathere is no really good undercover places that don't attract the local rozzers....so if it's bad, we just move it :)
Or angry Bunnings people...
-
My car looks like neon green in that photo - how did you do that lol
Sunset in Kingsgrove :)
Play around with settings on the camera, and shoot with a RAW format (then photoshop the photo and change the settings for colour and light)
-
I won't be able to make it this month, American Exchange Student is leaving 4 days later and her going away party is that night... (She was with my girlfriend at the annual; they were also rolling on the grass at kiama lol)
-
Loving the maccas on the car :P
Do you happen to have a full res photo of my car you could send to me?
Either RAW or JPG, Since my SD card died on the first photo of the annual, I didn't get any photos ;( -
I am regretting not coming to Olympic Park...
I really need a decent shot of my car for a comp on 6GC haha :P -
I'm in for the June meet :) Will try and rope in a mate who has a Celica ZR with a few mods
Which Gen Celica? o.O
Would love to see another 6th Gen there :P
-
Posted some of the mini-meet photos in the photography thread, I did get a few more than what was posted but my connection is absolute crap and will take over a day to upload....
Hope you all enjoy and looking forward to seeing the other peoples photos :D
(P.S. My Cameras SD card died this morning at the first stop, so I didn't manage to get any photos today ;( ) -
A few of the better photos from the Mini-Meet Last night :)
Hope everyone likes 'em: -
Great drive today :D
What's happening with pancakes tomorrow?
-
Yiew, Great meet tonight :) So excited for the drive tomorrow :D
-
Big day of mod completeing tomorrow, ready for the meet :D
-
Anyone know what's happening on the Monday for this Pancakes on the Rocks thing?
:P


 )
)


RentASpace's ST204 Progression Thread
in Members Rides
Posted
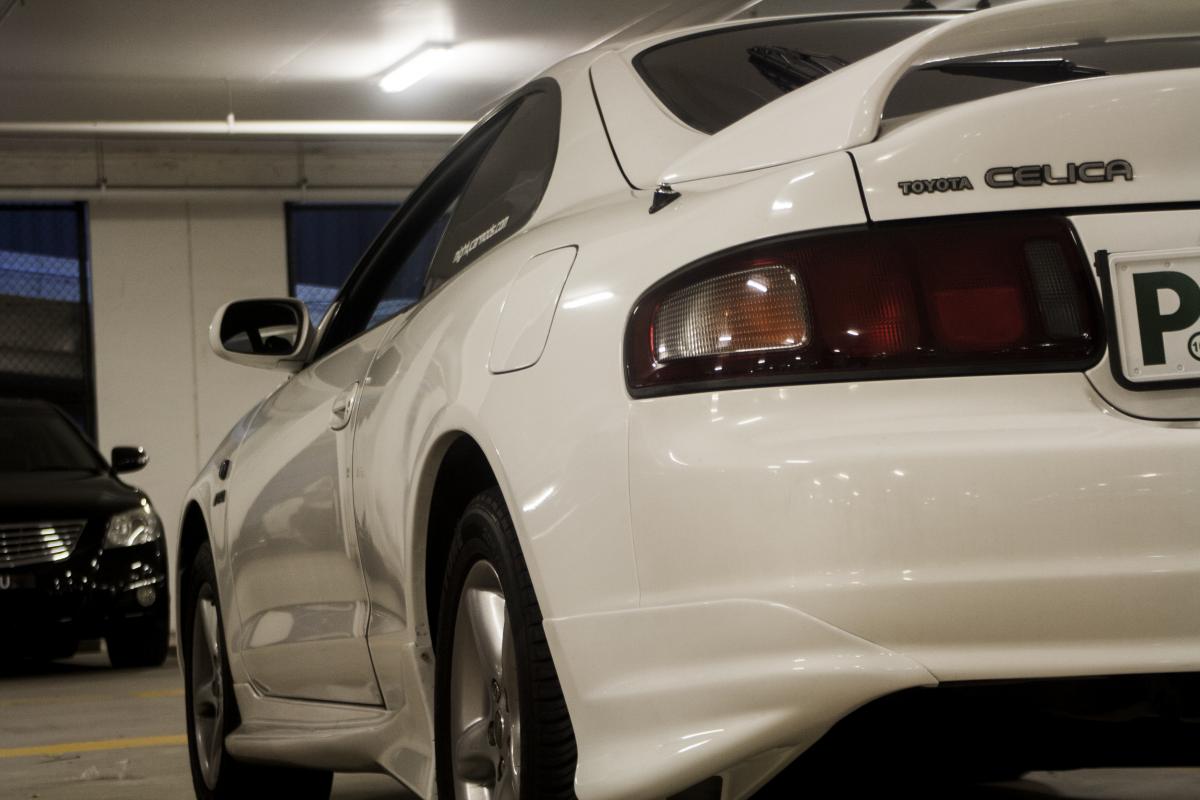
Time for some JDM goodies:


I ran into a big problem when two of the nuts were 5mm instead of the
10mm that every other was >.< So, I took the rear plastic off, and
started searching for a spanner to undo the nut... I found a
socket/screwdriver hybrid which fitted perfectly (If Only I had found it
before so I didn't have to remove the plastics)...
Installation is straight forward, so I won't go through all that jazz and instead just show photos:
Before:
The difference is pretty amazing; One JDM, one ADM:
And After:
At Night: