soundbyte
-
Posts
45 -
Joined
-
Last visited
-
Days Won
1
Content Type
Profiles
Forums
Events
Gallery
Tutorials
News & Articles
Videos
Everything posted by soundbyte
-
Not sure which flasher you have but I have just installed a "LED" flasher into my 2002 Corolla Wagon and with LED's installed. You can hardly see the "lock / unlock" flash as it is so short the LEDs just flash and that is all. If you do not have LED's perhaps the lag time of seeing the light from incandescent globes does not give them enough time to light, hence no flash. As this applies to a Corolla perhaps none of this is relevant? Just a thought. soundbyte
-
FOGLIGHTS FOGLIGHTS FOGLIGHTS!!!!
soundbyte replied to Evo7's topic in Corolla / Corolla Sportivo Club
Just to update my install. Hardware went reasonably well but I did have to make two longer metal thread rods to mount the lights in the bumper as the one provided were not long enough. Wiring was a different thing altogether. Wiring loom seems to be made for a left hand drive and took a LOT of mods to get it installed as I like ie not much different to factory loom. Most things you need are provided but you do have to cut and shut, move wires from one part to another and extend a couple of wires to reach the switch. Wiring the LED's into the switch to replace the was difficult but I managed I would say this is part NOT for the electrically challenged. They do work OK, globe colour is very yellowish not white so that is OK for fog. I am happy overall with the setup and for the price I think they were value for money. Anyway that has been my experience YMMV. soundbyte -
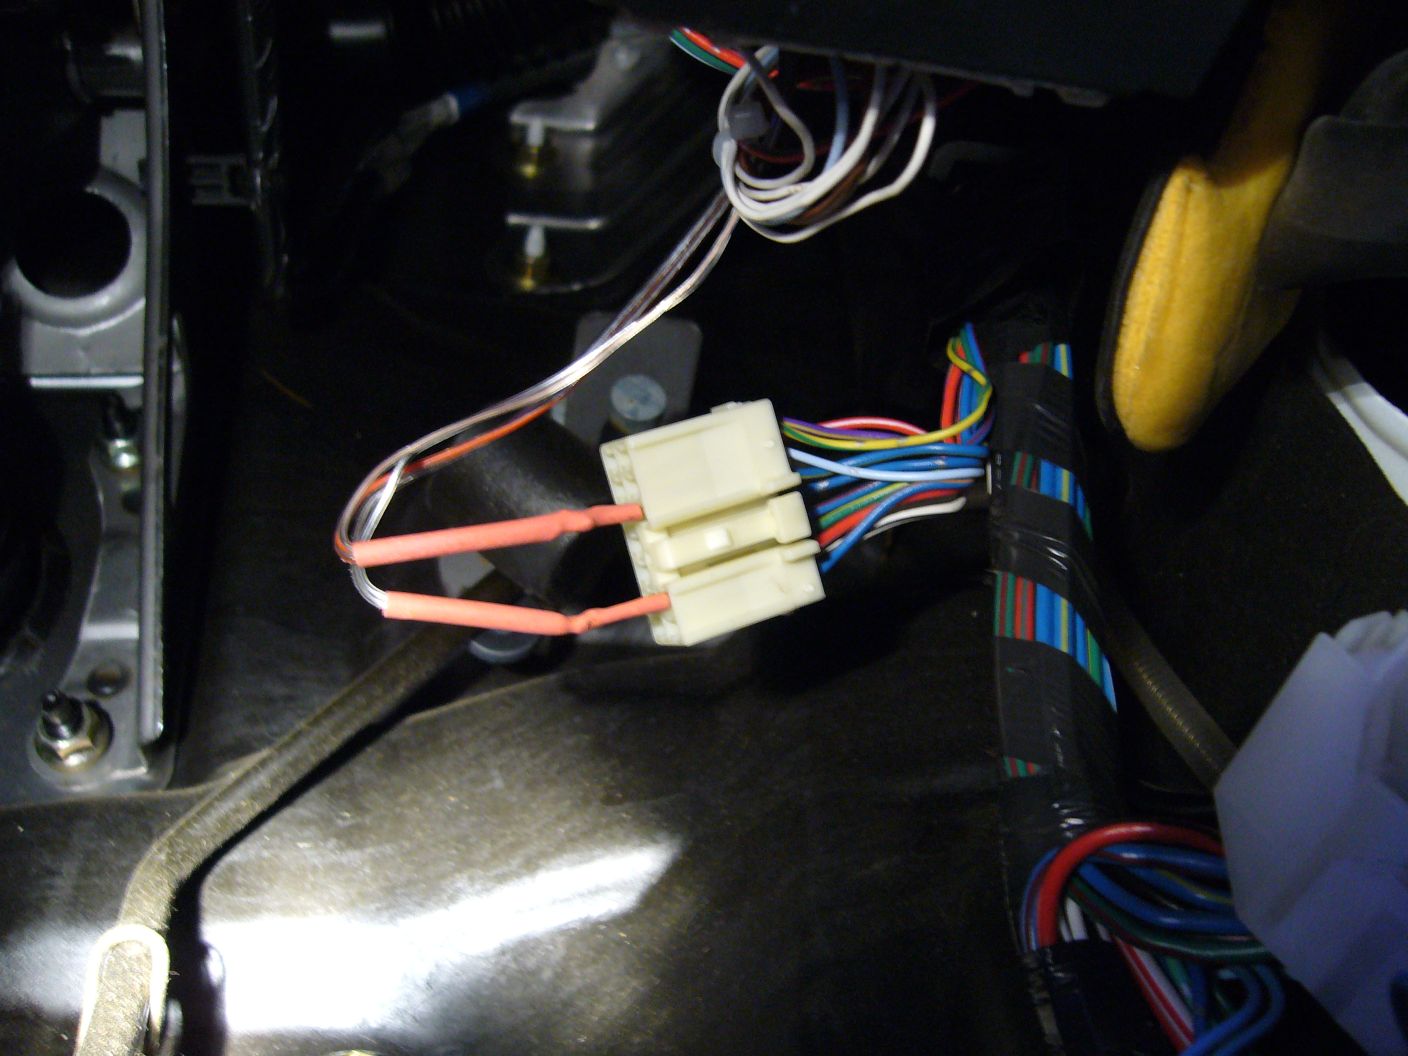
I have been playing about with this issue of wiring for the interior light as I have installed some strip lights under the bottom lip of the plastic that makes up the dash which I would like to turn on in the same manner as the dome light. I found on my 2002 Corolla station wagon a plug on the wiring loom that houses the door switches connection, see photo below. It was behind the door kick cover on the drivers side and was tied onto the outside of the loom that runs upwards from the floor level up behind the dash. The door switch connections go through this but the dome does not it seems. Connections made using s piece copper wire flattened to fit into the connector, soldered to the wires going to the LED's. I have not as yet found the dome light connection and have looked in both door pillars and around the door kick panels. I do have the wiring diagram for the 2004 Corolla (pinned in the Corolla section) but it is not correct for my model. The wiring diagram says the dome light wire goes to a connector as described in another post behind the panel above the glove box but I cannot yet get access to it to work out with my meter which connector I should or can connect to as yet. It may well be a problem if you provide too much load to this contact for the dome light as I am pretty sure this is driven from the Integration relay which most likely has a finite limit to what can be driven. Have not found the door sill wiring installation as yet but will keep searching. Obviously more info on this is needed. soundbyte.

-
FOGLIGHTS FOGLIGHTS FOGLIGHTS!!!!
soundbyte replied to Evo7's topic in Corolla / Corolla Sportivo Club
My fog lights arrived today from CarsRus and look very good, see eBay item number 380213273876 for similar item. Die-cast casing with what looks like a hard plastic lens, fitted with 12v 55w 9006 Halogen globe. Comes with good quality wiring loom and switch with an indicator so you can tell the fog lights are on, it is an insipid orange colour, that will have to be changed! Blue LED coming up. There is the required mounting hardware for direction adjustment and a few cable ties. Wiring should be straight forward and I will get to that this weekend hopefully. Only down side is no installation instructions (they do tell you there are no instructions), but that should not be a problem. I will follow up with description and photos if I get really eager. soundbyte -
Wanted, standard gear lever for a 2002 ZZE122R Corolla Wagon. The whole standard gear lever mechanism or just the standard lever, should be left over from a short shifter conversion. Anyone got one that is not needed and are willing to part with? Do I need to post more car/model details? Please let me know your price by PM. Thanks, soundbyte
-
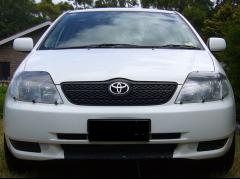
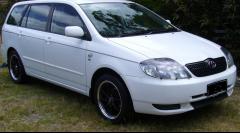
Pics of myToyotas
-
-
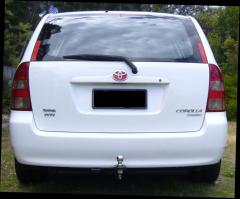
From the album: Soundbyte's Toyotas
© ©
-
-
From the album: Soundbyte's Toyotas
© ©
-
FOGLIGHTS FOGLIGHTS FOGLIGHTS!!!!
soundbyte replied to Evo7's topic in Corolla / Corolla Sportivo Club
Did you get your set? What are they like? Good, bad or indifferent? soundbyte -
LED taillights for ZZE hatchbacks
soundbyte replied to chicken's topic in Corolla / Corolla Sportivo Club
djkor: if you read my reply I mentioned initially that you could do the "look" with DIY by drilling the standard tail light reflectors that would give you that "look". From what I can see in the photos only one section is LED the rest are standard incandescent light sockets. Can I not see something that you can? DIY lots cheaper than buying from the links provided. soundbyte -
LED taillights for ZZE hatchbacks
soundbyte replied to chicken's topic in Corolla / Corolla Sportivo Club
Is this a matter of getting lots of LEDs in the tail light or just replacing the incandescent bulbs? If it is getting lots of LEDs then you should be able to get a standard set of tail lights (wreckers?), drill out the reflector to suit the LEDs you want to use ie:-5mm or 10mm red, white and amber LEDs. The resistor value you need in series will vary dependent on how many LED's you use and how you wire them, in series or in parallel. If you are using lots of LEDs you will need to wire them in both series and parallel to get them working correctly. Each colour LED has a different voltage drop when lit so you need to think carefully about how many LED's you want, then work out the series parallel combination needed, then calculate the resistor value for the combination of LED's. See seller "lvehk" on eBay for LEDs in bulk eg:- amber 10mm 350269684830. You might be able to get a few members here to share the price. I used this method for putting in a single 10 mm red LED on the outside edge of the tail light that is on all the time. I removed the tail light assembly and drilled a 10mm hole, hot glued the LED in place and wired it to a ignition switched 12v which I got from the rear wiper motor. If it is replacing normal incandescent's then look at "warden_jp2002" on eBay, I have found this seller to be reliable and quick. These are similar to the ones I used for brake 200443339177, turn 190376486767, backing light 190375724706. Your standard turn relay will probably not work and has to be modded for the lower current drawn by the LED's, plans on the web though (Google is your friend here). You will need some electrical skills here ie be able to measure low resistance and be able to solder . Watch out for relay connection layouts with electronic flasher units on eBay. Buy all your supplies from warden_jp2002 using the same currency otherwise you will not get combined postage. This is the route I took for all my lights apart from head lights as all small lights are just plug in replacements if you get the correct size. I hope this helps, it may not. soundbyte -
Rear Windscreen Wiper Fluid
soundbyte replied to DemonRolla's topic in Corolla / Corolla Sportivo Club
I have a wagon and I have the delay but I think that is a blocked or not working one way valve,but when it does "squirt" it flows quite freely and does not "dribble". Not sure where the valve is but it should prevent back flow to the reservoir ensuring "squirting" when you need it. Apologies for the terminology!! soundbyte -
Last night installed Whiteline rear sway bar, took some doing but it is in and makes a difference to the handling, not so much understeer. Just finished fitting Lovells super lows to front of the 2002 Corolla Conquest wagon. Springs uncompressed were longer than the Lovells lows but fitted were 20mm lower! Super lows were smaller diameter than the Lovells lows but I cannot sense any really big difference in ride. Car now looks better with ~70-75 mm between top of wheel arch and lip on tyre (where measurements taken) all round. Much better looking. Maybe need some photos now I have it looking about right. Nothing special it looks standard just a bit lower. soundbyte
-
2002 Corolla Conquest wagon, Mirror mods
soundbyte replied to soundbyte's topic in Corolla / Corolla Sportivo Club
I had checked out your DIY and was thinking more minimalist than using purpose built LEDs which had to have the blue LEDs changed etc. The cutout would be difficult as well, but I will need to ask the CNC expert at work if it would be possible to do the cutout neatly and easily on the CNC mill. Protection from the weather is provided by using hot melt glue to enclose the rear of the LEDs and to stick them in place. I tried to make the position of the LEDs as easy as possible and my first post with the straight line did not translate well onto the curved surface. When you draw the line using my method using the CD cases the line across the front of the cover, it is actually straight but when it goes around to the outer edge it curves upwards towards the top of the cover. It is straight when you tilt the cover towards the rear and look along the LEDs, but it does looks curved when in place on the car. I could put more LEDs in but with the LEDs illuminating the white covers it does spread the light through the plastic but only after dark. Possibly a cover over the LEDs may work but finding something suitable may be difficult. Not sure I am really happy with the result, but it does prove a minimalist approach may work, just need to sort LED spacing and layout. Ideas for layouts? I will possibly try surface mount LEDs fixed into the 5mm holes next and see how that looks. Luckily I have a number of covers to tryout these mods thanks to daniboy. Thanks mannyMANNYmanny for your input and comments that was exactly what I was after, another perspective on this mod. Anyone else? soundbyte -
2002 Corolla Conquest wagon, Mirror mods
soundbyte replied to soundbyte's topic in Corolla / Corolla Sportivo Club
Don't like the blanking on the side indicator. Mirror mods update. I have added 5 X 5mm amber leds to the cover of the passenger mirror. Please see photos. Not sure whether it was a success overall, but they do work well at night, but look a bit weird with the LEDs poking out of the cover in the daylight. Maybe need surface mount LEDs rather than the 5mm type. Marking out drill line, pen on 4 place mats with six thin cd covers to give correct height. How I held the cover on the flat surface to mark line. LEDs were spaced 15mm from outside edge with 25mm between each LED. Drilled holes with drill on four place mats and 2 cd covers LEDs in the cover, I have used 400 wet and dry to make the LEDs opaque. Bit nipply? On car door LEDs lit front on. Side on, note LEDs rise towards back of car because of the way I placed line. After dark front on, LEDs have lit up part of cover around LED and have added width to light. Comments? Suggestions? soundbyte
-
Does anyone have a set of Lovells low springs to suit the 2002 Corolla Conquest wagon (TRL-99 and TFL-98) that they would measure the spring lengths for me and post a reply here please. My rear Lovells low springs are ~290mm long, factory length is ~335mm. Factory length fronts are ~315mm . I have not measured the Lovells low fronts yet as they are still on the car, may get a chance this weekend to measure them. I am trying to sort out what springs were supplied and what the length dimensions should be for Lovells lows. Maybe there is a need on this site for a list of spring manufacturers and the length of the various springs NOT installed, to get an idea of what reduction in height each spring set may give when lowering. I did not get the amount of lowering for the front that was stated in the manufacturers data as being 30-35mm for the Lovells lows. In my case the rear springs are approx 40mm shorter than the factory set and that was replicated when the springs were installed. I may need front super lows to get a similar height reduction for the front ~40mm from standard. Thanks, soundbyte
-
2002 Corolla Conquest wagon, Mirror mods
soundbyte posted a topic in Corolla / Corolla Sportivo Club
I have read a few posts about putting LED indicators in mirrors. I propose to mod my mirror covers as per the photos with 5 X 5mm amber LEDs each side all wired in series with a resistor (~150 ohms) to the side indicators. Mirror in original factory form. Photo showing cover removed and arrows pointing out what holds it on to the base and the black dots on the line the proposed hole positions. Line of holes hopefully positioned to miss most of the plastic sticking out from the mirror base, base might need a bit of delicate grinding with a dremel to make the LED's fit where the covers bend around to fit near the outer edge of the mirror. Photo shows mirror base without cover, mirror base folded towards door, arrows showing where the lugs go to hold the cover on. Red dots approximate position of LEDs with cover on. Not easy to show that the LEDs go around the outside edge of the cover so a couple will illuminate sideways as well as three forwards. LEDs will stand proud of the cover front by about 5mm but should not be too visible as the LEDs are clear when not on. To get covers off you will need a long shank, flat bladed screwdriver, not too large perhaps 4mm shank diameter max. Looking at the mirror from the rear of the car, slide the screwdriver into the gap between the mirror and the base and lever carefully the two lugs (1 and 2 in photo 2, sorry numbers are upside down) so that the lugs no longer grip the base. It should then be a matter then of gently pulling the cover forward and down and it should come off easily. Not actually done this yet as I need to get the drilling angle correct so the LEDs point forward at the same angle and that will have to wait until I get back to work to ask for guidance on how to get it right from the drilling experts. Comments? Corrections? soundbyte
-
Yesterday I put the new KYB shocks (Excel G nothing flash) and Lovells springs (TFL98 and TRL99, lows) into the 2002 Corolla Conquest wagon. I was checking the car last weekend and found both rear shocks leaking so they needed changing. Front of car factory spring from front tyre lip to guard was ~105mm with Lovells ~90mm, ~15mm change. Rear of car factory spring from front tyre lip to guard was ~115mm with Lovells spring ~75mm, ~40mm change. Looks like the car is dragging its behind along the ground and feels like it when driving. Lovells Rear Factory Rear Lovells Front Factory Front. Both front and rear Lovells springs looked quite a bit shorter than factory springs before fitting so I am a bit nonplussed as to why I have only got ~15mm lowering to the front to the car. Any ideas as to why only ~15mm change at the front would be appreciated. Thanks, soundbyte
-
2002 Corolla Conquest wagon trailer socket location
soundbyte replied to soundbyte's topic in Corolla / Corolla Sportivo Club
Toyota dealer called and the parts have arrived. The wiring harness is installed using the rear tail light wiring loom connections, both LHS and RHS. It is a matter of removing one rubber plug to get wires into car and then remove connections to tail lights and plug in wiring harness then plug connections for tail lights into harness, drill holes for mounting trailer connection on tow bar, recommended time .5 hours. There is no black box so do not know what the other Toyota spares man meant. Part number for the Toyota wiring harness for a 2002 Corolla wagon is PZQ61-12060. I also picked up the little black clips for the rear door sill, P/N 90467-07152-B4. Nearly as much as the wiring harness! Hope this might help someone else. soundbyte. -
2002 Corolla Conquest wagon trailer socket location
soundbyte replied to soundbyte's topic in Corolla / Corolla Sportivo Club
I visited the local Toyota dealership today and found out the deal with this socket location. The person who was on the "Service Desk" wanted no part of me finding out any technical details without me booking for the Toyota crew to find and install wiring. NO THANKS. The parts guy (thanks David) came through with the information after walking me over to the new car garage and chatting with one guys who install tow bars. The trailer connector is in the loom, behind the passenger side rear side cover. To install any trailer connector in this model you need to buy a Toyota harness as the after market version with only a connector and wiring will NOT work. The cost for the Toyota harness is around $45.00 and includes a black box, cabling and good instructions. I have seen a harness and there needs to be a cable run from the rear of the car to the battery from the black box (part of harness). When I get the harness I will post the part number so that may be of assistance to others. Soundbyte -
At present trying to find in the 2002 Corolla wagon the location of the trailer wiring socket (if there is one) so I can connect my tow bar/trailer wiring. The tow bar was provided with a wiring harness with a connector. Does anyone know if the socket is part of the 2002 Corolla wagon wiring loom and if so where is the socket located? According to the 2004 Corolla sedan wiring diagram the trailer socket is part of the wiring loom with identification connector T21, not sure this is the case with the 2002 wagon. The provided harness would connect to the T21 socket as described in the 2004 wiring manual I have searched the Toyota Owners Club - Australia web site and Googled with no luck. Any help would be appreciated. I hope I have posted in the correct place, first post here. Thanks, Soundbyte