

Full-Throttle
-
Posts
743 -
Joined
-
Last visited
-
Days Won
65
Content Type
Profiles
Forums
Events
Gallery
Tutorials
News & Articles
Videos
Posts posted by Full-Throttle
-
-
On 1/25/2016 at 4:42 PM, Kanmuri79 said:
I don't think i've seen this much effort in such little time. Great work.
I don't think I've ever spent this much money in such little time!
 . Thanks mate.
21 hours ago, GDude said:
. Thanks mate.
21 hours ago, GDude said:You take some pretty good pics!
Cheers man!
-
 1
1
-
-
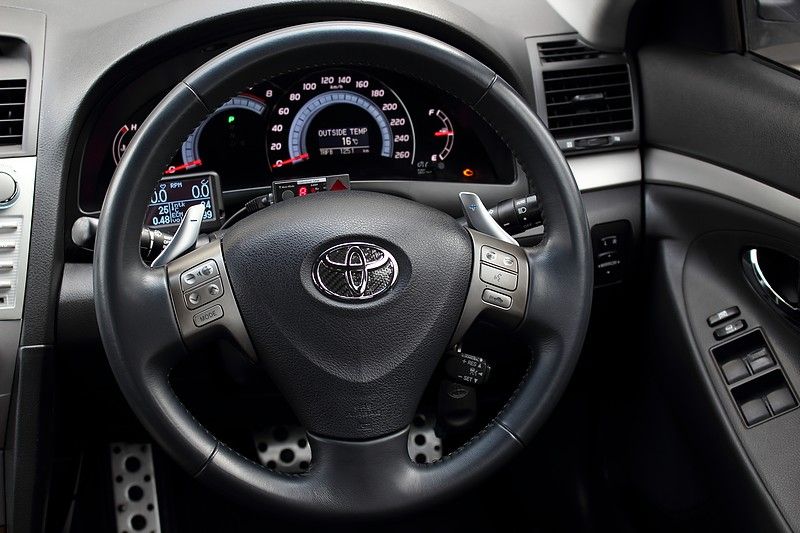
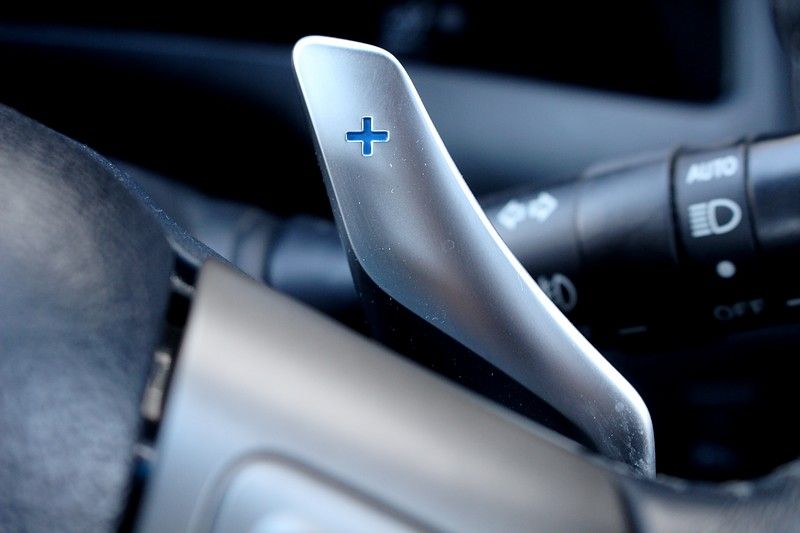
The steering wheel I'm using is from a Japanese Toyota Blade Master G, which coincidentally has the same V6 2GR-FE engine that the Aurion does. They come with factory plastic paddle shifters, but the paddles on my one are from a Lexus IS-F which are made from magnesium (not that it makes any difference to the performance, lol). You could use a paddle shift steering wheel from other models, such as the Lexus IS250 etc, but if you want to add the paddles to your factory Aurion steering wheel I'm not sure how successful it will be.
Wiring was relatively easy as I just had to add two extra pins to the factory airbag clock spring. I also had to swap over the airbag module on the back of the hornpad but that was easy, albeit nerve-wracking. I wired the paddles to the shifter in the centre console, so it just mimics what it would be like if you changed gears using the knob (which you can still use if you want to). The new steering wheel didn't have a 'DISP' button for the cluster, but luckily I managed to wire in the radar cruise control button to function as the 'DISP' button instead. All in all they work well with no lag. Admittedly I don't often use them and they're mainly just a novelty, but it's a nice addition to have just for the hell of it
-
1
-
-
New photos:
-
1
-
-
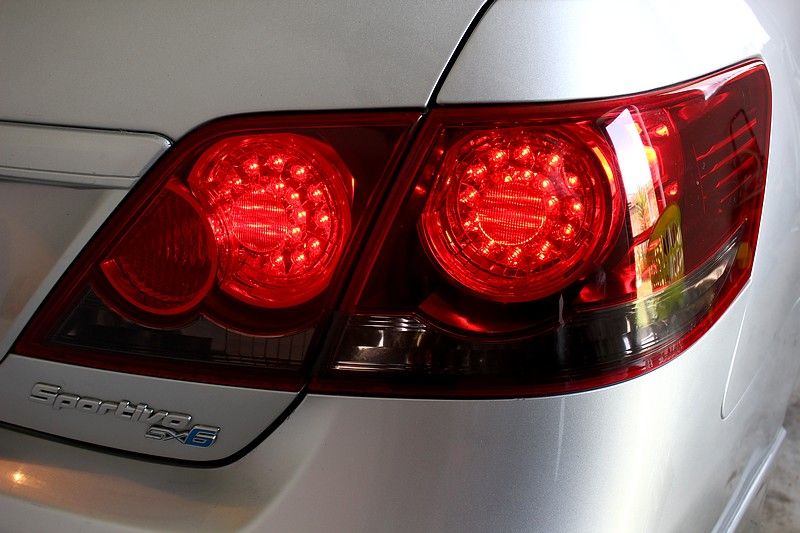
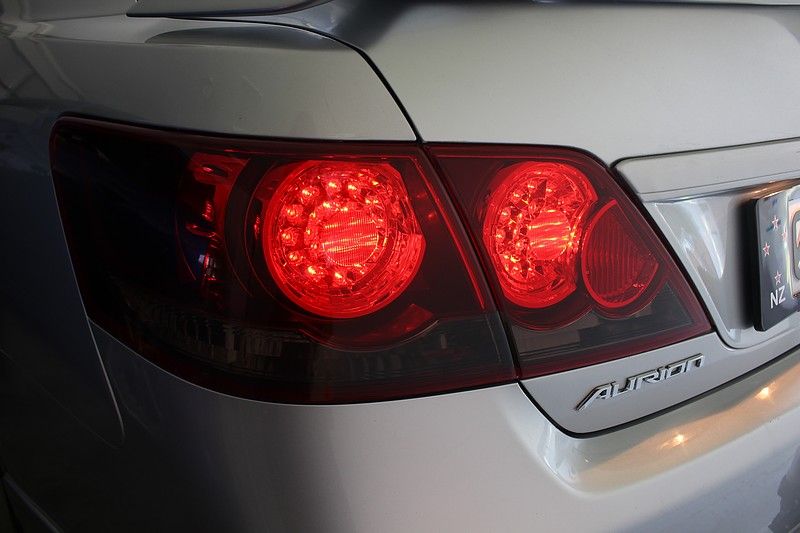
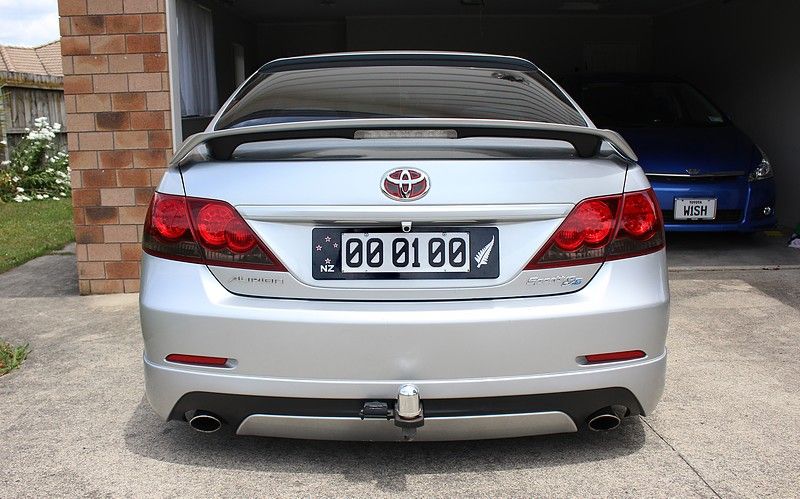
This is my one in silver with colour matched eyelids, to give you an idea of what it looks like:
-
2
-
-
They look good but definitely need to be the same colour as the car in my opinion.
-
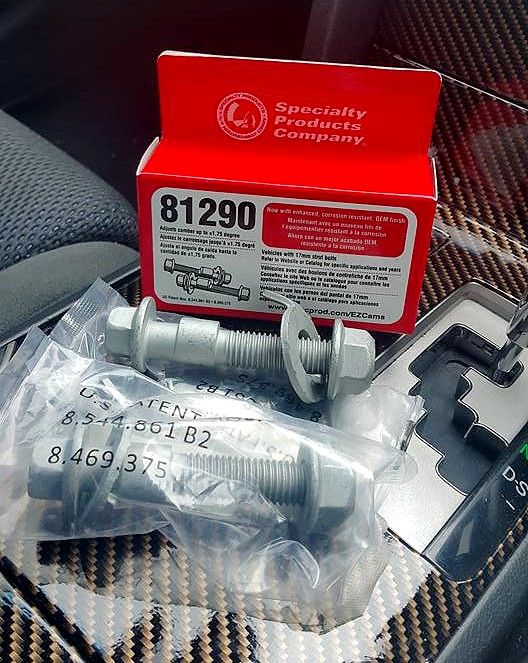
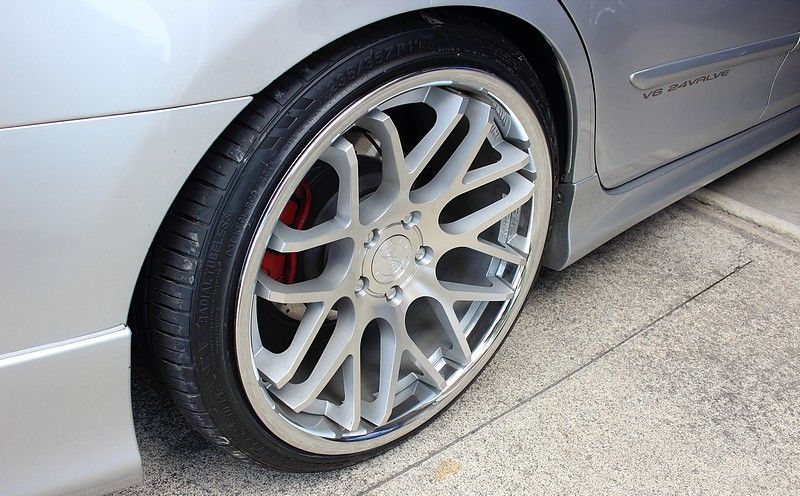
Threw some camber bolts in the front tonight. It's evened it out nicely now, so no more strange poke at the front.
-
2
-
-
7 hours ago, trentmeyer23 said:
The style makes them look rather small.
They look pretty damn big in real-life mate
-
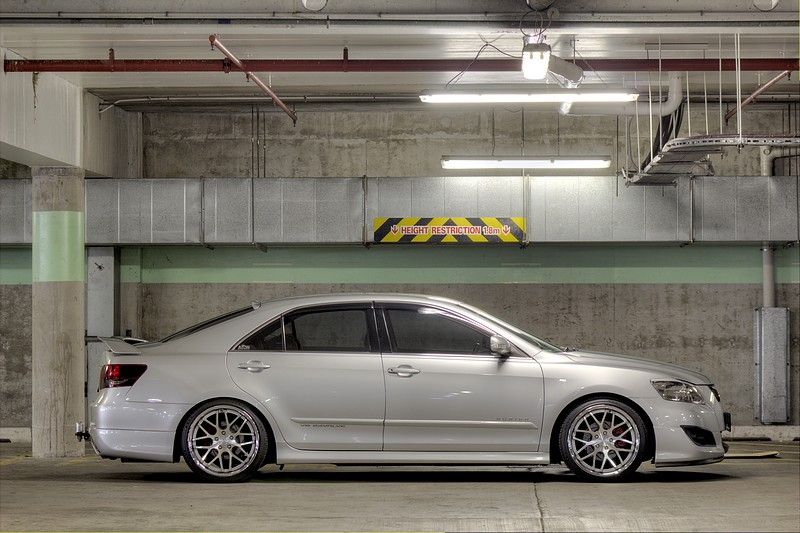
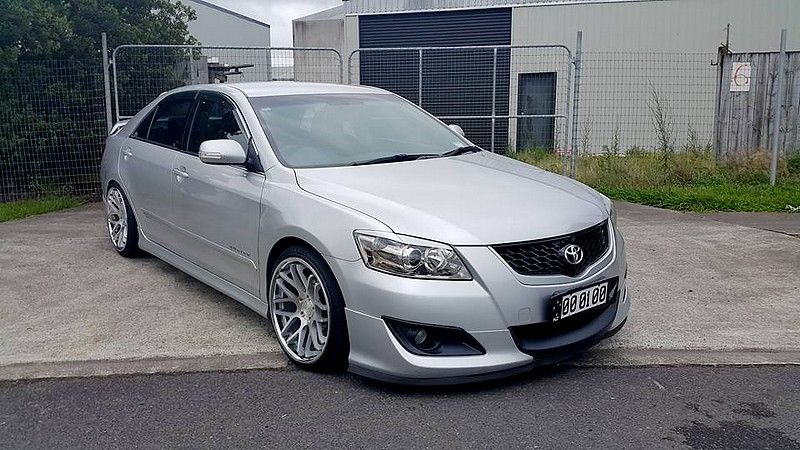
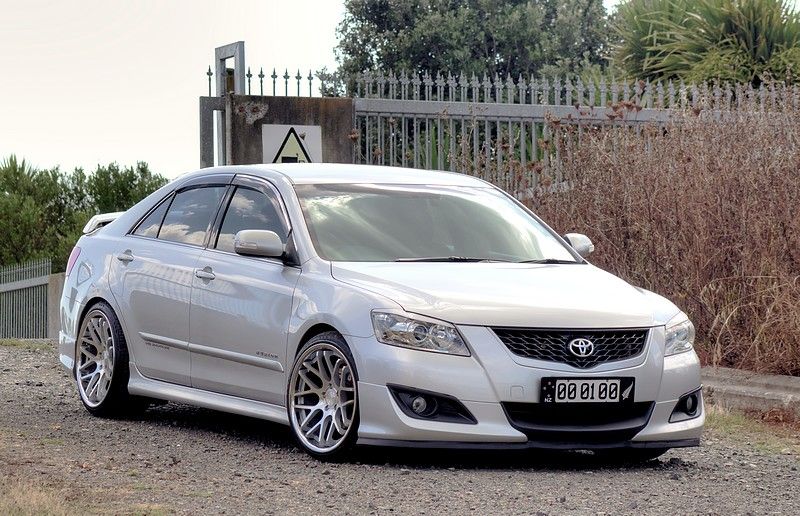
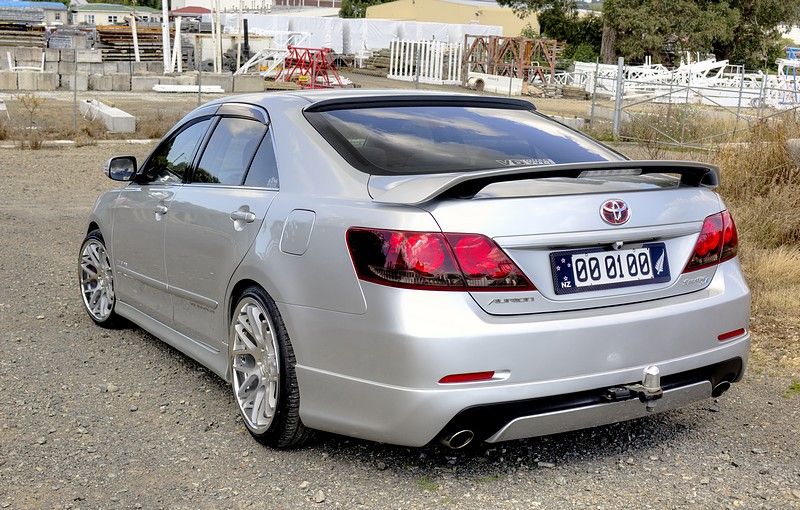
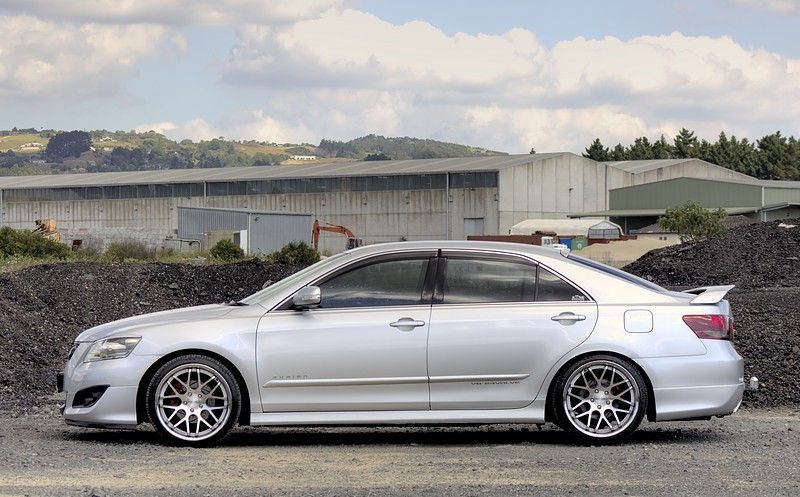
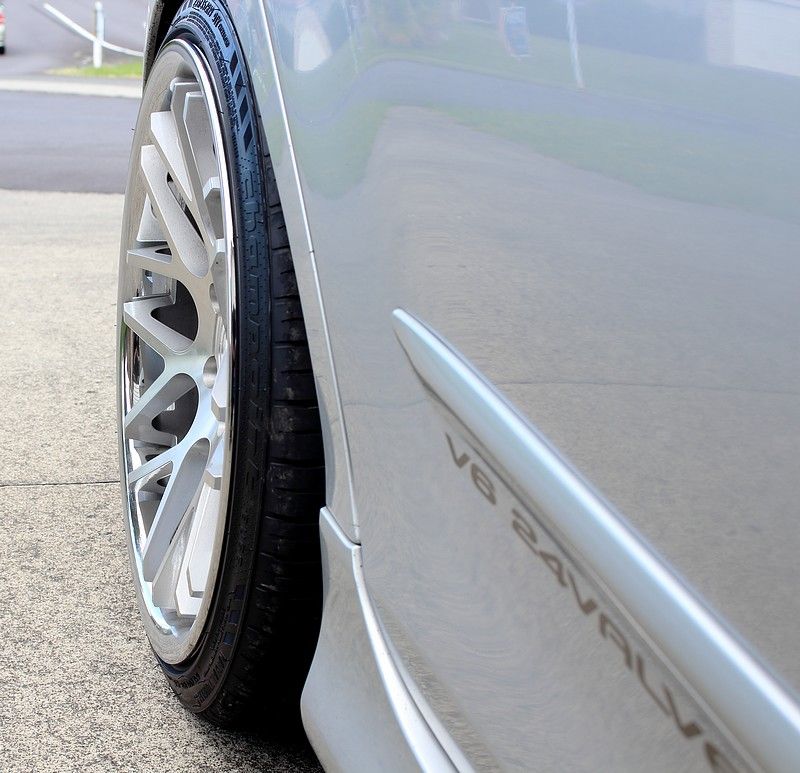
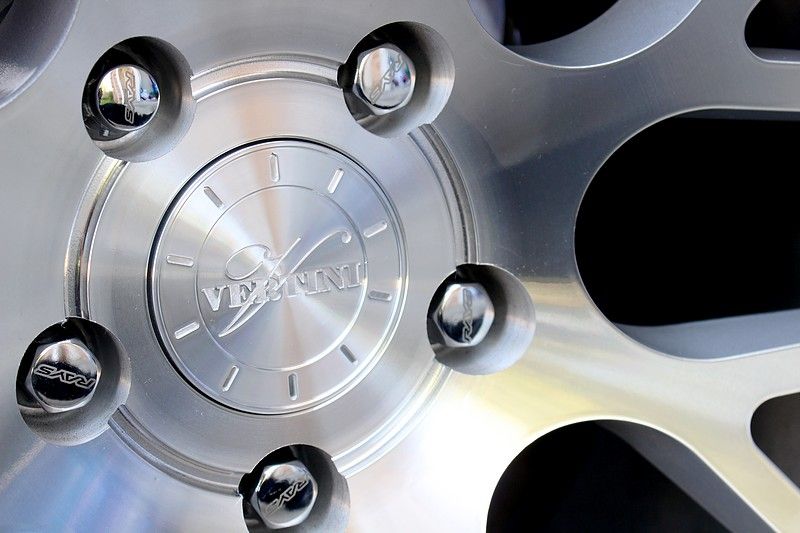
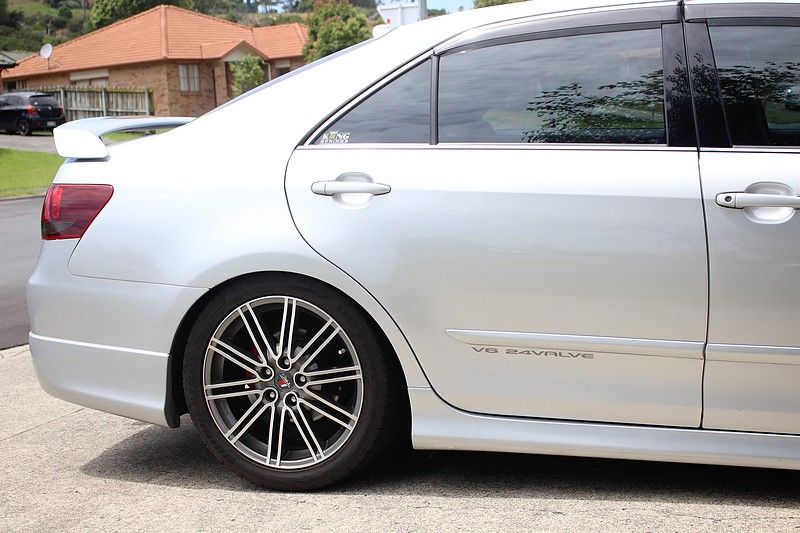
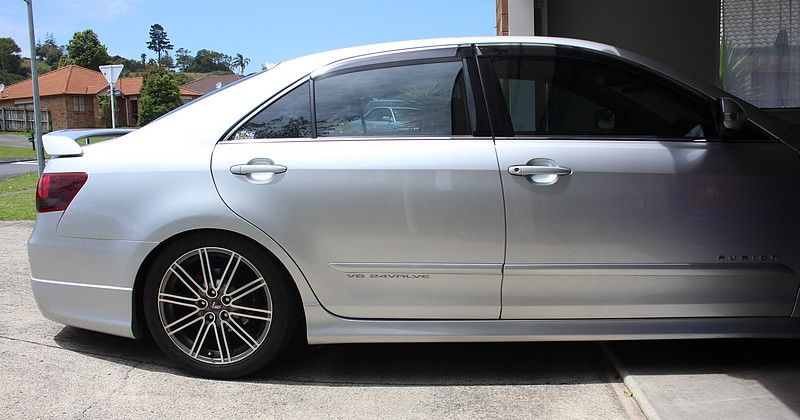
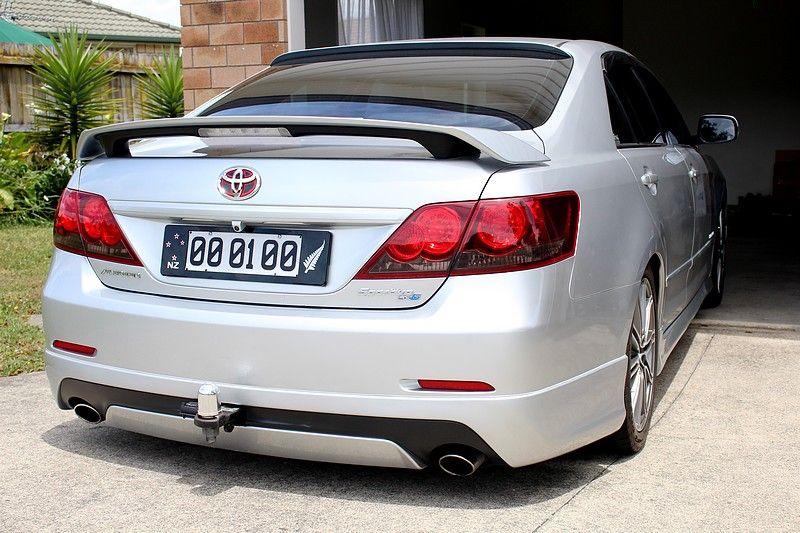
The Aurion got some new wheels today. They're Vertini Magic (concave) 19x9.5 front and rear, +32 offset and wrapped in 235/35/19 rubber. They get custom drilled for the stud pattern and shaved for the offset you want so I had to wait about a week for them to get machined, but it was worth waiting for
. Being concave they bow in the middle, giving that very dished effect.
The rear guards needed to be rolled as there was slight scrubbing around corners, but apart from that the fitment was pretty straight forward. I just have to get some camber bolts for the front so I can give it some negative camber and tuck the wheels in a bit more, but apart from that the fitment is great and I'm loving the new look
-
2
-
-
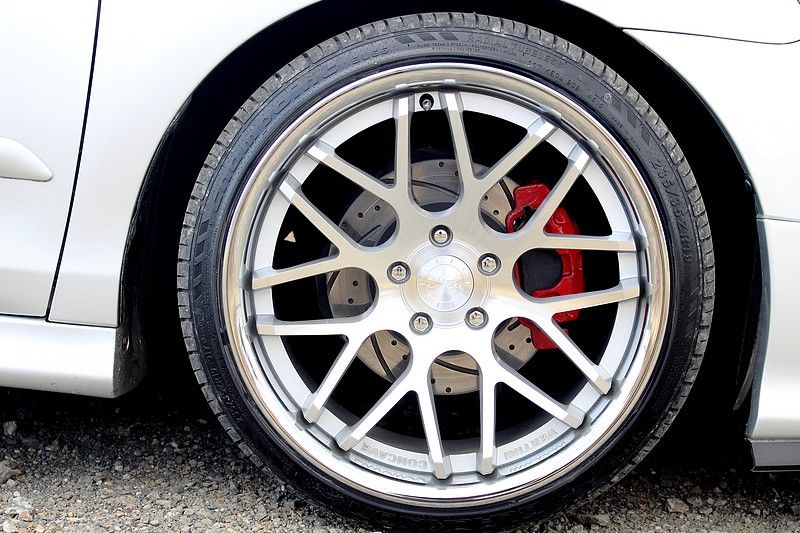
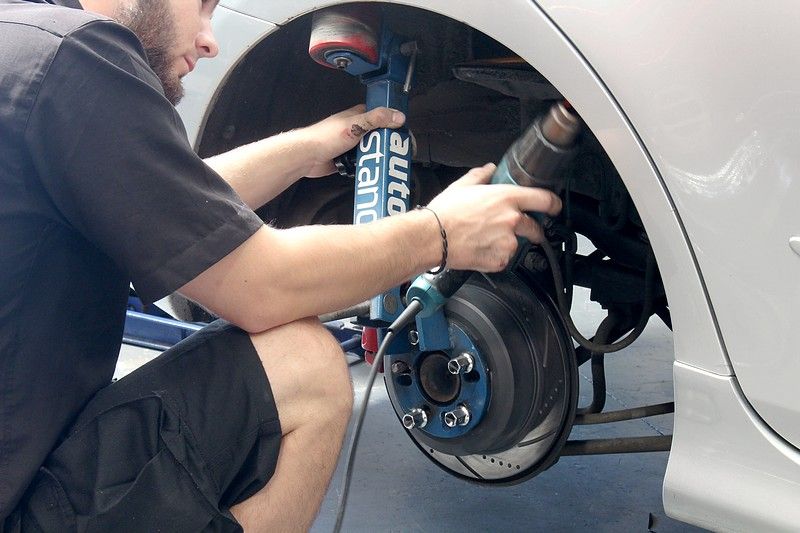
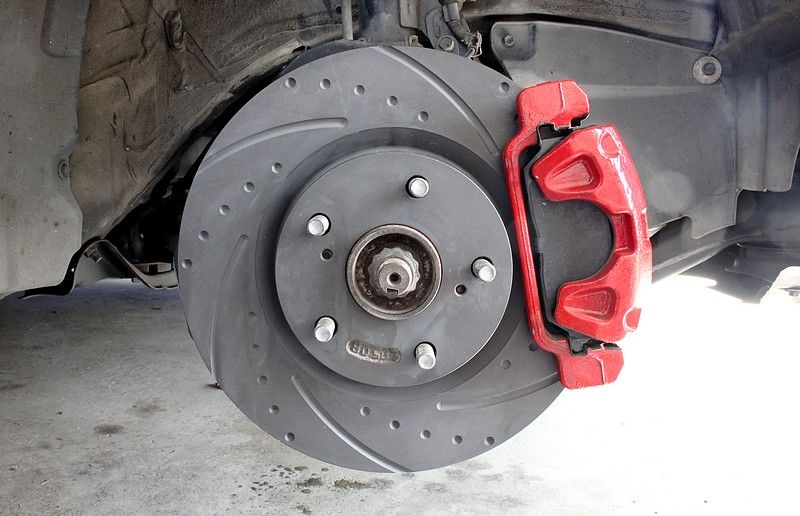
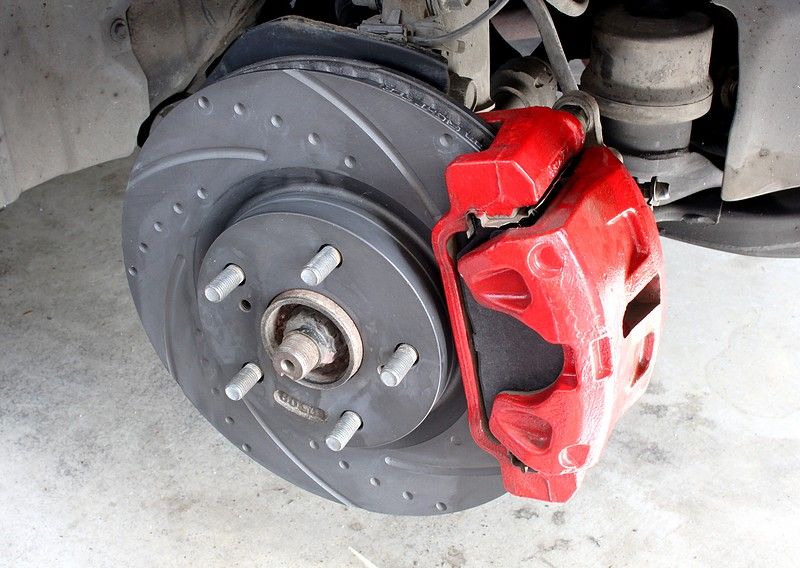
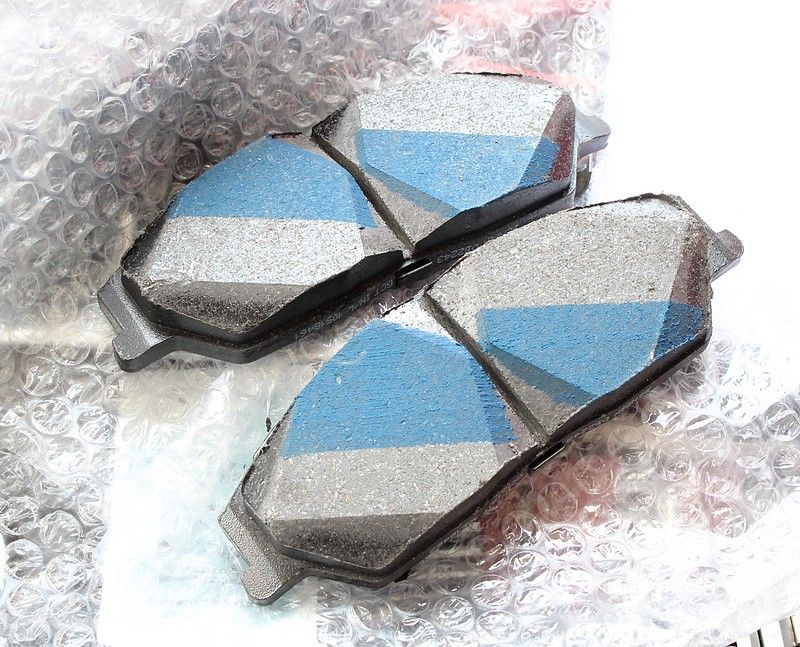
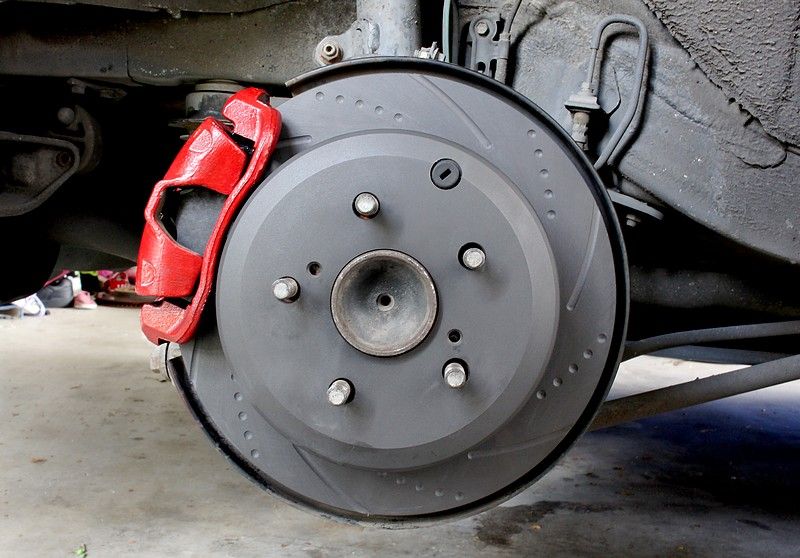
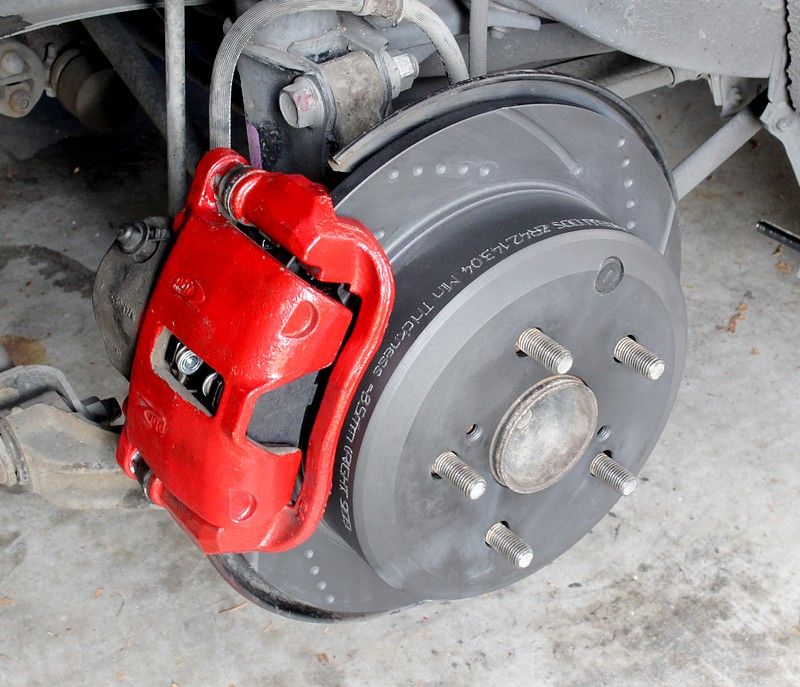
So I decided it was time to upgrade my brakes, but I didn't need want to go for bigger calipers or larger rotors since my daily commute to work is only 10km and it's mostly straight, lol, so I settled on these Znoelli dimpled drilled and slotted rotors front and rear, combined with Bendix brake pads all round.
Znoelli is a New Zealand company who have been around for years making race brakes and custom wheel spacers/adapters, so when I managed to get a nice trade discount off the retail price I placed my order and 2-days later they were ready. Obviously after driving the car and applying the brakes the black coating on the face of the rotors comes off to expose the shiny silver underneath, but the rest of the rotor won't start looking crappy from surface rust etc after a while.
That's all for now, time to get back out there and burn some more brake pads
-
On 1/11/2016 at 0:42 AM, TRD #527 said:
Hey Scott!, love the build so far mate, I have a question? I really do like the wood grain centre console that you had installed before the carbon fibre. I'm rather interested in doing the same for my TRD aurion. Is it a New Zealand only genuine part or have you wrapped it yourself? as i have not seen anything close to it on a Australian gsv40r. Cheers Matthew
Hey Matthew! Thanks!! I got the centre console from a Touring model. It's the only type I've seen with the 'flat' looking woodgrain. Most others like the Grande/Presara have the glossy woodgrain, which I'm not really a fan of. I decided to go with the factory silver compartments to break things up a bit, but the woodgrain itself is a factory option, so you might have to hunt around a few wreckers and see if you can find one
. I'm now using my carbon fibre wrapped console and I'd offer to sell you the woodgrain one, but I ended up using the woodgrain rear flip-open pocket as my original silver one had a couple of broken mounting tabs.
-
Very easy. Only 4 bolts holding the front seats in, just make sure you disconnect your battery for half an hour before unplugging the airbag connectors under the seats so you don't risk setting them off. As Trent mentioned above, you may have to do some wiring on the passenger's side seat for the electric controls as only the highest spec Aurions have electric seats on both sides, but it's just a case of lengthening/splicing into the wiring from the driver's side.
The rear seats are a little bit more time consuming to change, but you basically just have to pop up the bottom bench seat (pull REALLY hard on each end to pop up the metal clips) and then remove the 3 bolts that hold the rear backrest part in. Once those are out simply slide the backrest upwards and out. Installation is the reverse procedure, just make sure that when you put the rear backrest back in that all the top clips locate and slide in. Can be a bit tricky if you're doing it by yourself but just push the seat as you slide it downwards.
-
1 hour ago, 07 aurion Touring said:
Favebook page??!
Yep - https://www.facebook.com/groups/AurionOwners/
-
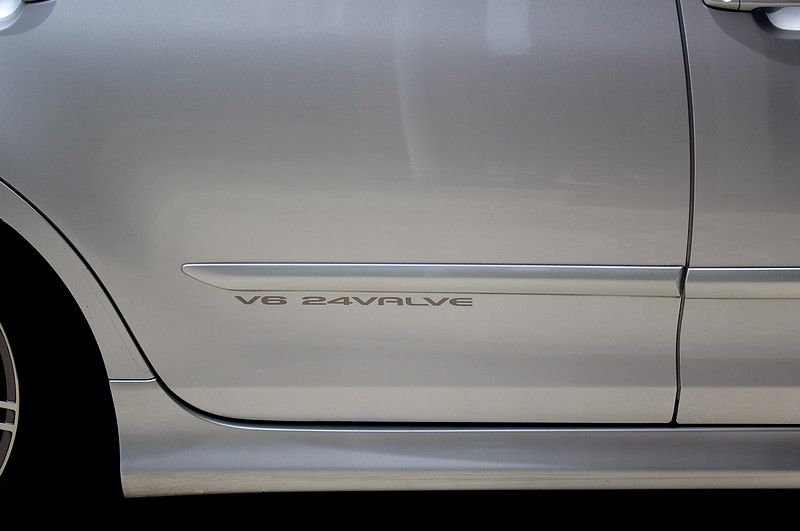
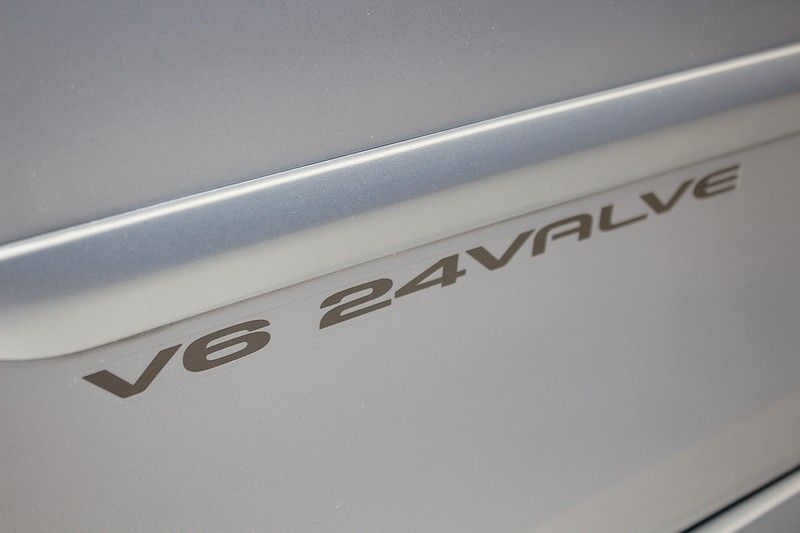
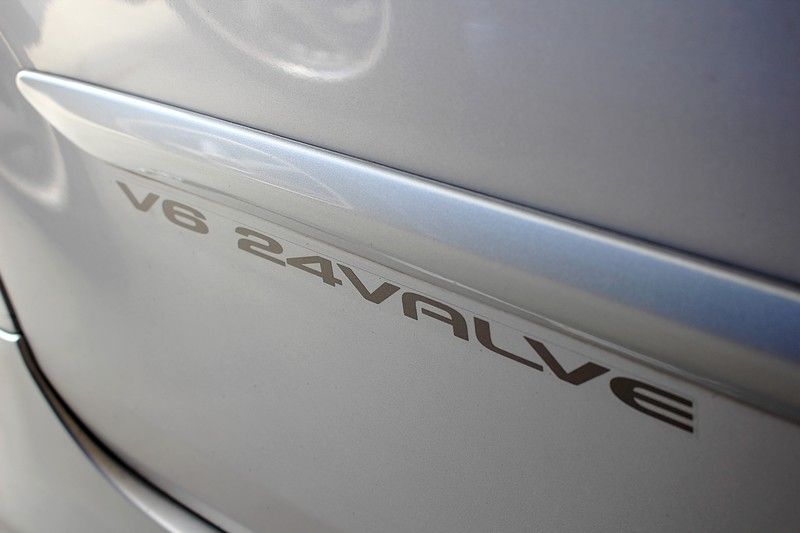
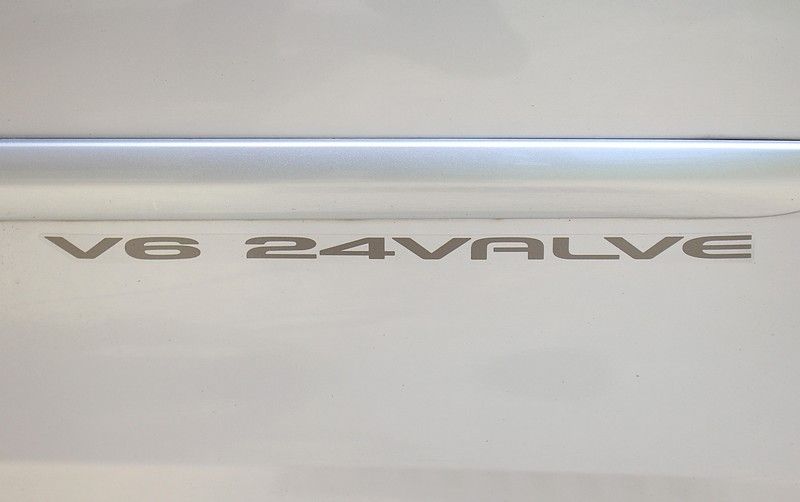
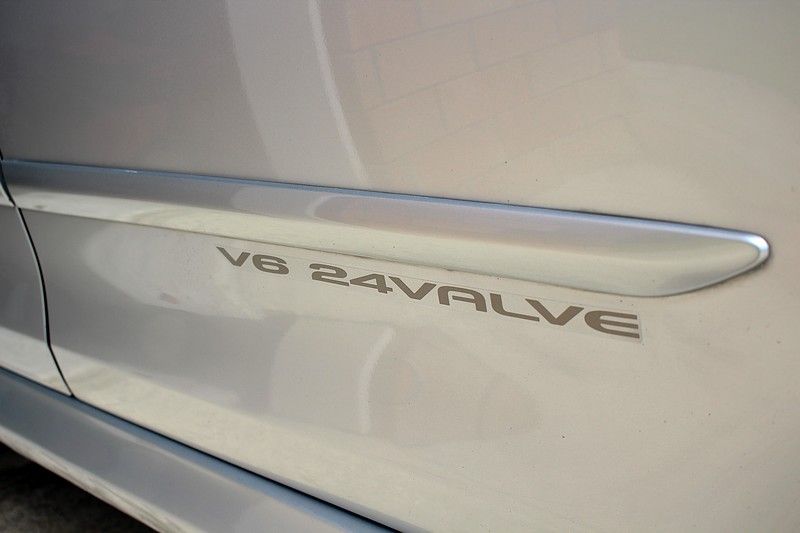
A few small updates:
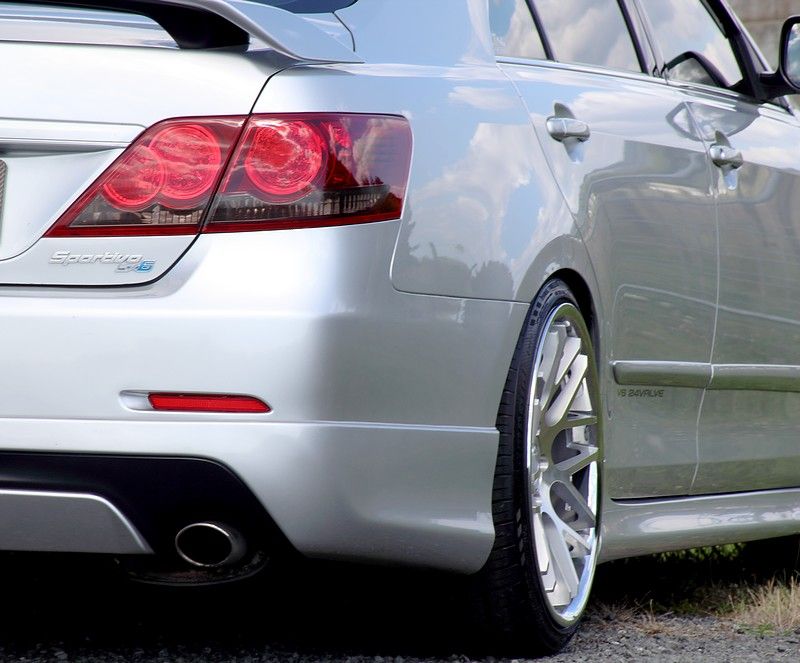
* 'V6 24VALVE' stickers fitted to the rear doors.
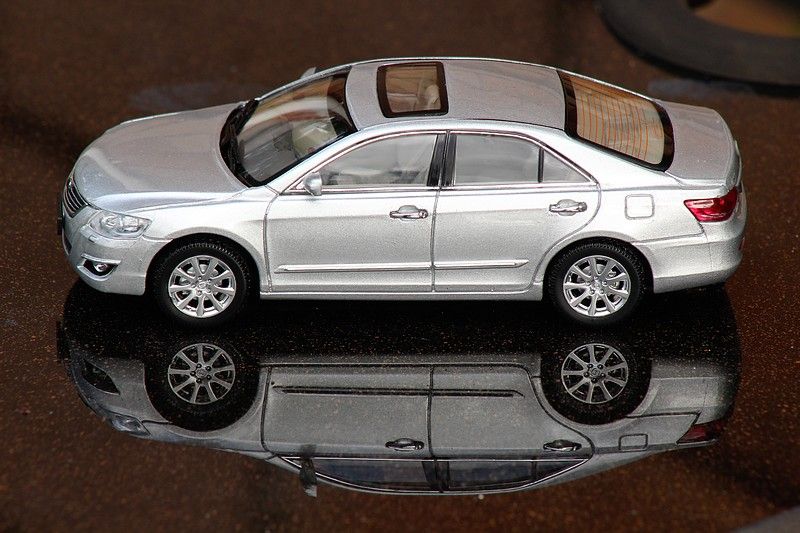
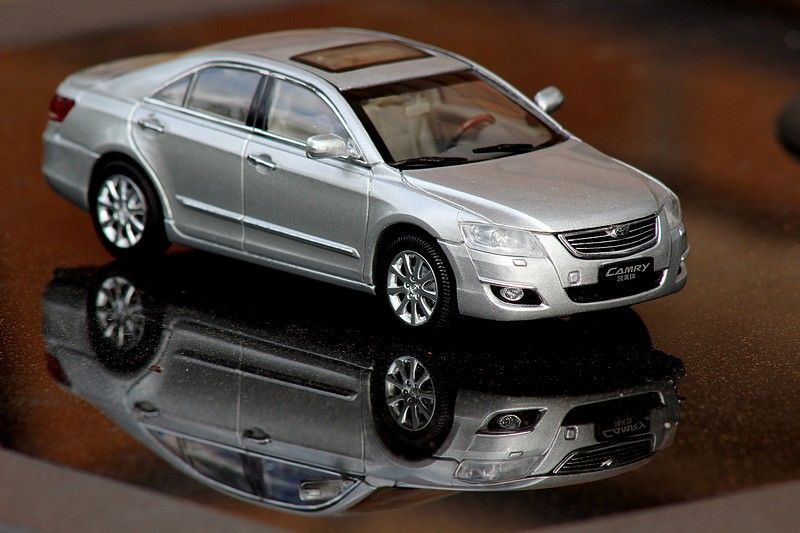
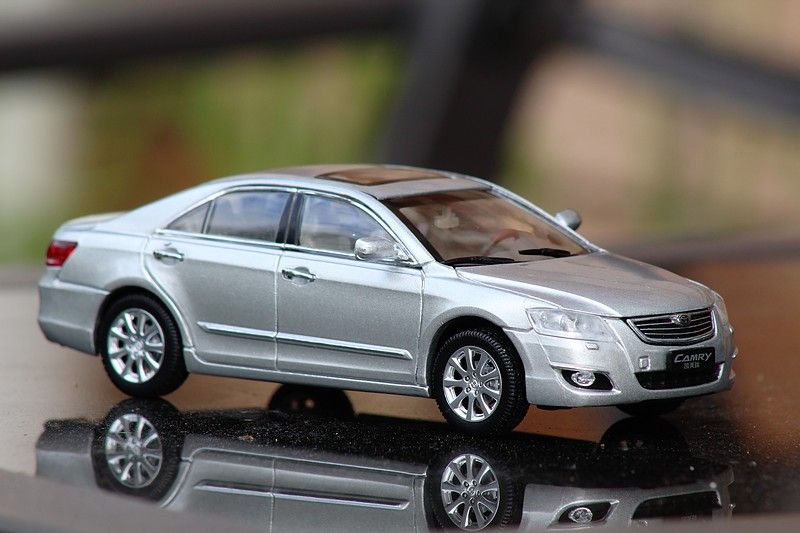
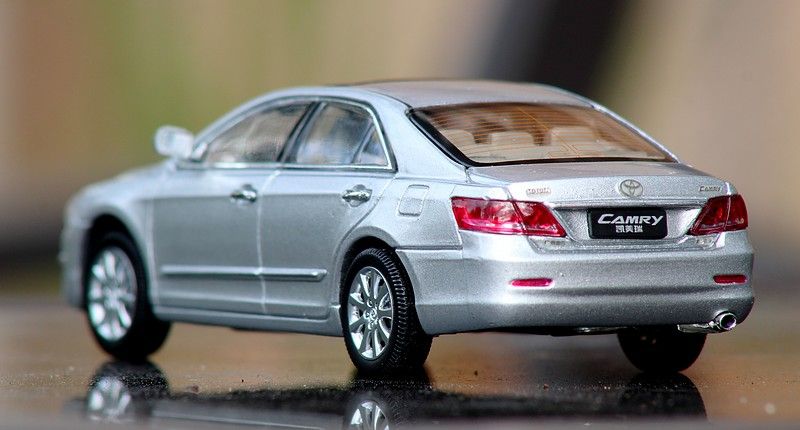
* Bought a 1:43 scale model of an Aurion (Asian Camry) from eBay.
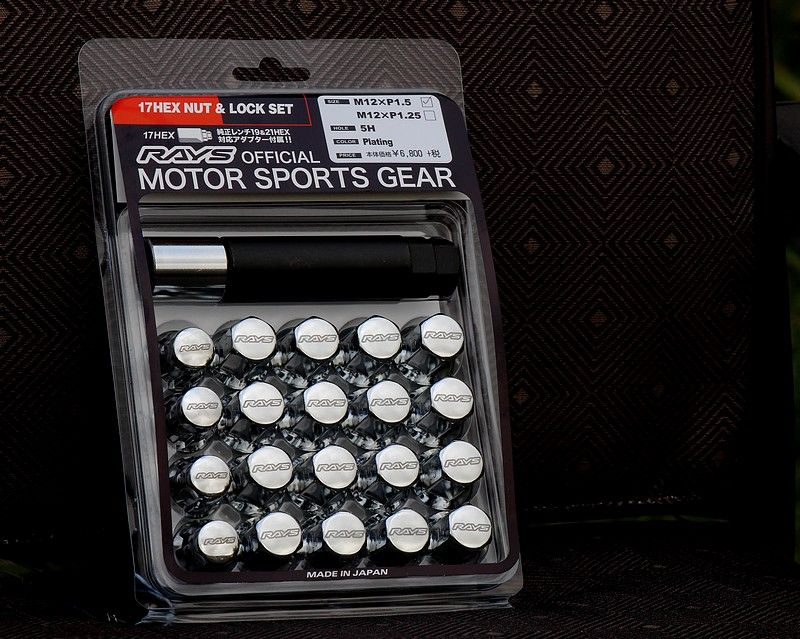
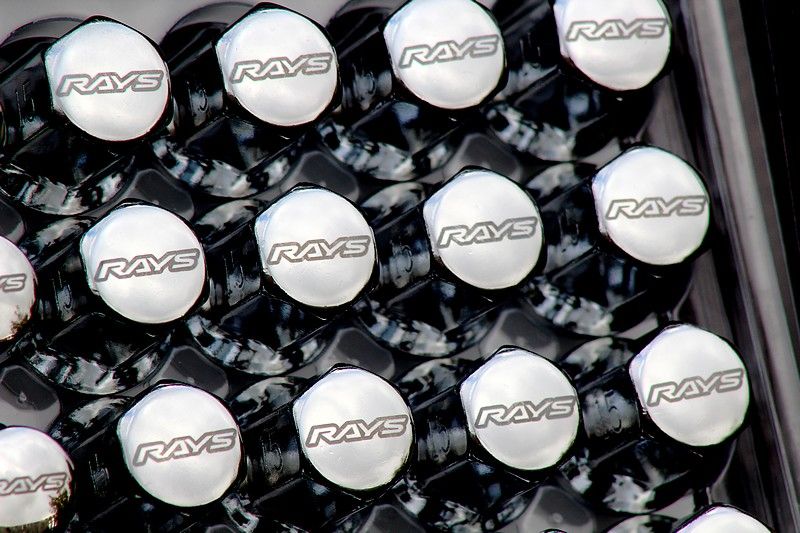
* Received some Rays wheel nuts from Japan. Watch this space
-
I had a look today at the airlines that were connected to the original air filter box. There is an electrical switch or something down near the gearbox ecu with a blue and a white wire. These wires fees into the gearbox ecu plug. Whatever it does seems to be gearshift related and that's why it feels different.
That's the solenoid for the active engine mounts. When you accelerate hard the vacuum switching valve sends vacuum to the engine mounts which stiffens them up to absorb any shocks when changing gear. This could very well why we can actually 'feel' the shifts more. I still have mine plugged in and have teed the vacuum lines off to it, but it may not be hooked up correctly in it's current configuration. I may have to play around with it and see if I can get it working as it originally was.
-
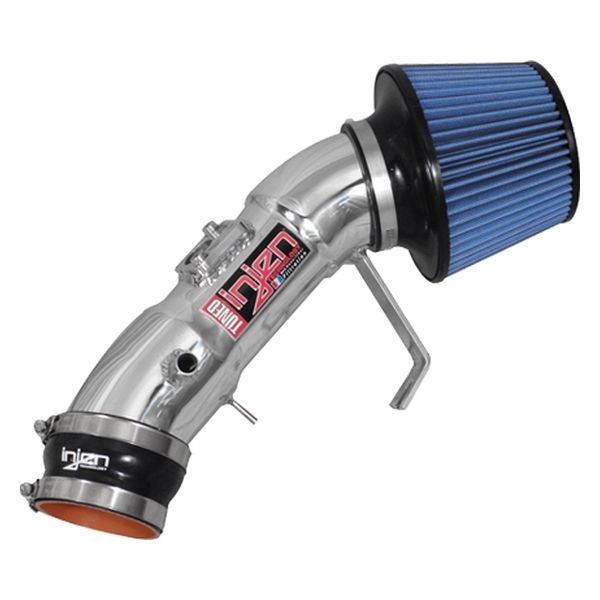
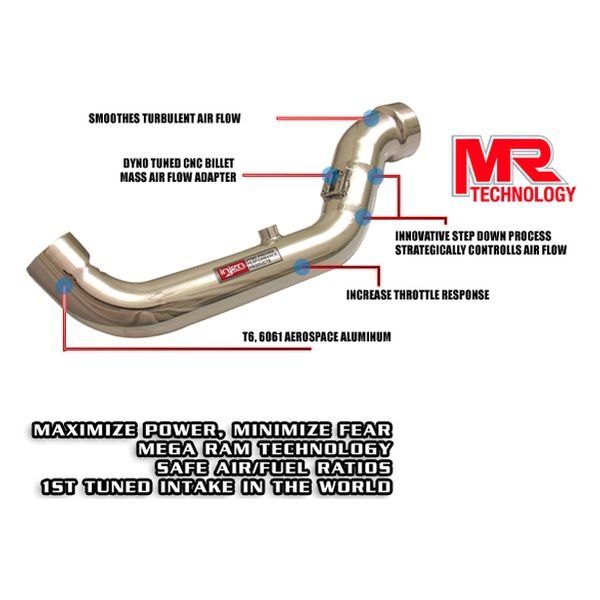
Did some digging around online and found this bit of information regarding that step down in the piping:
"Injen steps down the diameter of the intake tube where the Mass Air Flow (MAF) sensor mounts, enabling the sensor to detect airflow within established parameters. The engine control computer can then maintain the proper air/fuel ratio and optimize horsepower and torque. Simply put, MR Technology tunes the intake system to avoid the necessity of recalibrating the MAF sensor, and prevents your engine from running too lean or too rich. With MR Technology, Injen created "The World's First Tuned Intake System", delivering optimum performance with a factory safe air/fuel ratio."
And this:
"Featuring Injen's patented MR Technology, Injen incorporates a step process into their intake tubes (meaning they increase or decrease the diameter of the intake tube at strategic points to control airflow)."
EDIT: I also just found out that the filter on the Injen intake is 3.5" and it doesn't look like it steps down onto the pipe, so it appears that the piping will be 3.5", with it stepping down to 3" for the MAF sensor.
-
1
-
-
There is one slight difference though that I'm suggesting you go with for a tad bit more horsepower. Expand your intake at each of your coupling by .5". What I mean is....go from 3" to 3.5". Then from 3.5" to 4" to your cold air filter.
Great post. Thanks for sharing your knowledge and experience! I have been considering upgrading the piping size to 3.5" since I made my intake. I didn't realize that the throttle body was 3.5" until I went to put my 3" T-bolt clamps on and they didn't fit, so I had to buy a few 3.5" ones. I was thinking that this might be the reason why the gear shifts are harsher since the MAF is getting mixed signals due to the piping diameter being different than stock. My MAF pipe adapter is 3" however, so I won't be able to make that any larger, but the rest of the piping I may change.
One thing I noticed is that on the Injen CAI for the 2GR is that they step down the piping between the throttle body and air filter just where the MAF sensor is. I'm not sure if they go from a 4" to 3.5" or from 3.5" to 3", but on their website it says "Innovative step down process strategically controls air flow". I haven't seen this on from other manufacturers though, such as K&N and Fujita etc, so it must make a difference somehow.
One thing to also note is that on my MAF pipe adapter, it has a built in bellmouth on the air filter side, so that would speed up the air just before it gets read by the MAF sensor. I'm sure there's also a good reason for this too, but it doesn't make much sense to me why you'd want to speed the air up directly before the MAF since it may cause turbulence. I have thought of turning the pipe around, but then the air would be flowing against a rough edge, which would cause turbulence into the throttle body (but I guess that's better than before the MAF).
-
Good to know I'm not the only one who has experienced that. Must be to do with the MAF sensor. I must admit, I kind of prefer the harsher shifts when you boot it, as when driving normally it still seems nice and smooth.
-
3 inch, piped in the breather and plenum tubes.
Awesome. Have you noticed any differences with the gear changes etc?
-
That looks great! I like how you've used a stainless pipe for the bend. Did you use 3" piping? Cheers for joining the FB page too :)
-
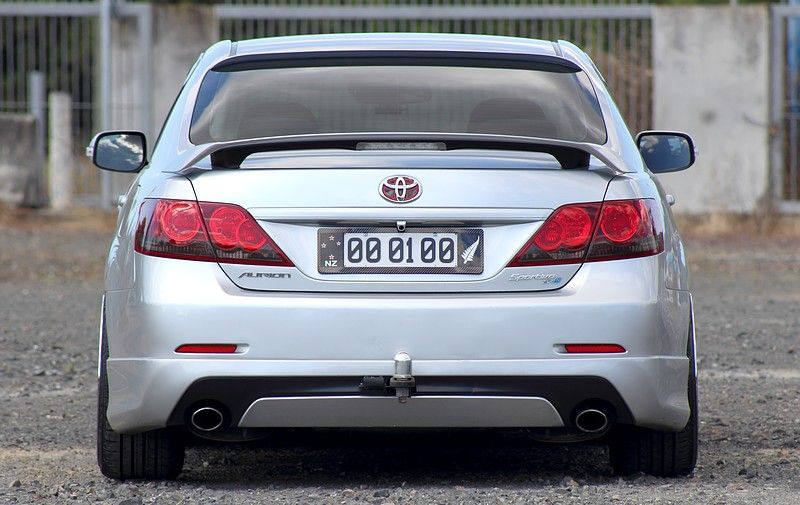
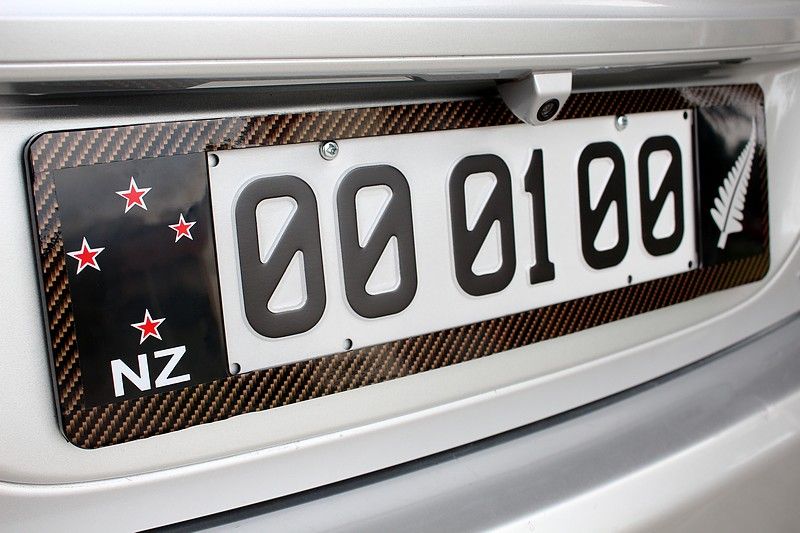
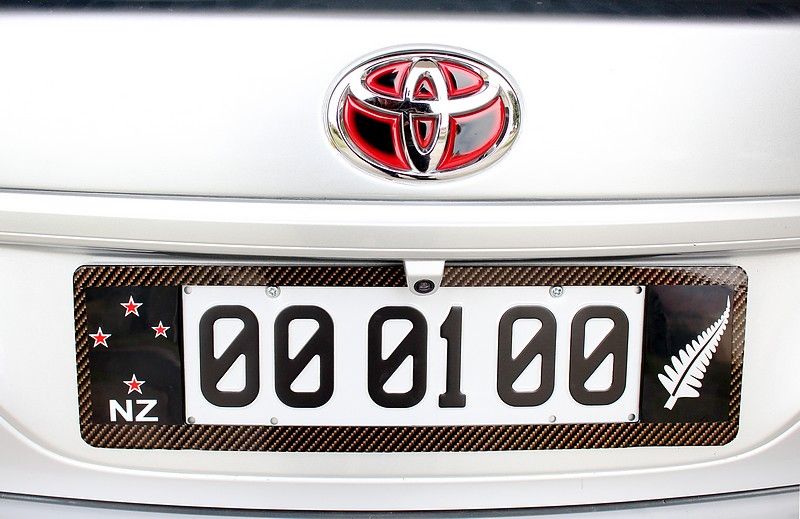
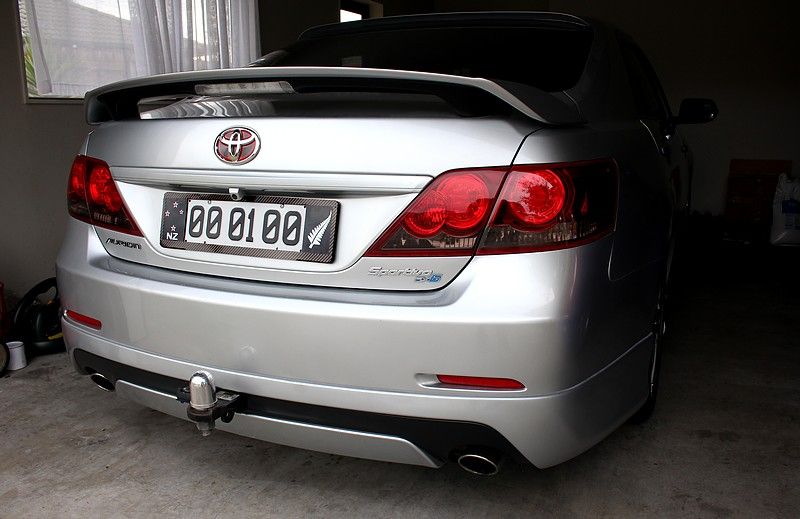
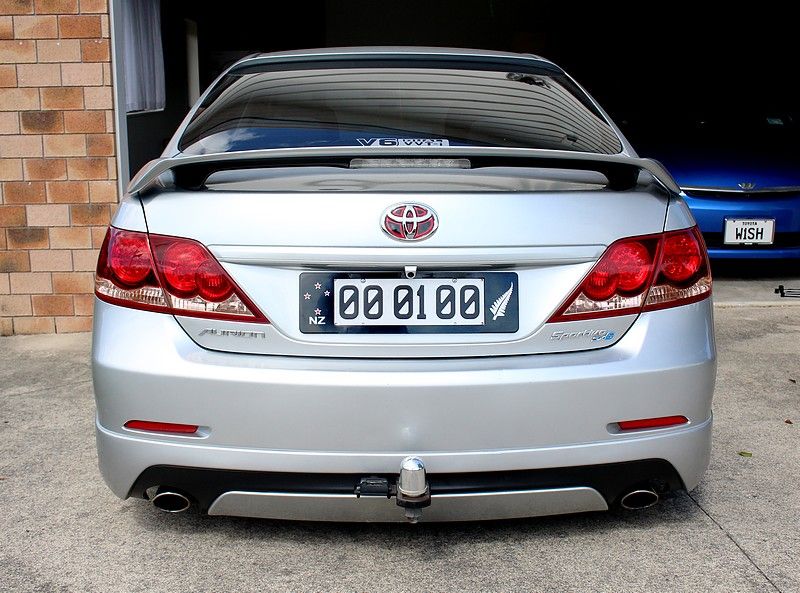
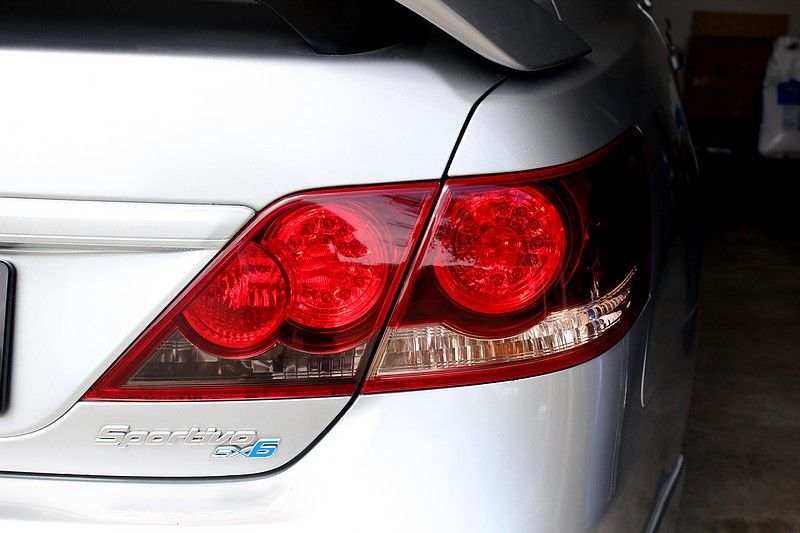
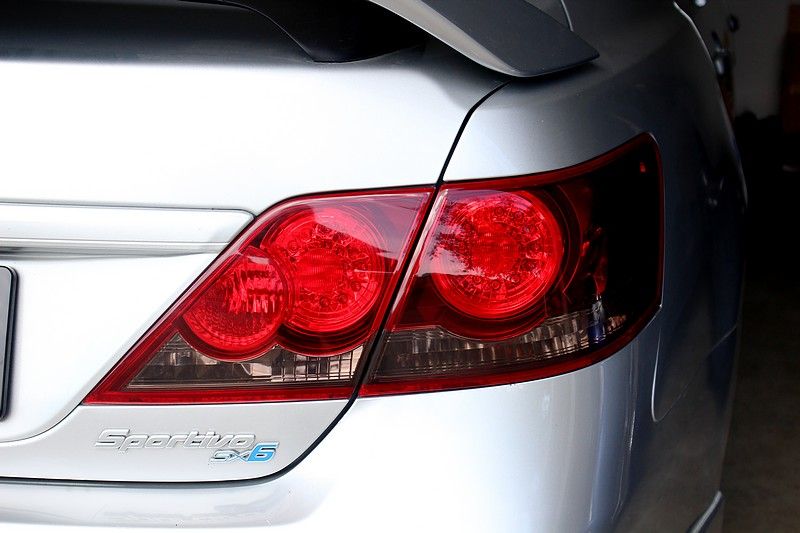
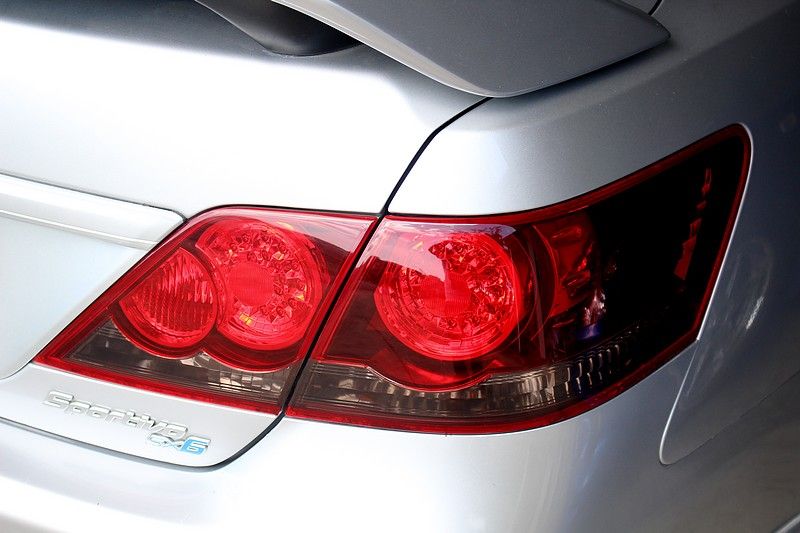
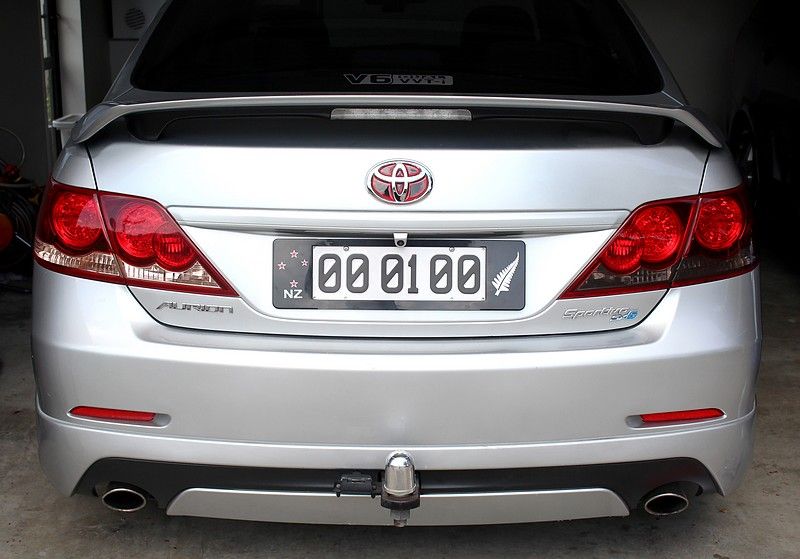
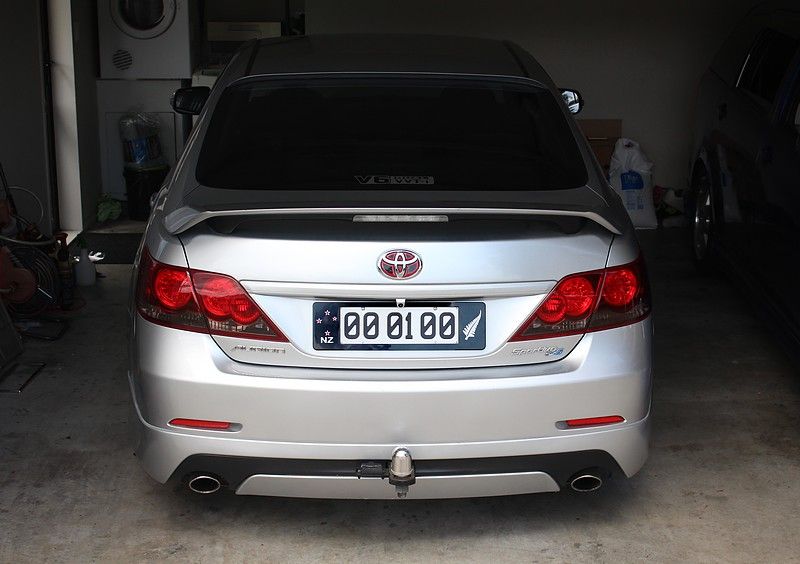
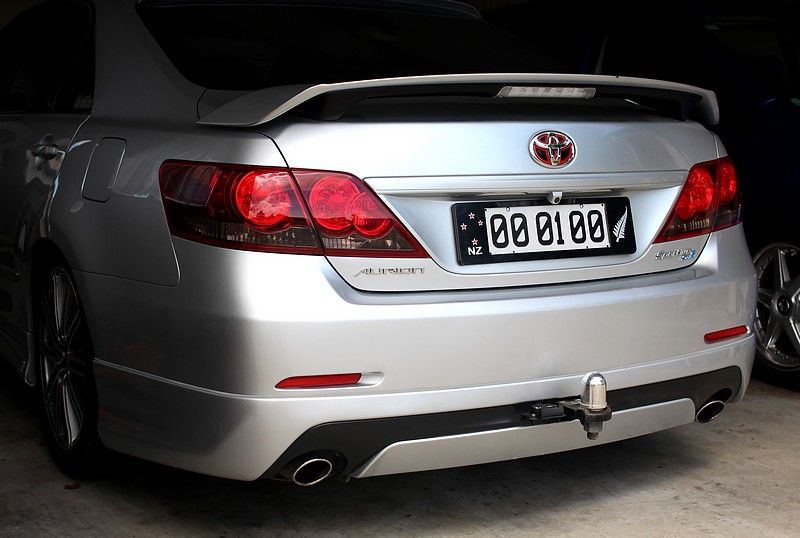
I wasn't 100% happy with the new plate surrounds, so I decided to wrap the rear one in some gold carbon fiber wrap that I had left over. Seems to take the blandness off and makes it a little more interesting.
-
More pics:
-
2
-
-
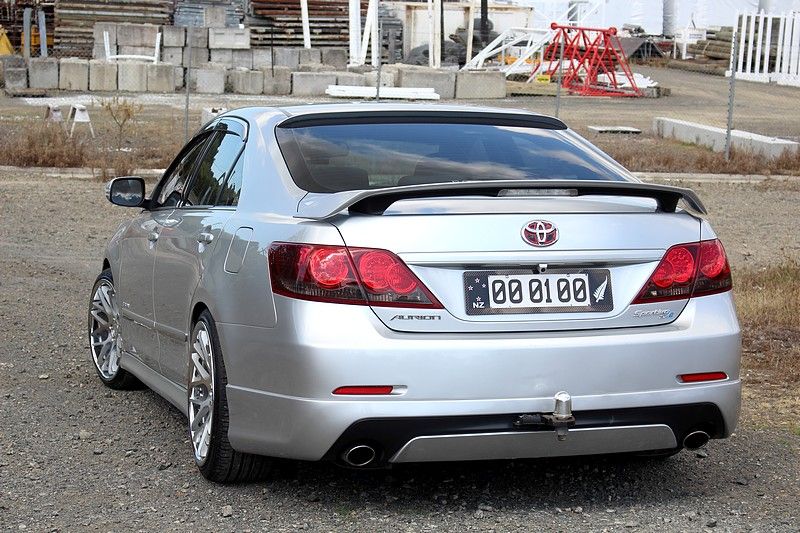
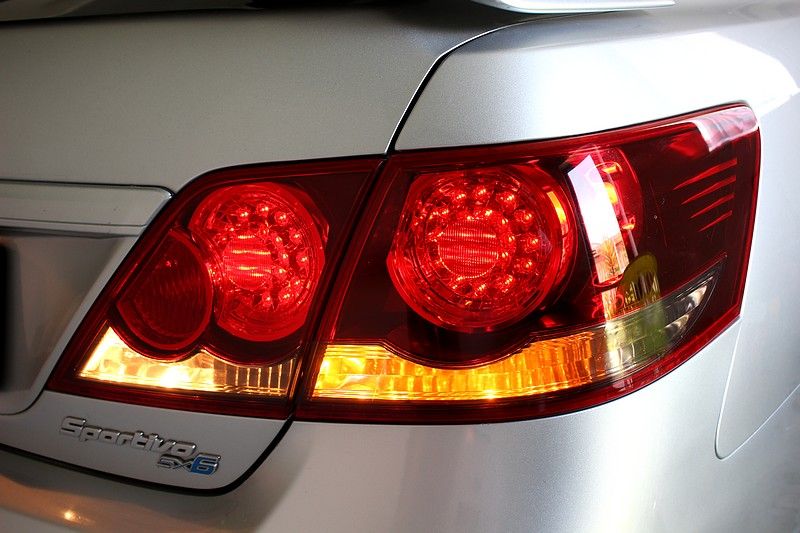
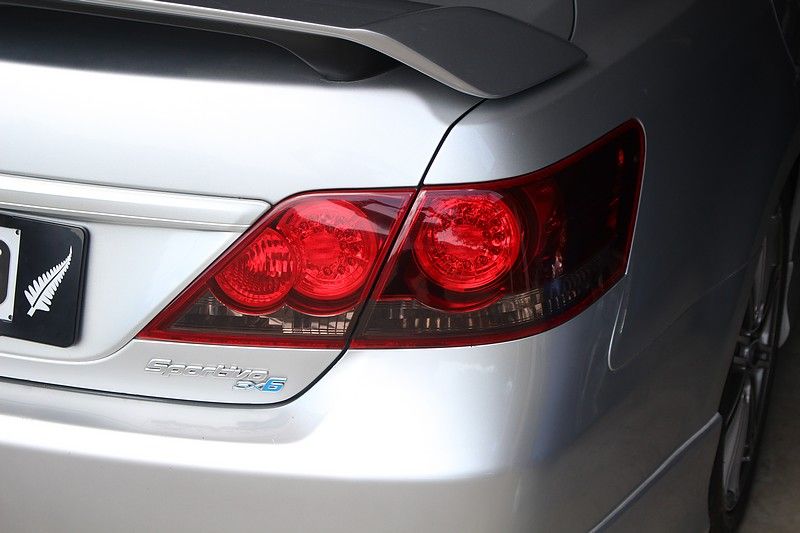
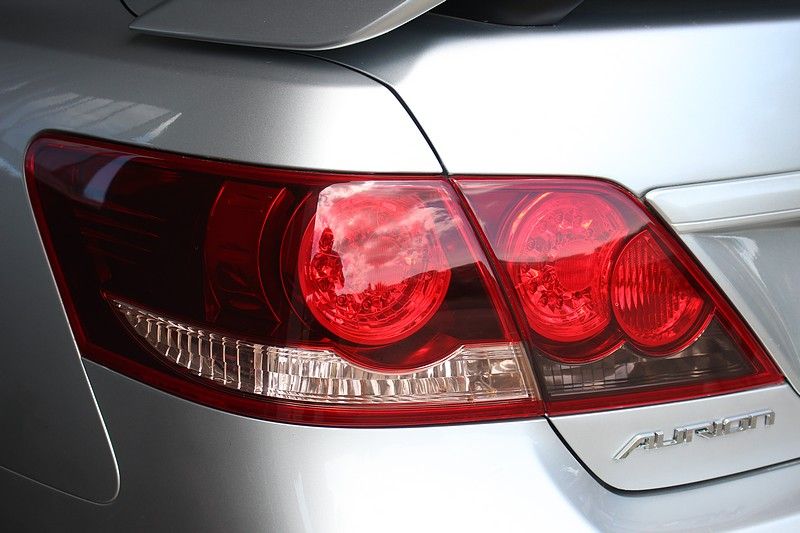
Got a couple of upgrades done on the Aurion today :)First thing was the installation of some Euro plate style license plate surrounds and the second was applying some pre-cut tint film to the lower sections of the tail lights.Here's some photos of the process and some before vs after shots:
-
I personally wouldn't change it. Most transmission problems start only after the oil has been changed and this particular gearbox can last hundreds of thousands of km's without having the trans oil & filter changed. Also, in the case of the U660E that the Aurion and other 2GR-FE's have there's a specific procedure that must be followed to avoid overfilling the transmission, so it's not just a case of 'drain & fill' unfortunately. If you MUST get it changed then I wouldn't go anywhere other than a proper Toyota dealership.
There's a good post here regarding the correct procedure: http://au.toyotaownersclub.com/forums/topic/36317-transmission-servicing/?p=483368
-
This is quite a common problem on the 06-11 Aurions & Camrys, so it doesn't surprise me it has happened to the GSV50 too. What's the exact error message the screen is displaying? It sounds like the CD has jammed inside the tray, likely due to some CD-R's being slightly thicker than regular CD's. The easiest thing to try is to remove your 'RADIO' fuse in your engine bay, or disconnect your battery for half an hour as this will reset your stereo and hopefully eject the CD. Failing that, you'll have to remove the unit and take the metal frame off to try and get at the CD. If it all turns to custard then at least you've still got your USB port ;)

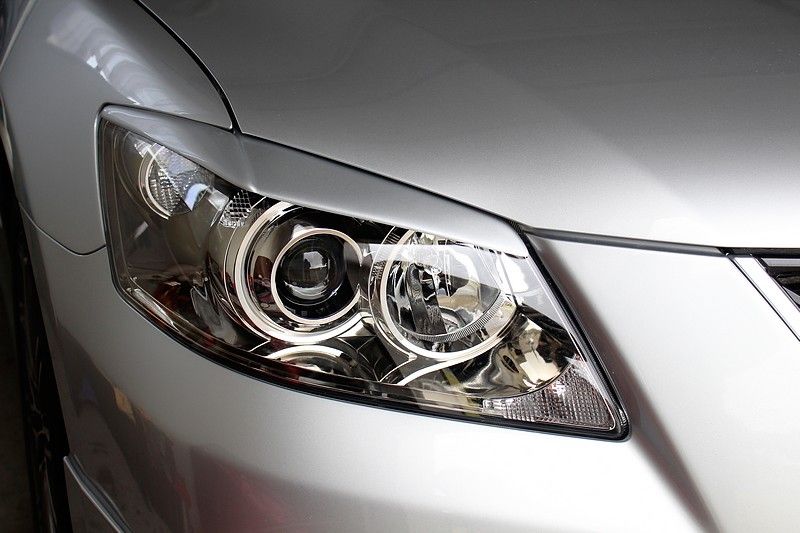


Eye lid opinions...
in Aurion / TRD Aurion Club
Posted
The issue with these eyelids is that one side where it wraps around the headlight usually doesn't stay stuck down for long due to the tension being too strong for the tape to handle. This happened on the RH side (driver's) eyelid for me after about a week of parking in the sun at work, so in the end I smeared some clear silicone underneath the eyelid where it wraps around and it's stayed stuck down. Apart from that, the tape it came with has held up really well and there's no way they're coming off in a hurry. The 3M tape is really good stuff though, albeit expensive.