

Scott_C
-
Posts
205 -
Joined
-
Last visited
Content Type
Profiles
Forums
Events
Gallery
Tutorials
News & Articles
Videos
Everything posted by Scott_C
-
Ive added some text to the top of the post. Just explaining the purpose of the exercise. (Some already knew I was doing this for the fog light install, some others are seeing this post for the first time)
-
Thanks Tayles, yeah LOL it was a bit insulting. It makes me wonder how often they spin stories like that. Boleh - if your in Sydney, you're welcome to come up to the Central Coast and ill do it for you. You buy the beer though. :D
-
Thanks Taka. Next to go in is a Pioneer stereo with bluetooth. Im probably going to get that installed professionally though as i dont have the tools for the job. Im also going to buy the Toyota tow bar assembly and put it in myself. (decided to go Toyota due to the slimline fit) Ill save money by doing my own install at least. Still considering the roof rails. The brackets are right there waiting for them. ;)
-
Hi Garry, thanks for the kind words. Taka, I didnt actually have one. I borrowed a Torx T-30 socket from my brother-in-law. I also bought a Torx T-30 screwdriver for $9 - came in handy.
-
Hey Taka, I must admit, I didnt see any spare connectors sitting there. Perhaps there is a whole seperate module for where those blue wires plug in? This might have an extra connection.
-
Hi Sinan, sorry I shouldve explained. I put a new switch assembly in that includes the dial for the fog lights. I bought aftermarket fogs and plugged them straight into the factory wiring.
-
Hi Guys, there was a request to photograph and document my steering wheel removal (Taka!). Here it is. Edit: The purpose of removing my steering wheel was to add a new switch assembly (indicator stick) that includes the dial for the fog lights. The first part of installing the fog lights is here; Fog Light Install - the base model Kluger has ALL the wiring, fuses and relays already installed for fog lights. You just need the lights, bezels for the bumper, and a switch. (either a switch assembly or a switch for the dash somewhere) Please note, if you follow what I did below, YOU DO SO AT YOUR OWN RISK. Im not responsible for any mishaps or omissions. My steps are below, but I strongly recommend getting the following two documents off the Toyota tech info site - doc id; RM000000UW801VX (Steering pad removal) and doc id; RM000000WAD015X (Steering column assembly: removal) You wont need to remove the whole steering column, but it shows the procedure for taking off the wheel. IMPORTANT: First thing to do, is remove the negative cable on the battery and wait 90 seconds. This is to prevent air-bag deployment. You need a torx socket (T-30), a flat and phillips head screw driver, and a socket wrench with a 16mm socket. 1. First step is to remove these covers; This can be done by using an electrical screw driver with some tape wrapped around it. (to prevent scratching) 2. Next is to loosen the T-30 torx bolts They'll come out to a point and stop against a plastic holder (in other words, they just loosen, not come right off) 3. Carefully take out steering wheel pad. It has the air bad connectors and the horn wire connected to it. The air bag connectors are weird, you have to pop the yellow tabs up with a screwdriver 4. With the 16mm socket, take out the centre nut holding the wheel in place. You also have to unclip the wires up top (think they're the wires for the button controls from memory) 5. Wheel off! Next is to remove the centre piece. If you're careful, this can be done without removing all the wires. Steering pad to the right 6. Unhook the wiring connector shown to the right, this will clip into the new switch assembly. (this is the wiring for your lights) At the same time, unclip the wiper assembly to the left, this will also go straight onto your new switch assembly. 7. Nothing left but the switch assembly. Taking that off was really tricky and took about 20 minutes. You need a pair of pliers, and need to grab a metal ring up the top, when you squeeze the ring, it loosens sufficiently to pull the switch assembly off. This was the hardest part of the whole exercise, the assembly wouldnt budge, i thought perhaps id missed a clip or something, but eventually it wiggled free. End result: One thing that really irked me, my local dealer said it would be $85 to remove the wheel and put the new swtich assembly in. Thats fine, but the guy looked me in the eye and said they need 45 minutes to 'repack the air bag' - an out and out lie. The air bag is inside the steering pad, I never even saw it in my removal. The whole operation took nearly two hours. This is mainly cause I went very slowly and carefully.
-
Hehe yeah, perhaps you should wait for the oil to make its way around the engine before zooming off. :P
-
I think Im going to need this sooner than later too. (paint for centre console) Every time I look at the bloomin thing, there's a new scratch or scuff. We've only had the vehicle a few weeks. I swear, there's some new scratches that weren't there after the vehicles first service today. Thing is, I cant be 100% sure, I dont spend my time logging each scratch as it happens. Lol. But, I agree, the centre console is very easily scratched.
-
Hi Boleh. No. PG 355 (I think) of our manual describes how to change a globe for the fog lights. Basically, there is a fender liner to remove underneath the bumper on each side. Once you have that off, you can pop out the old bezels, plus install new lights. The wiring for the fog is sitting there taped up. You just need to snip the tape away and plug the wire straight into the back of the light. (its a standard H11 connector) http://www.hoen-usa.com/hardware2/h11.jpg Honestly thats up to you. You do need to disconnect the negative on your battery and wait 90 seconds before commencing the steering wheel removal. This is to prevent air bag deployment. The wheel itself comes off easily, but you do need a torx socket wrench to take off two bolts on the steering wheel. I have the Toyota technical workshop doc on it if you need it. The stalk (known as a switch assembly) I bought from toyota as well as the fog light bezels. The Camry fogs I got off an ebay seller in Hong kong. You're welcome! Any other questions just ask.
-
Will do Taka ;)
-
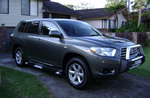
Hi all, here's some progress pics of the fog lights Im installing on my KXR; Im half way through the install, I can confirm the Camry Fog Lights fit. Before with old bezel: The replacement fog light bezel (colour coded) and the 07 Camry Fog light: End result: I still have to do the other side and put this switch assembly in. Note how this switch assemble has the dial for the fog lights: Unfortunately, its a "steering wheel off" job. But so far, its been dead easy, the light fits perfectly, the factory wiring is already there. the fog light fuse is even in the box too. Just for some background; the lights are Camry 2007 Fog lights. They fit the Kluger perfectly, holes line up etc. I bought them off an Ebay seller. As mentioned, the wiring for the fogs is already in the vehicle, I just had to break a bit of tape where the wiring was bound up. Connector (H11) plugged straight into the back of the fog. The fog light bezels can be bought from a Toyota dealer for around $65. The switch assembly (or plain old indicator stick as I call it) is around $215
-
Thank you for your help and your knowledge. Much appreciated, Scott.
-
Please reread my post. I said tow bar assembly. So perhaps I was right in the first place? (when you disagreed with my saying there is a 30% price difference) Hayman Reece tow bar (with all wiring etc and fitment) - $493 with a lifetime warranty. Toyota tow bar assembly with fitting - is somewhere around $700+?? Yes, I kind of guessed you might. :P
-
Where are you getting these prices? Ive been quoted $650 for the tow bar assembly at three different dealers - without fitting. If I can get a Toyota Genuine Tow Bar for $427 + aftermarket harness, Ill dam well buy it!
-
As said earlier, Hayman Reese CANNOT copy the genuine Toyota bar. They are licensed to make the Toyota bar but cannot sell it as their own so your misconception that Hayman Reese = Toyota genuine bar is sadly, incorrect. Your simplifying my post. I never said that Hayman Reece = Toyota Genuine. I realise that Hayman Reece make one tow bar to suit 08 Kluger and make one with a different design that is Toyota Genuine. Its the fact that the SAME company make a tow bar for the SAME car. Yet one of those tow bars is roughly 30% dearer. I concede that there is extra expense in making a specially designed tow bar for Toyota, but I get shirty when Toyota dealers tell me how special 'their' tow bar is, and that I shouldnt get any other.
-
You did very well to get it at that price.
-
No one is saying it should cost $50. But $750 for a trailer hitch is a rip off in my opinion. Hayman Reece make one hitch to suit the 08 Kluger, and one hitch to err... suit the 08 Kluger - WITH the Toyota name on it. And the difference in price is roughly $250. Im all for paying for good quality products, but I resent that Toyota outsource this stuff and then slap a premium on it. Their side steps are almost $1000 fitted, thats just nuts.
-
What aren't you happy with in your new Kluger?
Scott_C replied to leighthebee's topic in Kluger Club
Hi Boleh, its hard to say, often you can upgrade the head unit and notice a significant increase in audio performance. The good thing is, if you upgrade the head unit for more features (built in bluetooth for example), and the sound is still lacking, it wont cost much to upgrade the speakers. -
Thats exactly what we did. My brother-in-law has the first gen Kluger CVX - he paid an additional $2k for the safety pack. We were looking for the same, but as they're rare, we were being funneled toward the old Grande (just for the safety features) and at the time, they were worth roughly $42k second hand. When we discovered the new Klugers all had the same safety features regardless of model, we were sold. As a friend pointed out to me, $40k+ is a lot to spend on a second hand car with no factory warranty.
-
Sam, PM me your email address. i have a Toyota doc on front door disassembly that might help. -Scott.
-
Im sorry to hear you had such a bad experience with the dealer, they're beyond incompentent. Ive been looking at the Toyota 6 stacker w/ bluetooth myself, at least I know it would fit perfectly. ;)
-
No matter what CD or MP3 disc I have in the car, my wife insists on listening to the bloody radio. Go figure. Can't see the sense in spending money on a decent stereo as a result. She makes me listen to the radio when she's driving, so I make her listen to my Jack Johnson albums when I'm driving. :) Haha, make sense. :) Im wondering if Im being too fussy with the car stereo, perhaps I should leave it well enough alone.. but then... I think of the AWESOME stereo's you can get these days with built in Bluetooth and a stack of other features, for around $300.
-
How many kilometer can done after a full tank of fuel?
Scott_C replied to sns's topic in Kluger Club
I was talking to someone recently who works at Caltex. She said to be careful of the independant chains selling fuel that might happen to say '98' on the bowser. It doesnt mean neccassarily that its 98 octane fuel. In the case of my Lexus, im not supposed to run under 94 octane for the engine, hence why I had to be a little careful choosing petrol. (Caltex 95 ron seems to be very good for the car) The interesting thing is, the fuel stocked at the 'shopper docket' stores is a lower grade of fuel. So even if you save a few cents at the bowser, you wont get as good mileage anyway. Same with the el cheapo chains. You might as well cough up and pay more when you fill up, you'll get better mileage anyway. -
Lol Don, thanks (I think!) :) I agree, we were happy with the KXR, I just wanted a few extra bits - I just wasnt prepared to pay the extra $10k for the KXS. I have a portable GPS, so Im not too concerned with that, but a decent stereo would be good.

