Jump to content


Phil's AE111


fillit

Recommended Posts

Hey guys,

I'm starting a build thread/diary for my car, as I have quite a few plans for it and can hopefully look back on it one day to see what I have been able to achieve.

I picked this car up in May this year from fellow forumer ky0, he has taken immaculate care of this car and it took me about 15 seconds to make the decision to purchase it.

My goal is to have a car which can stick it up to other NA sports car and give turbo cars abit of run for their money :P My focus would be more towards handling as I do not plan to implement force induction. All this whilst being aesthetically pleasing and a joy to cruise in.

Toyota Corolla Levin AE111 '97

*Blacktop 20v 4AGE engine

*6spd close ratio gearbox

Modifications:

*Helical LSD

*Sard metal catalytic convertor

*HKS Silent power cat-back exhaust

*Aluminium front strut brace

*Pioneer stereo, VDO front and Alpine rear speakers

*Kid's racing 15" Alloys with yokohama tyres

Wish List:

*TRD front 3 point brace

*Coilovers

*K&N filter

*Single Din headunit

*Rear sway bar

*Diffuser

*Single Din defi gauges

*Short Shifter Kit

This is how I got the car (stolen from ky0)

16815810150404731410235.jpg

Photo taken after a good wash.

img0552medium.jpg

Lip is abit discoloured, will be repainting it in the next few weeks.

28/5 - 123000KMS: Gave the car a good service, new oil (castrol magnatec 10w-40w) and a ryco filter, felt much better than the repco stuff in there, fixed up the airbox as the repco mech didn't assemble it properly and retightened some of the wrapping on the exhaust manifold which was dropping off. Accidently spilt abit of oil on the wrapping when removing the filter, but it burnt off after 20mins of driving :D. Also gave it a good wash, rims and all, made notes of anything that required attention to.

31/5: sold my old car, from the first call for inspection to the sale took less than 12 hours. I hope the new owner will take good care of it! Goodbye Yoona :( (car was abit more stock when sold)

imgp1756small.jpg

Moments before it was driven away.

img0603medium.jpg

Now, the AE111 journey really begins.

6/6: Wanted a new headunit as the pioneer one didn't cut it, got a dvd from a mate but it didn't quite fit into the facia, the mechanism wouldn't retract fully flat as it hits the plastic ( now it's off ), also had problems where i would poke the screen (change the song) while going into 3rd and 5th gear :P

img0626mediumb.jpg

5/6: Car's steering started making a muted foghorn sound/a little vibration, did abit of searching on the forum and figured it was dry bushings in the steering column, liquid silicon lubricant spray fixed it up. (props to farrell for the idea!)

7/6: Won a set of wheels on Yahoo Auctions, now the wait for 6 weeks for it to be delivered to my home :), keeping what it is a secret until it's on the car! (little teaser: 16x7 +35s and I will be running rear spacers :D)

8/6: After bringing it back to Melb I had a few battery issues, probably due to the increased amounts of driving which I do, anyway took it to the mechanics, they found it to be a dead battery so I had it replaced, got a silver calcium Exide one as it was the best product they had and I wasn't ready to make an investment into a drycell yet. Figured the DVD headunit may also be draining it due to dodgy wiring, so I took it out. Been swell ever since.

12/6: Got this baby in place of the DVD headunit, I decided to purchase it as it had bluetooth, also it can change colours so I can make it orange to suit the AE111. I decided against getting another DVD unit or single din DVD unit as it would impend on the climate controls/top din slot.

img0628mediumh.jpg

Been calling around for a few installation places as I wanted this to be done professionally :) did some wire tracing for the rear speakers, was a journey as I thought they were using aftermarket wires like the fronts, but instead they just hooked it to the OEM ones, which ran along the Driver side trim, noticed that the front speakers running aftermarket wiring were bending the trim a little, may decide to run it along the OEM lines one rainy day. Also the rear right passenger side seat doesn't fold down like the left one? perhaps I am doing something wrong but I was dumbfounded by it, not that it really matters, just made accessing the speakers easier.

Apologies if pics aren't up yet and bad quality as my iphone is generally my most handy camera :D.

Thanks for reading my thread guys! any suggestions/feedback/constructive criticisms would be greatly appreciated!

Link to comment
Share on other sites

  • Replies 85
  • Created
  • Last Reply

Top Posters In This Topic

18/06 - So today was my first day off since exams and work, I have developed new hatred for public transport after being sent into the city for training ( which was the biggest waste of 4 days in my life, spent good time drinking beers with workmates though). Nevertheless woke up in the morning to test some P1s on, however I felt quite lazy so i kinda just put it next to the car, found a good angle and took a pic. (sorry satyriasis666, but i think this would be a fairish indication on what P1 sfs would look like on an AE111, the red strip also doesn't show up very well on my iphone camera :( ).

img0635medium.jpg

will be packed and shipped to the new buyer tmr!

Just a few random pics of the AE111, funnily enough my mums car/my first car is an AE112R :D.

img0630mediumf.jpg

img0631medium.jpg

img0641medium.jpg

Picture of the interior. Still rolling Japanese floor mats, really want to get black ones to suit the interior colouring, but these just seem sooo... special?

img0636medium.jpg

Very big empty hole :(

img0638medium.jpg

Went to Riverside Customs in Werribee to have my headunit installed. They were highly recommended by a workmate of mine, although they were a little out of the way, they have a really good reputation in the community which convinced me to choose them over the local backyard shop. Nevertheless I was quoted $80 over the phone, upon inspection he recommended using a harness as the previous systems were just tapped into the OEM wires. Overall the install took almost 2 hours as they were pretty meticulous with the wiring and in the end i was charged $110 which i considered reasonable as he had to rewire all the OEM wires to the plug, then rewire all the JVC wires to the harness. The new headunit makes a world of difference in the audio quality and having the rear alpine speakers back in action was a great feeling. So far i've also paired my phone with the headunit to avoid any popo raising revenue.

My experience with Riverside Customs was rather pleasant, only complaints is that my din pocket was put in upside down, however as the AE111 is a 20 second job to remove the facia I just went home and fixed it up. They also could have vacuumed the car afterwards as i've found a fair few bits of wire and tape around and a few jap import magazines would have kept me more entertained :) Nevertheless, i would definitely go back and highly recommend them.

The interior feels much more homely with it's latest addition.

img0639medium.jpg

In action.

img0640medium.jpg

Planning to respray the lip tomorrow, does anyone know the colour code for a white AE111 and have any tips/recommendations.

Link to comment
Share on other sites

19/6 - So i've finally find the motivation to repaint my lip, woke up one lazy afternoon and went to autobarn to pickup some paint and clear coat, needless to say my local one lacks parking as it's next to a chinese restaurant and weekend yumcha is like boxing day sales. Then off to bunnings for some lovely loyal cable ties and sandpaper needless to say the drama didn't end there, some stupid P plater girl in her corolla reverses back through 2 spaces without looking while i'm driving straight, gave her the *WTF IS GOING ON* and gunned it past her, her car looked like it had a few battering experiences aswell.

Unfortunately I couldn't bear the sorry state of my front lip anymore, I read through several DIY threads and watched some youtube videos and felt like I had the confidence of doing a somewhat reasonable job :whistle: . Personally I've never sprayed a kit before, the biggest item I've actually spray painted were my calipers on my old car. Never the less here are a few pics of how it was.

1111krp.jpg

2222zl.jpg

img0644medium.jpg

Firstly I took it off, thankfully it was just 2 screws where the wheel guard is and cable tied underneath, it actually took abit of effort to take it off, and the car was jacked up, i don't think it would be able to be removed without it raised.

Looks soooo clean

333cs.jpg

444hq.jpg

Gave the bumper and lip a good wash to get all the dirt off it.

img0648medium.jpg

After lots of sanding and a coat of paint

After clear coat and the rubber trim stuck back on, i used double sided tape as i didn't want to glue it, i figured it being wedged against the kit would suffice. Over all i think i did about 5 coats of paint and 3 coats of clear, waiting 20mins between each coat.

img0653medium.jpg

Put the lip back onto the car, unfortunately the colours didn't match that well even (abit on the beige side) though I went in with my paint code so i'm a little dissapointed about that, however it's not the most unenjoyable task so i wouldn't mind rectifying it in the future, but the improvement is enough for the time being.

5555lk.jpg

img0659medium.jpg

Link to comment
Share on other sites

12/8 - Exciting times!

Was having a boring day at work before i remembered to check the postal tracking of my rims, to my surprise they had been delivered this afternoon! Have to say it was one of the fastest runs home from work i've ever done. Coming home to this put a smile on my face.

img0723medium.jpg

After opening it my wheels have come already! here's a sneak peak, see if anyone can guess what they are, already have tyres ready for them so i'll have everything on by tomorrow.

img0724medium.jpg

Also have these bad boys ready for my gearbox.

img0725mediume.jpg

Link to comment
Share on other sites


13/8 - started day off very motivated as my rims unexpectedly arrived yesterday, rushed off to get tyres put onto my rims, first tried tyre professionals but they flat out and couldn't get it done until tomorrow so i choose to try somewhere else ( they are really great guys, definitely recommend them, but i wanted these on TODAY!) tried out kmart tyre and auto but same story, they gave me a recommendation to try out the new goodyear service centre across the road, went there and they had it all done within 30mins, definitely recommend them, great prices, nice guys.

How the car looked like in the morning.

img0726medium.jpg

So here are the beauties after 8 weeks of waiting! worth every second! rims are ENKEI SC03s 4x100 + 35, 2 are wrapped in TOYO PROXES T1R 205/45/16, 2 are wrapped in BRIDGESTONE GRID 2 205/45/16, picked up 2 sets of decent tyres and a set of rims for $300AUD a few weeks ago, toyos i had left behind from my old car.

img0735medium.jpg

I've been meaning to do an gearbox oil change for a while, the gearbox doesn't feel as smooth as it should be and after much research i decided on royal purple 75w - 90w, was $50 for 2x 1quarts bottle, props to harold from performancelub! I was putting it off for a while as I've never attempted to do it before and was feeling abit nervous, nevertheless I needed to get all the repco crap out of it asap.

Jack the car up so it's level.

6666ee.jpg

Remove the right front wheel, makes work ALOT easier.

Underneath is a plastic splash guard, the screws are as follows. One of the screws decided to snap, so I just cable tied it back, will get to it another day..

Top plug is fill bolt, Bottom is drain bolt, make sure you remove the fill bolt first before the drain bolt otherwise if the fill bolt is stuck then you're without a car for a while.

img0727medium.jpg

While it was draining, my steering column has been making the mute foghorn sound of late, as the car was jacked up it made attacking the steering column with silicon spray a whole lot easier.

I let it drain for about an hour before i filled it up again, i bought a 12mm tube from bunnings for about $5, wired it through the engine bay into the hole, my gearbox is a 6 speed with LSD so it was around 1.8L~ I poured 2 quarts ~1.9L in, with slight spillage.

img0739medium.jpg

After that just put everything back together the way it was.

Did a check on fluid levels, found coolant to be pretty low went to supercheap to stare at the coolant rack for a good 10minutes before deciding on castrol. I will probably do a radiator flush in the near future so i'm not terribly picky with what I put in there atm.

img0750medium.jpg

The fun bit, car with the wheels on, toyos on front, bridgestone grids on back, held together with Works wheel lock nuts :) I'm running a 5mm spacer on the back, i think the offset is about as good as i can get it, once my coilovers come in and the car is lowered abit then it should be perfect.

Really need to respray the front lip again.

777eb.jpg

img0746medium.jpg

After taking the car for a test drive, i was as excited as the day i first bought the car!

Link to comment
Share on other sites

mini update!

14/09- had a few bits on the car that needed touch up, last time i endeavored in painting my car (lip) the colour turned out all wrong, this time after consulting dreadangel, i decided to get it custom mixed. I went to olarenshaws in sunshine, $25 a can mixed to whatever colour you want! paint turned out excellent! matched beautifully.

A few pics of the repainted lip (only 1 layer of clear coat this time kyo :P), makes the car look soo much cleaner!

20110914142415medium.jpg

20110914142355medium.jpg

Since I got the new rims i've been experiencing some wheel wobble, after playing around with the psi, and hubrings i decided to just get it balanced.

Again the guys at goodyear auto doing a great job, very professional, highly recommended.

20110914123652medium.jpg

Hopefully my coilovers will come by next week and the car can be dumped on it's *****! atm i'm looking at getting some 25mm hubcentric spacers are my rears are going to be sunk after the drop and toying with the possibility of camber bolts, however i want to see how much natural camber can be achieved through lowering it first as I don't want something too ridiculous.

Link to comment
Share on other sites

Update time.

17/09 - Got pretty bored, and my dint in my driver side guard was annoying me. Time for DIY panel beating! Youtubed some solutions and decided to use the heat + compressed air trick, actually worked pretty well, but unfortunately the dint was reasonably severe and the metal seemed kinda stretched.

After going with the compressed air, i decided to use the good old hammer and hair dryer. So far i've managed this result, i won't be able to improve on it without the proper tools. I asked around for quotes with PDR and panel beaters, eventually I just bought a mint condition fender from japan for around $160AUD shipped, less than half the price i've been quoted for a repair job.

fromto.jpg

mmmm love deliveries. wonder what these could be?

20110920123350medium.jpg

JIC coilovers!!! Thanks Yoey.

20110923062008medium.jpg

Other odd shaped object! TRD BAR!

20110920151514medium.jpg

23/7 - Woke up early that morning to run a few errands, ended up at GT Hyper at 8.30 in the morning to get my coilovers put in. Great service as always, went out with some mates to eat and whatnot, came back at lunch to see the coilovers in and an alignment being performed, the height looked slightly sucky which was dissapointing, but as i have a ridiculously low resonator it was for the better of things. After an hour or so I went to pick the car back up, took the car for a spin first and what an impression it made! It is definitely alot more stiff than standard suspension and i could feel every bump in the road, however handling has become simply amazing, the car had the bodyroll reduce incredibly significantly.

Will post up some pics soon, but it looks pretty much the same with front lowered by about 3-4cms.

img69922.jpg

Need more low.

when i got home i had this lovely package waiting for me :)

20110923200923medium.jpg

i'll keep the contents a secret ;)

25/9 - Dyno day! Started the day meeting up with TOCAU guys and cruising down to DR. Drift, where it was $50 for 2 runs. There were heaps of cars and lots of classic toyotas, a few nissans and turbos started the day off pulling off a fair amount of power. After a while it was the turn for fwd cars, first up was a b18c civic eg which pulled 93.x fwkw, this definitely put doubt into my mind as to what my car will be able to pull. The guys there was nice enough to give me 3 runs which returned 79.2fwkw, 82.5fwkw and 82.5fwkw. I was undoubtedly slightly dissapointed.

20110925212039medium.jpg

I think after a rear sway bar and "possibly" fender braces, i will then be chasing power. I hope to get this car on the track by early next year.

Edited by fillit
Link to comment
Share on other sites

A few updates, sorry been soo busy,

23/10 - friend convinced me to go tracking with him, so i was in abit of a rush to get a helmet, fire extinguisher and a car service.

decided to go with royal purple 10-40w and a KNN filter, feels much better than the castrol magnatec and ryco combination before, although a little hefty on the pocket.

307565_10150356335364496_833394495_8081310_1378115557_n.jpg

28/10 - Gave my resident mechanic a visit, had my brake pads replaced with bendix ultimates (DB308) brake fluid flushed with castrol DOT4 and had my fire extinguisher mounted. My rotors were grooved but i declined to get them machined as they weren't shuddering yet and i was planning on getting new slotted/vented ones.

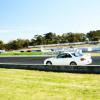
1/11 - the big day!

woke up at 3am in the morning to go to my friends house where we met up and endeavored to a 2.5hr drive to winton race track.

Originally i was planning to use my set of yokohama Cdrives to learn the track, then my GRID 2s and T1Rs to set a fast lap. Unfortunately i didn't think my plan through and my lugnuts didn't quite fit the set of rims with the yokohamas, i ended up running Cdrives on the front and grid 2s on the back.

session 1 - terribly exciting as it was my first ever session on the track, i spent most of the first lap just warming the tires/brakes, i experienced slight oversteer, second lap i attacked a sweeping left hander and it sent me into the grass which turned the interior of my car into a garden, the rest of the session was yellow flagged as a car came off track. did a 2:03:xx

session 2 - we dropped the tyre pressures front to 30 and back to 32 my friend who is a very very decent driver took my passenger seat to give me pointers and what to do, we spun in the first lap and again a few laps later, although i didn't really improve much i had a much fairer idea on what lines to take. 2:01:xx

My friend then took me out on his sportivo with full slicks, absolutely amazing handling and driving, made a 1.46:x with a passenger, very very good effort!

session 3 - decided to dump the yokohamas for T1Rs, 32psi front/back, the car instantly felt much much better and noone experiencing understeer then oversteer then the car biting back and throwing me off the track, it became much more predictable and i was doing consistent lap times. ended up doing 1:56:650. I kept hitting the limiter, i'm considering installing a shift light for the next track day.

session 4 - had an aim to do a 1:55:x, however after 2 laps, the car fuel light came on? probably due to the car cornering, but it was slightly concerning, and then the braking became slightly dodgy and the car was sliding under hard braking so i decided to call it a day.

I believe the rotors are the cause of the braking problems which i will address, atm i need to sort out a few issues in regards to having more grip on the rear. Any advice on tracking AE111s will be greatly appreciated!

Photos will come shortly I promise :)

Link to comment
Share on other sites

Sorry for the multiple posts guys, but the image restrictions makes it hard for me to port the posts over from other forums.

there is a better formatted build thread with all of the photos on: http://forum.jdmstyletuning.com/showthread.php?35082-Phil-s-AE111-build-(noob)-track-debut!

Link to comment
Share on other sites

woo took you ages to make this didnt yah ;)

bro, took me like 15 minutes :( stupid restrictions lol, need to vacuum my car.. garden is growing in there

Link to comment
Share on other sites

1/11 - the big day!

woke up at 3am in the morning to go to my friends house where we met up and endeavored to a 2.5hr drive to winton race track.

Originally i was planning to use my set of yokohama Cdrives to learn the track, then my GRID 2s and T1Rs to set a fast lap. Unfortunately i didn't think my plan through and my lugnuts didn't quite fit the set of rims with the yokohamas, i ended up running Cdrives on the front and grid 2s on the back.

session 1 - terribly exciting as it was my first ever session on the track, i spent most of the first lap just warming the tires/brakes, i experienced slight oversteer, second lap i attacked a sweeping left hander and it sent me into the grass which turned the interior of my car into a garden, the rest of the session was yellow flagged as a car came off track. did a 2:03:xx

session 2 - we dropped the tyre pressures front to 30 and back to 32 my friend who is a very very decent driver took my passenger seat to give me pointers and what to do, we spun in the first lap and again a few laps later, although i didn't really improve much i had a much fairer idea on what lines to take. 2:01:xx

My friend then took me out on his sportivo with full slicks, absolutely amazing handling and driving, made a 1.46:x with a passenger, very very good effort!

session 3 - decided to dump the yokohamas for T1Rs, 32psi front/back, the car instantly felt much much better and noone experiencing understeer then oversteer then the car biting back and throwing me off the track, it became much more predictable and i was doing consistent lap times. ended up doing 1:56:650. I kept hitting the limiter, i'm considering installing a shift light for the next track day.

session 4 - had an aim to do a 1:55:x, however after 2 laps, the car fuel light came on? probably due to the car cornering, but it was slightly concerning, and then the braking became slightly dodgy and the car was sliding under hard braking so i decided to call it a day.

I believe the rotors are the cause of the braking problems which i will address, atm i need to sort out a few issues in regards to having more grip on the rear. Any advice on tracking AE111s will be greatly appreciated!

Photos will come shortly I promise :)

yeahh.. dont do the folliwng ;) ! hahha just playing with ya phil :D ^_^ :lol: :)

DSC_7389.jpg

DSC_7390.jpg

DSC_7392.jpg

:whistling:

Link to comment
Share on other sites

I'll drive your car next time @ Winton Phil! :P jk

Add some sway bars and monitor your tyre pressure = good 2 secs off methinks

swaybar is definitely something im researching atm have to make sure i'm getting the right one..

i'm completely amazed by your time at winton... did you do the 1.46 on slicks?

Link to comment
Share on other sites

Damn. That was one long detailed write up about your ride Phil. You did quite well at winton considering it was your first time. Just 1 second behind me. I gotta say its good to know someone like you who takes so much effort to maintain/mod your AE111 Levin. Much respect. Look forward to many more meetups/conversations/cruises/carwashes and whatnot with ya. B)

Thanks Jonnie, i actually have my main thread on clubae111, so i copy and paste it to the forums which i'm active on, i find it enjoyable just jotting down everything i've done to the car, i use it as sort of a diary.I really wanted to push for an 1.55, i thought i the car had that and maybe even 2 more seconds, but the car wasn't prep'd enough to handle that many sessions.

Digging from the old posts

4q4z1z.jpg

the yellow eg is quangs? and i think that red ek is his friends, i've seen it around a few times before..

Link to comment
Share on other sites

Add some sway bars and monitor your tyre pressure = good 2 secs off methinks

Tyre pressures make an amazing difference! Dropped my tyres down another 5 psi and i got an extra half a second :)

Just be careful with going stiffer in the suspension, build your suspension around the tyres you're gonna track your car on.

Link to comment
Share on other sites

i'm actually planning to loosen the suspension a little, it's actually quite uncomfortable driving around normally with it, tyres i'm highly considering RE002s atm.

nevertheless, mini update.

lacking abit of flushness on the rear wheels, decided to action some 22mm spacers.

20111013211408medium.jpg

mmm fat

20111014191651medium.jpg

could do with a little more poke

img75152medium.jpg

but still quite happy, atm it's 16x7 + 13.. looks like i'll need to be nearing 0 or get 8 wide wheels to have it poke

Thanks dwee for the rolling shot!

Link to comment
Share on other sites

Phil, I did it on the same tyres as Duy: Hankook C71 semi slicks. They look like slicks but are still classified as a semi slick as the compound is different and still has 2 grooves (yes I know what your thinking lol)

The EG belongs to Quang yes, and the red one is Phong's but I'm not particularly fond of him or Thai (white EF9) - egotistical dudes lol. Their other friend, An with the turbo'd EG is pretty damn fast. He lapped a 1.44.xx last time I saw them there

Them RE002's, with some suspension tweaks should get you into the sub 50's/high 40's I'd imagine. I'll be at Winton on November 20 for the EXE track day if you want to come spectate

Link to comment
Share on other sites

Join the conversation

You can post now and register later. If you have an account, sign in now to post with your account.

Guest
Reply to this topic...

×   Pasted as rich text.   Paste as plain text instead

  Only 75 emoji are allowed.

×   Your link has been automatically embedded.   Display as a link instead

×   Your previous content has been restored.   Clear editor

×   You cannot paste images directly. Upload or insert images from URL.


  • Join The Club

    Join the Toyota Owners Club and be part of the Community. It's FREE!

  • Latest Postings

    1. 2

      Rukus for sale

    2. 0

      For Sale: Toyota AE86

    3. 1

      Toyota Paint Defect Class Action

    4. 83

      White Pearl Paint cracking & peeling on a Prado

    5. 26

      Changeover manual A/C for Dualzone climate control

    6. 2

      Toyota Estima Air Conditioning

    7. 2

      Head Unit with Apple CarPlay

    8. 3

      Typical Price for a Replacement Key - 2000 Toyota Torago

    9. 1

      Invisible Instruments fix

    10. 0

      Finally found all Tarago's 6 speakers - 2 in roof lining

×
×
  • Create New...

Forums


News


Membership