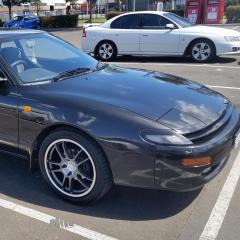
5th Gen Celica Engine Mounts
-
Latest Postings
-
10
Android auto
OK. Does any of Toyota's advertising material mention Android Auto? If so then kick up a stink, with Toyota management, about misrepresentation and false advertising, reminding them of the hefty fines. Herb -
0
E160 Corolla fielder suspension
Does any one know if the trd sportivo suspension for the 2017 facelift corolla fielder fits the 2013 prefacelift version? Is the chassis the same? Thanks for the help. -
0
Remote start
What bipass do i need for immobilliser to install a remote start to my 2021 hiace -
1
1999 Camry Driver's door locking hatch issue
It's possible that it could be something fouling or dirt build up, dry, or a broken mechanism, so have a look and give the mechanism some lubrication, most likely though, it'll be the actuator. I found one for a good price on Ebay, $25 delivered: Front Door Lock Actuator Right Side For Toyota Camry 1997-2001 | eBay -
0
Query about the correct rotors for 2006 ACV40 Camry.
Hi, I'm looking at a set of front rotors for an ACV40 2006, 2.4L Camry. I got a good price on some RDA's at Sparesbox. However both RDA8112 and RDA7686 show as for my car and I'm wondering what the difference is and if there were changes to the rotors during the model production. So does anyone know which rotor is the correct one? Many thanks in advance. -
10
Android auto
It's a simple solution though? Already laying down 60k for a RAV4, so what's another 1k on a phone to make everything work seamlessly? 👍 -
10
Android auto
Your solution is akin to suggesting that switching to a different car manufacturer would resolve the issue. However, not everyone shares the same enthusiasm for using an iPhone as you do. -
1
Turboed Corolla Overbuilt?
that engine will be fine, the rods are the main thing to be concerned about. The 2860 is a decent turbo for the 1zz but in this day and age I'd go for a G25-550. The injectors might be on the small side, we run DW1000's. You need a full length injector, the shorter injectors with adaptors like ID1050x dont fit the 1zz head. You don't need an aftermarket intake manifold, if you do go down that path, avoid the CNC innovations unit, it's garbage. Do the boost control with a MAC valve and control it with the aftermarket ECU of your choice, I use Link stuff on most of my builds with the G4x Storm as the minimum. I also wire a fuel pressure sensor and oil pressure sensor to the ECU in my installs. Use a decent intercooler, the better cores (ARE, PWR, Garrett, Vibrant, Plazmaman, Hypertune) work a lot better than the chinese stuff like Aeroflow. a 450x250-300 fits fairly well with custom end tanks to route the cooler pipes through next to the radiator Don't forget about the clutch and gearbox. These days I like the Uniclutch twinplate, Above 300whp you'll want to think about upgrading the 3rd and 4th gears in the box also with the SSC (Hollinger) gear set and install an LSD of your choice. If you're going to give it a hard time, you'll also want an oil cooler. I like the HKS thermostat type sandwich plates and setrab or mocal oil coolers with -10 speedflow fittings/lines (Chinese AN fittings neck down to a lot smaller internal diameter in their bends, not great for flow) You'll also want to think about brakes, Celica or Sportivo front calipers will bolt on with sportivo discs as a starting point. To have somewhere like Tunehouse do the work you'll want to budget somewhere between 20-40K -
3
Camry Touring 2010 Fuel consumption 15.2L/100km. Normal?
I did the mathematics myself regarding costs vs benefits for fuel injector cleaner. I have changed from 91ULP to 95PULP and 98PULP. Price difference can be about 13 -20 cents. Compared to 91ULP, Premium quality fuel should have a better quality additive package designed to have superior engine cleaning capabilities so the engine can perform at their best.- camry
- fuel consumption
-
(and 1 more)
Tagged with:
-
3
Camry Touring 2010 Fuel consumption 15.2L/100km. Normal?
"Fuel injector cleaner is a waste of money" Only if you by the cheap crap if you use LiquMolly a German Product it does work and you won't waste your Money.- camry
- fuel consumption
-
(and 1 more)
Tagged with:
-


Recommended Posts
Create an account or sign in to comment
You need to be a member in order to leave a comment
Create an account
Sign up for a new account in our community. It's easy!
Register a new accountSign in
Already have an account? Sign in here.
Sign In Now