-
Posts
743 -
Joined
-
Last visited
-
Days Won
65
Content Type
Profiles
Forums
Events
Gallery
Tutorials
News & Articles
Videos
Everything posted by Full-Throttle
-
And the same to you in return! Seasons Greetings!! :D
-
Is the sx6/zr6 rear diffuser just added onto the ATX rear?
Full-Throttle replied to Rin's topic in Aurion / TRD Aurion Club
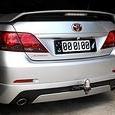
Ohhh, so your Aurion is a Touring model. In that case it will be cheaper to buy a complete Sportivo rear bumper secondhand as Aurion2Envy mentioned above, as they have small slits in the face of the plastic for mounting the rear lip (something that would be difficult to cut into your existing Touring rear bumper). I thought the photo you posted was of your car, but now it makes sense why I was struggling to see any hole in the rear lip where the towbar used to come through -
There's another 20-amp fuse right next to the 'CIG' fuse which is labelled 'PWR OUTLET'. It's the second fuse in from the right on the bottom row. This is the one for the power outlet/socket in the centre console.
-

Is the sx6/zr6 rear diffuser just added onto the ATX rear?
Full-Throttle replied to Rin's topic in Aurion / TRD Aurion Club
No problem at all :). Your best option would be to buy one brand new from the Toyota dealership as I'm not aware of any aftermarket alternatives out there. I just called up my local dealership a few minutes ago and they quoted me $540 NZD ($508 AUD) + tax (15%) retail for the rear lip on it's own, so it will likely be a similar price from an Australian Toyota dealer. However, I did some hunting around and it's MUCH cheaper to buy one from Amayama.com - Still genuine, still brand new and with the correct part number of 76891-06903, just a few hundred dollars cheaper ^_^. The shipping price will make the price rise since it has to come from UAE, but it might be worth inquiring about if the patch/repair from a panel beater is going to be a similar cost. Here's the link to Amayama: https://www.amayama.com/en/search?q=7689106903 -

Is the sx6/zr6 rear diffuser just added onto the ATX rear?
Full-Throttle replied to Rin's topic in Aurion / TRD Aurion Club
Yes, the rear lip can be removed relatively easily and be replaced with another one. You'd likely to have to buy a brand new one though as most wreckers won't part with just the lip on it's own, and you'd have to fiddle around with broken clips and possibly a new rubber seal (+ the cost of painting etc), but it is absolutely possible. Your cheapest and easiest option would be to get the hole filled up by a panel beater. That way if anyone in the future wanted to fit a towbar they just have to recut the hole, using the old one as a template, and it saves you forking out truckloads of money for a new one :) -
There is a specific 20-amp fuse for the cigarette lighter sockets labelled 'CIG'. This is located inside the car under the glovebox. You'll need to poke your head underneath the dashboard and pop out the black plastic trim that covers the fusebox, but it will be the 26th fuse (bottom row, 3rd in from the right). The diagram on top of the fusebox will help if you get stuck. If that looks ok then pop up your centre console (5-second job) and make sure the wiring connectors are plugged in nice and tight.
-
You should have a separate A/C condenser in the back of the van for the rear A/C. This could be clogged from debris over the years and may need cleaning or replacing. You'll need to re-gas the A/C if you remove this unit, but it's cheap enough to do these days and certainly won't hurt. We call them Estimas here in NZ and they're all Japanese imports, but the Tarago should be virtually the same. I've attached a diagram below of the rear blower unit in your van, and some photos of the rear condenser being removed/replaced (photos are of the latest shape ACR50 Estima but the ACR30/40 should be the same). If in doubt, I'd highly suggest taking it to a proper air conditioning specialist for their opinion and diagnosis :)
-
Sounds like you had quite the ordeal with the first dealer. Good on your for sticking to your guns though. Sounds like you came out on top in the end. Hopefully this won't take the shine off your new Aurion as it appears that you got a very good deal. The new shape Aurions don't tend to cause much trouble so you should get many years of trouble free motoring out of it. Congrats on the purchase! :)
-
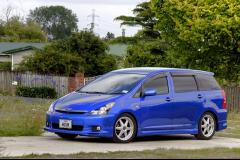
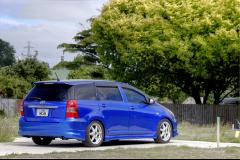
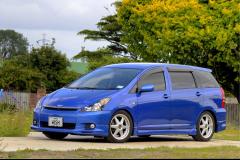
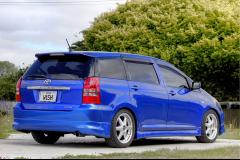
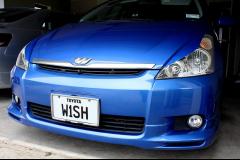
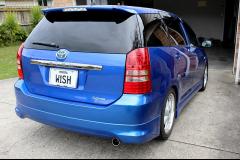
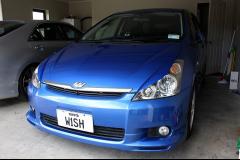
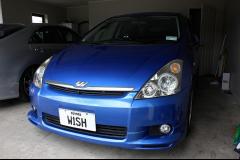
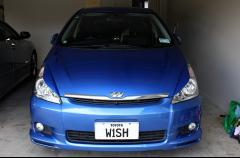
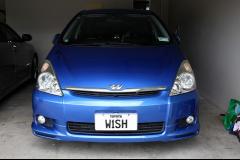
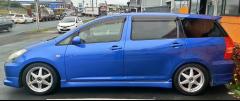
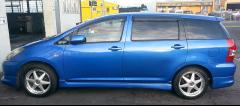
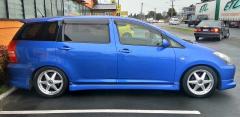
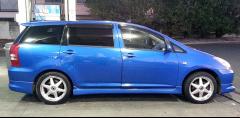
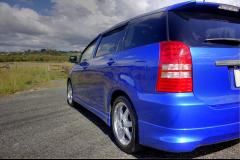
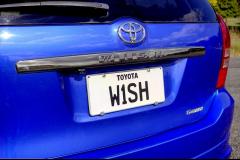
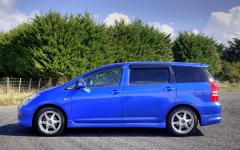
Haha thanks guys. Absolutely loving this car, and getting out for some nice drives in this sunny weather as we edge closer to Christmas ^_^ I may as well post these photos that I took today of my partner's 2004 Toyota Wish too :)
-
Hi Simon, there's a separate blower motor + cooling unit for the rear of the van and the A/C lines run to it from the front, so you should get cold air in the back when the A/C is running.
-
Welcome, and congrats on the purchase!
-
From the album: Wishful Thinking - '04 Toyota Wish XS Sports
-

Wishful Thinking - '04 Toyota Wish XS Sports
Images added to a gallery album owned by Full-Throttle in Member's Gallery
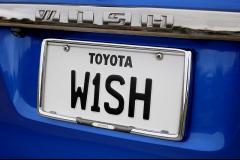
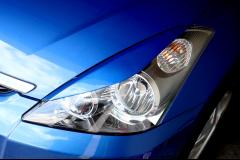
This is my partner's 2004 Toyota Wish XS Sports. With 3 kids under 5-years old we decided to sell her previous Toyota Sprinter and upgrade to something more spacious. We bought it completely stock, but it is now sitting on 17" Racing Hart wheels, and Tanabe DF210 springs. Other upgrades include personalized plates, facelift dash cluster, facelift A/C controls + trim, aftermarket headlight eyelids, Novatek A118 HD dashcam and a JVC DVD/Bluetooth/USB headunit. -
From the album: Wishful Thinking - '04 Toyota Wish XS Sports
-
From the album: Wishful Thinking - '04 Toyota Wish XS Sports
-
From the album: Wishful Thinking - '04 Toyota Wish XS Sports
-

Sx6 zr6 mix and match parts...?
Full-Throttle replied to Mardo305's topic in Aurion / TRD Aurion Club
The seats will fit but the front ones on the ZR6 are both electric, as opposed to only the driver's seat being electric on the SX6, so you'll have to splice into your existing driver's seat wiring for them to work (make sure the wrecker cuts the harness back as far as possible). I can't see the speakers being any different so I wouldn't bother replacing those. -

Debadging vs Paint fade - A worry or not really..?
Full-Throttle replied to suffixwhk's topic in Camry Club
I wouldn't worry about it. Just clean up the area afterwards with methylated spirits (rubbing alcohol) to remove any residual double sided tape, and if by any slim chance you can still see an outline of the badge(s) on the paint in certain lights then some cut and polish will clear it right up B) -

A must for TRD Aurion owners! Front view cam
Full-Throttle replied to TRD468's topic in Aurion / TRD Aurion Club
I installed a front camera in my Aurion 5-months ago and it has been one of the most useful additions to the car so far. Most of today's modern garages are quite short and with a car as long as the Aurion it's easy to misjudge how far in or out you are when parking, so the front camera ensures that I park in the perfect spot every single time. It also comes in handy in car parks that have high bollards/curbs, in front of walls, and navigating steep driveways etc. I have a strip of tan coloured masking tape on the garage floor which I line the yellow lines on the camera up with, so when I get home I just hit the 'AV IN' button on the headunit to activate the front camera. It's worth noting that I have an aftermarket headunit installed, which made the job a lot easier than using a factory one. -

Can't get a replacement VVTI Oil line?
Full-Throttle replied to Aurion2Envy's topic in Aurion / TRD Aurion Club
Look at the back of the engine on the driver's side and you'll see a pipe that goes downwards. You'll easily be able to tell if you have the full metal line or the rubber one. Here's some pics for your reference: -

Can't get a replacement VVTI Oil line?
Full-Throttle replied to Aurion2Envy's topic in Aurion / TRD Aurion Club
The part number for the oil cooler line gaskets are 11496-31010 (engine side) and 15785-31010 (oil cooler side). Both gaskets can be bought from Amayama. There are a few washers for the rear VVTi oil line but I ended up reusing my old ones, however the part numbers for those are: 90430-16012 (2x required) and 90430-16016. -

Can't get a replacement VVTI Oil line?
Full-Throttle replied to Aurion2Envy's topic in Aurion / TRD Aurion Club
There have been many posts online about Toyota replacing the line with the updated rubber one, so it wouldn't surprise me if some dealers out there tried their luck. There were even some reports about dealers saying things like "the new metal line isn't compatible with your car" etc. It definitely wouldn't make sense to use anything other than the solid pipe these days though since how well documented it is, but after experiencing first hand how quickly both of these lines can squirt out the majority of your engine oil and leave you stranded it's not something I'd be waiting for to arrive from Japan. You could buy the two gaskets for the front oil cooler pipe at the same time, but other than that you won't need anything else. -

Can't get a replacement VVTI Oil line?
Full-Throttle replied to Aurion2Envy's topic in Aurion / TRD Aurion Club
^ Niiicccee B) Haha, they only keep them or emergencies? Maybe a change of plan: Call them up in a panic and tell them that your oil line has burst and you need one URGENTLY! :o . Plan B would be to buy them from Amayama. Here's a link to each of the lines: Rear VVTi line: https://www.amayama.com/en/search?q=15772-31030 Front oil cooler line: https://www.amayama.com/en/search?q=15767-31020 I work at a Toyota wrecker so I got them through work, so a bit of an unfair advantage in this case :P, but they're definitely out there if you look hard enough ;) -

Can't get a replacement VVTI Oil line?
Full-Throttle replied to Aurion2Envy's topic in Aurion / TRD Aurion Club
For the recall they'll likely just put the 'revised' rubber line in anyway that came on the facelift models, so you could be waiting 6-months for no real gain. As I mentioned above, try sourcing the full metal line elsewhere and get Toyota to cover the labour since it's part of the recall anyway. Sounds like a fair compromise to me. -
From the album: My '06 Aurion Sportivo SX6


