

dutchie101
-
Posts
2,043 -
Joined
-
Last visited
-
Days Won
2
Content Type
Profiles
Forums
Events
Gallery
Tutorials
News & Articles
Videos
Everything posted by dutchie101
-
'09 versions
-
Footwell lights in 2009 Levin ZR
dutchie101 replied to dutchie101's topic in Corolla / Corolla Sportivo Club
Thanks Whitey1212. I assume this is also the same power source for the interior light as the lock/unlock (light on/off) not just the door opening switch? -
Hey'all. Just wondering if some one can guide me to find the easiest interior power source/wire to hook up some footwell SMD led's. As the ZR has airbags everywhere, the dome wont be that easy to use if at all. Does anyone know off the top of their heads the best place to pick up an interior light power source? Ie on/off with the doors. Ive searched the forums but most threads seem to be for older rolla's and use the dome. Thanks for your assistance ") ------------------------------------------------------------------------------------------------------------------------------------------------------------------------------------------------------------------------------------------------- Ok, now its sorted, see installation guide below: 2009 ZRE SMD Interior footwell illumintaion Removal of the Glove box cover: 1. Remove the door suspension part, just pulls off in the direction shown. 2. Pull the lower part of the door towards you to release the hinges, easy as. It will snap out of place. This will expose the wiring cluster behind the glove box.... The Cluster: Finding what we are after.. Note the plug to the left of the cluster, with 3 white/pink striped wires and 1 solid blue wire. This is the internal lighting control wiring. The Power Source: Here are the power wires. Tested with a multimeter and these are def the ones that run the dome lights. Blue= (+)Positive, White/pink (-) negative. These are the ones you are going to want to tap into. Use scotch locks if you like, probably the best and safest way. I would recommend running a fuse in line also, i dont think it would be needed but just in case. Ill edit this post and continue the instal when i get my SMD strips in a week or so.... -=+ Install Continued +=- FRONT FOOTWELL SMD's I opted to use the 5050 SMD strip, from KennethStore88 on ebay. Man these are nice and bright. After receiving a few other types in the mail, these shat over all the others. Much bigger SMD chips. They are also connectible, ie can connect them in series, which makes things easy. These come with connection wires also. Just cut the plug end off and away you go. Also, due to these having pins/plugs, you can change the colours at any time, just unplug and plug in your new colour. Easy as, no soldering or re-wiring. The following info is for direct soldering to the factory wiring. <<IF YOU DO NOT WANT TO DO THIS TO THE FACTORY WIRING PLEASE SEE UPDATE IN POST #31 FOR BREECHING EXTENSION>> Ok. Now you want to either use some of those dodgy scotch locks to splice into the two wires mentioned above, or strip a little insulation off and solder some wires to the dome wires. You can use some small gauge speaker wire if you like more length to play with. Run the 'marked" wire with the "+" wire so you know which one is power all the time. I soldered the SMD connector wires straight to the Dome power and negative wires. Be sure to check the SMD strip is working before you solder reverse the polarity if it doesnt. Like this: (i apologize for the crappy photoshop job, a few people weren't sure about this step) Alternatively you can use scotch locks instead of soldering. So essentially you want to connect the first 5050 SMD strip. Test is working and thats it for now. Dont stick it up under the lower glove box yet. Leave it on. Take two of the cables that come with the SMD's, cut both ROUND plugs off, Join the wires(be sure to get the polarity correct) using 1) Solder and shrink wrap or 2) twist and tape well. Solder is by far the best option. You could use joining terminals too i spose. IF your going to do rear footwell lights as well, you will need to splice in speaker wire here, when joining the two connection wires. Around 1.5m will do, that way you'll have plant to play with. Front and Rear: (using connecting 5050 SMD strips) For NON connecting 5050 SMD's, wiring will be different, see bottom of this thread for diagrams. Now connect the socket of the newly made cable to the back of the first SMD strip. Then take the other socket of the new cable, and connect your second SMD strip. If all goes well, they should both be glowing profusely. :) Excellent. Now its just a matter of fiddling through the cable we have just made, either using a wire/coat hanger wire or the 2nd SMD strip itself through behind the dash/stereo unit till you see it over near the drives side. I went up near the air condish foot outlet, theses a nice gap there.I actually pushed the glowing SMD strip through, made it easy to find :). I also removed the lowest panel under the steering wheel, there is two screws and one click tab in the middle. With this removed you have easy access to find you cable.. Pull it through. Now find where you want to put the SMD strips. This is where i placed them: Passenger Side: (dont worry about stickin it on an uneven surface, it's fine. Any further bak and you could see it, i wanted mine hidden.) Drivers side: (again, due to the weird shapes down here, stick it where you like) Now tuck the wires neatly out of the way, and there you go, stage one complete! :) REAR FOOTWELL SMD's: This is a little more tricky. If you spliced in you speaker wire when you joined the two SMD strip connectors, you should have a length of wire sitting in the passenger footwell right about now. Run it down passenger side of the console in the footwell, you can flex the console a little here. Then run the wire the length of the console, tucking it between the carpet and the console. Remove the Middle console glovebox. 4x10mm bolts will be found under the carpet liner in the console. Undo these. Next lift the rear of the handbrake rubber surround, it should snap up. The front sides are a little harder to remove, lift the rear and you will see little tabs toward the front and a gap to fit a screwdriver. Put a cloth or credit card on the console, and pry up those gaps to release the front clips. Youll see what i mean when you do this. Unplug the lighter and unscrew the other 10mm screws. Lift out the console. Now pick up the speaker wire,and continue tucking till you up to the handbrake. You are going to want to splice this wire, so strip the ends, and join the remaining SMD strip cables to these. You may actually be one SMD cable short due to joining two earlier. You can just order another cable when you get the SMD's or i had a joiner with mine, so i soldered another speaker wire to the first and third pin. So essentially you will have the feed speaker wire, split off to two positives and two negatives for the SMD's. If youve got his far you know what i mean :P Plug in the the SMD's to see they both light up. If they do all good, if not check polarity again. I tried to pickup the airbag wires under the seats, but couldnt track them back to the console easily, and i didnt want to accidentally fire them so i opted to punch a small hole in the carpet on each side, near the rear seat mount. I fed a small hard plastic tube thru the hole up to the opening in the console area and taped on the SMD cable to the tube, and pulled it back thru to bring the cable out under the seat. (dam i hope that makes sense!) I recommend you cover the wire with that automotive black corrugated wire protection. Bring it up under the seat and leave it hang rear the rear, toward the console. Position you SMD's and plug in, find the right spot for them and stick up under the seat on the material, they stick quite well. Check for free play in the wire, at bothe extensions of the seat, fully clode and way back. Now neaten up your wiring, making sure that there is no way it can get caught up in the handbrake mechanism. Replace the center console glovebox and connect the lighter, clip back in the handbrake surround. Ok, so you should have a set of operative front footwell lights and if you opted rears as well. All good :) YAY!! This is just a guide, and i wont be held accountable for any screw ups, so please be careful, test all your connections before soldering and check your SMD strips are all working before running the cables. NON Connecting 5050 SMD's diagram: Front only non connecting SMD Front and Rear non connecting SMD Sorry, i had to link these as i had maxed out the number of pics allowed per post. Over and Out, D Thanks to Whitey1212 for the hints.
-
Facelifted Auris (Corolla Hatch)
dutchie101 replied to ToyotaFreak's topic in Corolla / Corolla Sportivo Club
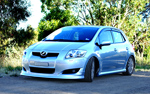
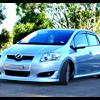
This model began production in Japan as of October '09. Any orders taken now in Australia that cant be filled with australian stock will be the new shape. Scheduled for mid January delivery '10. I personally dont like that rear bar at all, looks very heavy and too much emphasis on the reflectors. The front isnt too bad. Im thinking the next face lift will be a better look, this seems to be one of those "inbetween" shapes to me. -
09 Levin ZR, Auto or manual?
dutchie101 replied to dutchie101's topic in Corolla / Corolla Sportivo Club
Thanks BKS, I just got the call i was waiting for! CONFIRMED i have the LAST, stering silver manual ZR in the country!! :) Oh im a happy camper i tell ya! :) Just gotta wait for it to get here from interstate, should be a week or so... Now time to email my chick in Japan for those aero parts im after :) -
Coilovers/Other height adjustable suspension
dutchie101 replied to patto1234's topic in Corolla / Corolla Sportivo Club
Re Pedders. Im currently running the new pedders coil overs on my '98 318iS Euro. They are great, with more dampener adjust-ability than most Jap types. If i go down the coil over road again, ill probably settle for the pedders without a doubt. Great service, reasonable price. I paid AU$1600 for the set, and $300 for installation and alignment. So for a shade under 2k, they are great value i think. Great to see they are releasing a setup for ZRE154's soon :) -
09 Levin ZR, Auto or manual?
dutchie101 replied to dutchie101's topic in Corolla / Corolla Sportivo Club
From the brochure: Levin ZR features in Addition to Levin SX Exterior: -Rain sensing wipers -Auto headlamps -HID Headlamps Interior: -Climate controlled air condish -Optitron combimeter -Electro-chromatic interior mirror -Smart entry and Start System (Tatami Dark grey interior trim-different softer material) Safety: -Dual front side airbags, dual full length curtain shield airbags and drivers knee airbag -Vehicle Stability Control (VSC) and Traction Control (TRC) Options available on Levin ZR: -Moonroof -Mica/Metalic paint -
09 Levin ZR, Auto or manual?
dutchie101 replied to dutchie101's topic in Corolla / Corolla Sportivo Club
Well i MAY, may have tracked down the last sterling silver Zr with a moon roof in Oz. After getting screwed around a fair bit by my dealer, i found one myself thru another dealer. I went back to the original dealer where i placed my order and demanded they get that car or i would cancel my contract with them. Negotiations are ongoing and hopefully ill know by tomorrow if they scored it for me. Fingers crossed. Its been a tense last few days for me to say the least!! Ill keep you posted :) -
09 Levin ZR, Auto or manual?
dutchie101 replied to dutchie101's topic in Corolla / Corolla Sportivo Club
Just got a call from Toyota customer service this arvo. Im a bit ******. Seems no more ZR current shape manuals are being made nor any in the country. Scheduled production will be January '10. Ive asked them to track me down any fully optioned ZR here in Aust, cause i really dont like the new front or rear bars. Bugger bugger bugger, the new shape is just crap. Hope they find me a fully optioned ZR or i might pull the pin on it. Arrrghhhh. -
Heya, Just searching for goodies for the ZRE, have come across these two Throttle Controllers, Blitz TC & Pivot TC Also the Pivot flat manual: TC Manual Look very promising to help increase the curves of the FBW systems, not sure if it reduced the throttle/rev lag though. Anyone running one yet?
-
09 Levin ZR, Auto or manual?
dutchie101 replied to dutchie101's topic in Corolla / Corolla Sportivo Club
Thanks for the input peeps, I just took the auto for 1/2 hour drive and then took the manual for a good 1/2 hour drive up our famous Gorge Rd. Mountain climb stylie. The manual was great fun, so ive changed my order and save 2k off the price! Need to eliminate that body roll and do the strut braces straight away but apart from that it felt great. Thanks again B) -
Hey'all. First post for me here. I would just like to say what a great site and everyone seems so nice and helpful here. Anyway, Im just finalizing my order for my ZR. Thing is I thought i wanted an auto. Now im thinking manual. Ive searched to see if there were any similar threads but i couldnt find any that dealt with the new series gear. Ive just read the post regarding thr 6 speed and everyone seems pretty happy with it so far.. Ive hired plenty of previous model corollas, not the lastest tho. All have been auto and they drove quite well. However, Im used to manuals, previous owner of a '91 twin turb (1jz)cressida and now a '98 318iS Euro M spec. Granted the power wont be there in a ZR, but i just wanted to gather some thoughts on the new auto vs the 6 speed manual. Whats your thoughts? PS, ive only got a few days to make my decision!! Thanks everyone, D


