

dutchie101
-
Posts
2,043 -
Joined
-
Last visited
-
Days Won
2
Content Type
Profiles
Forums
Events
Gallery
Tutorials
News & Articles
Videos
Everything posted by dutchie101
-
Just had my C-One front sway and front strut brace, Cusco rear sway and Eibachs installed yesterday. Il do a write up with pics tonight or this arvo :) TRD linky
-
ZRE HOT HATCH POTENTIAL + ZRE182..pg117
dutchie101 replied to juvenile's topic in Corolla / Corolla Sportivo Club
Wouldn't that be a "blade" bonnet? -
Did you use 2 part mix or can of foam? Sorry to hear it didnt set. You can always make layers of the foam, allow to set a layer, build it up from there. Ive never had it not set. Its specifically made for confined spaces like boat hulls so not sure what went wrong. :(
-
I havent done it myself (yet :) ) but i do have the photos of most of the removal and SMD change over shots. Yes, you can pull apart the two smaller screens and replace these too.. I personally dont mind the amber combi meters, makes a nice contrast of colours.. Hope that helps.
-
Its a pretty daunting task. I do have pics of the majority of the work. If you require them i can upload them. I would not even consider it if you have never soldered or un soldered SMD's before. Too much cost involved if you stuff it. You can always contact your local electronics repair shop, see what they would charge for it. I imagine if its already pulled apart and ready to go the cost wouldnt be too high..
-
Nah the C-One is as follows from their site: ZRE152・154H、NZE151・154H ●25φ(純正23φ) ●ブッシュ付 From what the translator says 25mm(genuine 23mm) with bush. I just did some quick calculations re sway bar comparison, and the 2mm difference increases stiffness by 1.3958 times, so about 1.4 times as stiff.
-
I assume you want to make a mold of the cavity? You could also spray foam (gap filler type) you know, the stuff in a can that expands like crazy. You can also get it at boat building or resin suppliers as a two part mix.. Use some thick plastic or multiple plastic large bin bags double sided to the boot walls fill with expanding foam 1/3 only. Expands and sets quick, makes prefect molds. You can "mask" off bits with cardboard ect to control the foam. Once set (now im going from memory from ten years back or longer) you can shape the foam, glass it up and dislove the foam away with a solvent (i cant remember which solvent dissolves the foam, sorry. Either toluene/ acrylic, enamel thinners or acetone should work!) Alternatively, you can make/shape the box/enclosure from styrofoam to fit, coat it with a film, glass it, dissolve it. Just experiment with the dissolving solvent/foam combo and go from there. Im sure you get the idea. Its been a while but i hope that helps somewhat. :)
-
JDM rear wiper conversion
dutchie101 replied to Speed_Chaser's topic in Corolla / Corolla Sportivo Club
Whats that old saying.... if you have nothing nice to say..... <_< -
JDM rear wiper conversion
dutchie101 replied to Speed_Chaser's topic in Corolla / Corolla Sportivo Club
Works ok, its a mod heaps of japs do. I got it from a jap auris site :) They actually do it to reduce snow buildup on the wiper. The actuator now pulls instead of pushes, or the other way around. -
JDM rear wiper conversion
dutchie101 replied to Speed_Chaser's topic in Corolla / Corolla Sportivo Club
It can be done with no need for wiring changes. It involves removing the motor, undoing the case, mark the standard arm position (blue circle), careful not to move any of the gears, remove the arm and replace it 180 degrees to the other side of the crown wheel and re install (as pic shows). I have a link here somewhere, ill search high and low till i find it. I cant remember the whole procedure but ill find it. Im planning on having a go within the next few weeks. :) Here tis: -
Heya Dwee. C-One is 25mm as is the TRD one. YES, i do think that if TRD offer this part, it will improve handling. Why the hell else would they offer it? To induce understeer? That doesnt make any sense. It was also recommended to purchase the rest of the TRD sportivo sus kit when purchasing the front sway. See TRD page here Who's to say that the standard ZRE front sway is only just firm enough to do the job? To me its seems far too soft. I opted for the C-One front sway because the price i was quoted for the TRD 25mm is the same as the combined price for the C-One 25mm front and Cusco rear 16mm (well, bloody close to it) Also, how do we know both companies use the exact same material? we dont in short. Thats why we have to experiment. Different materials Vs diameter puts another spin on the whole thing. Yep John, I miss my Velo too, I was going to get the seats trimmed in leather, i might have my drivers seat customized a little while im at it :) Nothing compared to a "proper" seat tho!
-
Everyone seems to be quite adamant about not using front sway bars. Why would TRD offer these instead of rear sway bars then? I agree, dirft spec is rock hard and no roll, thats why im asking for help with the FF ZRE. I have little other sus experience other than the old Capella.. Re Kings, When i did a quick stint at Pedders as a stand in manager, they manager of the SA branch told me that Kings tolerance wasnt that low, ie they would allow up to 4-5mm each spring difference! That put me off straight away. That was 6 odd years ago so things could have changed. Surely they use coil overs in V8's?? Re front sway, If i am to go one stage heavier in the rear, then with no rear sway as standard, the one stage heavier would be the cusco unit, and the c-one front, correct? Has anyone here actually tried a front sway on the ZRE or is this all hearsay? I just got confirmation from Eibach that the pro-kit only lowers the car 30mm lower than standard height. Will I still have a higher bum? Maybe try the Lovells? from what John is saying, handling on the ZRE is better with a higher bum...
-
If your looking for handling improvements, i would probably go rear sway first. From what i know, the front strut brace will "tighten" the front end. Its really a case of stiffening or boxing the front rails/subsection. This should and will improve handling, but probably to a lesser extent than the sway bars. Once you stiffen the front sway bars (increase diameter) i would recommend adding the front strut brace. Yep Ive been in contact with 'phat_azn' re the Eibach, im waiting on a pic from Clarlie so i can see the ride height. With the Moellista front lip, i cant really go full slam on the front, or ill loose the lip!
-
It just that the ZRE is my first FF car ever. Ive steered clear of FF all my life till now, and i have no idea how to set up FF. From the sounds of it, it should actually be similar to drift spec for FR. I would have never thought of that. I guess Im just a stickler for JDM stuff Tho with my Modellista rear skirt/panel, i think im going to have to go with a custom Aussie/ custom JunBL exhaust setup. I dont want to import a JDM exhaust and not have it fit oh so snug :)
-
Thanks SuperDave (man that mustachio on your avatar kills me every time!) :) Yep Im aware of the useless mods/aftermarket bits, not keen on anything other than what i know works really. Im normally one to dyno any change to make sure its worth it. I must say Im use to setting up FR drift cars (oversteer), so pretty different grip FR. Prob more akin to FF by the sounds of it! Ive already got the front strut brace sitting here, so i may as well use it. Anything to "box" in that front end. Im aware it wont do much other than stop chassis twist. With the firmer sus and sway bar, normally twisting on the front end is inevitable. Cheerin
-
Thanks Ray and SuperDave. Ive ordered the c-one front sway and the cusco rear. Ill let you all know how this all progresses, please see any additional comments in the "corolla" forum :) Wouldnt the oversteer from the rear sway bar somewhat neutralize the tiny amount of understeer induced on the front? I dont have a huge ammount of sus knowledge re front wheel drives, ive been a rear wheeler all my life so this is all new to me. I wish i had one of those race suspension problem shooting booklets. They run through problems and solutions when tuning a suspension set up. Im wondering why TRD only offer a front sway bar then? as does C-One, both companies are well hursed in toyota handling, yet neither offer rear sway bars. Surely they wouldnt be selling products that induce understeer would they? The TRD front is 25mm, the same as the C-one bar. TRD
-
Well Ive just ordered the C-One front sway and the Cusco rear. Ill let everyone know how they effect the cars handling once fitted. Still undecided on springs tho. Steering towards Eibach, due to their awesome performance and rugged testing, but i like the ride height of the lovells. Im not too keen on Kings, i just have some ad version about putting aussie parts on/in a jap car. Seems sacrilegious! (forgive me for this, i used to build JDM drifters way back, and any aussie stuff made back then was utter crap compared to the awseome build and finish quality of japanese performance parts) Any one experienced with various springs and their qualities? I have seen a few threads dealing with this but not too many for ZRE's.
-
HEya, Ive copied my post from the corolla forum to here, just incase some sus minded people may miss it there. Im looking at starting to upgrade the ZRE sus. If any one has any experience with the combo below or the parts separately, Could you please share your feedback. Cheeers! wink.gif I am using the car as an everyday drive, with the weekly hard drive thru the Adelaide hills. Old drifters never die! - they end up in FF Corolla's laugh.gif Firstly i need to reduce the roll, looking at Cusco rear sway(stabilizer bar) and C-One front 25mm. Im probably going to end up getting low Eibach springs (30mm drop), leaving the standard struts till they fail. I think there are a few quite knowledgeable sus folk out there, hopefully they can shed some light on this combo. Thanks in advance, D
-
Thanks Dwee, Ive already got the C-One front strut brace, its sitting here, i may as well do the whole lot at one time. I specifically interested in the sway (anti-sway) bar setup. Cheerin
-
HEya, Im looking at starting to upgrade the ZRE sus. If any one has any experience with the combo below or the parts separately, Could you please share your feedback. Cheeers! ;) I am using the car as an everyday drive, with the weekly hard drive thru the Adelaide hills. Old drifters never die! - they end up in FF Corolla's Firstly i need to reduce the roll, looking at Cusco rear sway(stabilizer bar) and C-One front 25mm. Im probably going to end up getting low Eibach springs (30mm drop), leaving the standard struts till they fail. I think there are a few quite knowledgeable sus folk out there, hopefully they can shed some light on this combo. Thanks in advance, D
-
From Castle Hill Toyota, Slim line weather-shield set 08611-12610 (but double check) $275.00 + $16.50 freight (this was to SA) These are a special order from Japan 3 weeks
-
ZRE HOT HATCH POTENTIAL + ZRE182..pg117
dutchie101 replied to juvenile's topic in Corolla / Corolla Sportivo Club
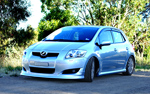
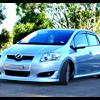
Finally some action! :) Fitted: Modellista front lip,Moon roof(factory) and kiku knot fusa (JP), Auris front emblem, Osram Diadems, Phillips CrystalVision h11 foggies, 6 chip LED parkers, internal SMD/LED fitout, blue footwells, JDM tail light swap. To come soon: Modellista Rear skirt and front garnish (carbon) and colour coded rear emblem to be fitted,lowering (maybe eibach), C-one front sway, cusco rear sway, exhaust (Kakimoto, C-one or custom SS), rims. Catz Super LED 4300k parkers. :) Getting there. Bit of Photoshop Drop :) -
Hey'all. Ive copied this over from my original post in the corolla forum. Enjoy! JDM Tail light switch guide No "rice" comments this time please This is an awesome JMD style tail light switch. Your parkers are now in the middle of the taillight, making the rear look tight and thin. Not that there is anything wrong with tight asses B) Now typical JDM style is to make the rear look fatter, wider and more full... I am talking about the rear of the car still, trust me :) Your brake light is in the middle as standard. Not cool, not fat. This guide swaps these two lights around, moving the parkers to the outside, widening the look of the rear, and moving the brakes to the center, making them shine brighter upon illumination also. The finished swap will look like this. Sorry for the over exposed pics but you get the idea: Now lets start. 1. TAIL LIGHT REMOVAL Now, before you go cutting anything, i can tell you that the swap can be made without extending the wiring. You can stretch the wiring to reach, it will make it with some serious stretching, but puts a lot of strain on the wiring and associated sockets, not good. I opted for a simple extension of the parker wires, also make for easier globe replacement. This tech goes through the extension process. First step is simple, remove the rear tail lights. All you need is a 10mm ring spanner or 10mm double ended spanner and a largish flathead screw driver and a pair of needle nose pliers if you like. OK,open the access panels found in the rear corners of the boot space. You will see two protruding bolts, one near the bottom and one towards the top. Both with 10mm nuts on them, loosen and remove these, dont drop the nuts or you wont see them ever again :) Next, you will see two blue clip tabs. The bottom clip has tabs can be squeezed in to free up the clip, and the top one is a little harder. Use the screwdriver to squeeze the bottom tab of the top clip, and then postion the screwdriver above the clip to push down on the clip and 'squeeze the clip top free the light. You will see what i mean when you try it. Unclip the loom plug and now you have your lights free. Yay! This is the standard setup for the left tail light: 2. LIGHT SWAP AND EXTENSION Ok, now undo both globes, and move the brake to the center hole. Good stuff. Easy. Now get two wires for extending the parker, around 10cm is fine. You will need 4 wires all up, 2 for each side. Neatly snip the parker wires in the middle, giving you plenty of room to move. Strip the wires back around 10-15mm. Twist the corresponding wires together, the loom side first, solder and slip over 2 pieces of heat shrink per wire. Neatly solder the joins. Again twist the plug side wires together with the extension wires, solder and slip the heat shrink over both joins and heat with heat gun or lighter to shrink. repeat with the other wire. Options other than solder Just checked out the Narva range. I dont know how good these are, but its worth putting them up for those that can or don't solder their joints. Narva cable joiners - item 56056BL i think Narva solder splice - item 56382 should be good Narva heatshrink terminals/joiners - item 56350 should be right Some of these come in a pack of 50 or 25. Prob more than you need. Last option is to drop into you local auto electrician, they should do it for 20 bucks or so. You should now have nice and neat extension of those parker wires. Simply slot that parker into the outer housing and your done. Like this: Tuck away those extended wires, replace the light, clip in, do those nuts up and away you go. Repeat for the other side and you done! PS: I changed the 5W T10 globes in the parkers to 8W T10 globes. I had these spare after changing my map globes for flux type 9x led T10's. Hope this all made sense and enjoy your plump ZRE!!
-
ZRE JDM Tail light globe switch
dutchie101 replied to dutchie101's topic in Corolla / Corolla Sportivo Club
No probelmo. :) glad to be of assistance. Looks much better doesnt it? :D -
ZRE JDM Tail light globe switch
dutchie101 replied to dutchie101's topic in Corolla / Corolla Sportivo Club
Yeah i noticed that the passenger side was easily stretchable, but for some reason the drivers side was way shorter. Way too much pressure on the other globe. (the reverse was it? cant remember) I decided to extend mine, cause the first time i tried to extract the now outside placed parker, due to the tightness on the wires and angle of removal, i lost my globe in the lens! Arghh, i wasnt going to have that happen again! Mind you, i am prone to silly screw ups like that, i just wanted to eliminate any chances. :) Extensions do give you more room to move, but like i said, you can get away without it.

