-
Latest Postings
-
1
Drive shafts
I paid $1200 ish to get a pair fitted to my aurion couple years ago. Thats supplied & fitted. Apparently it wasnt a fun job. Id get the mechanic to source the parts incase theres an issue in the future. -
0
FUSE BOXES ALLOCATION - 1996 SUPER CUSTOM Model (Import)
Hi All we have a 1996 Toyota Hiace Super Custom (Import), the Cigarette Lighter doesn't work & need to allocate the Fuse Box. if anyone can steer me in the right direction, would be greatly appreciated. -
10
Vibration through body (not steering wheel) under acceleration
Well, new tyres, a proper wheel balance seems to have done about 90% of the trick - the car now drives like it once did. The only thing is that a wheel bearing was called out as "completely stuffed" and as it is so bad, the only way to fix due to wear on the knuckle is to replace the whole thing. Quoted $600 for the repair and no parts for this until mid next week. Once this is replaced I will update if back to 100% or still more problems. I was thinking that the aftermarket CV shafts could be to blame - very glad this turned out not to be the case. -
0
possible fit 2015 kluger Grnde driver seat on 2019 kluger GX
Is it possible to fit 2015 Kluger Grande electronic driver seat on 2019 Kluger GX ? what i should be aware of before buying one online ? -
0
front brake calipers
anybody know where i can purchase new front brake calipers in Qld drawing a blank everywhere i go also will corolla or camry fit car is a 2011 model -
1
Drive shafts
Can anyone tell me what a reasonable price to purchase drive shafts and how much it would be to fit them for 2016 aurion sportivo -
315
New to Toyota - 2005 Corolla Sportivo!
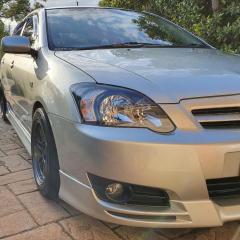
Long time no update. In all honesty, not an awful lot to update on. Life has been super busy and inbetween life, I get a chance here and there to clean the beast and also arrange for the usual 5000 km oil change. The car is showing it's age with more noticeable paint fade on the roof. After some time I've decided to order the parts to fix my slow power steering leak. After receiving the quote from Toyota, I was able to get the parts from overseas for not even a 1/3 of the cost it would've cost me to order here. The parts are due here in 2-3 weeks and I'm thinking of getting this done with the major service which will be due later this year at some point seenig as the car is quickly approaching 293000 kms this month. Other than that, I'm still enjoying driving the car and the money spent late last year was well worth it. -
10
Vibration through body (not steering wheel) under acceleration
I've noticed the same issue after changing the front shocks from OEM to KYB - and while I don't think the shocks are to blame, it could be that there's been an issue which the old shocks covered up by not working at all after 230,000kms. I've also changed the CV joints in mine, replaced the front suspension bushings; hoping that a wheel alignment and new tyres helps this - will post back in the morning the result. Adam, -
0
P0420 Catalystic converter below Thrushold
My kluger gives p0420 code even after changing the catalytic converter I’m help less now I have invested so much money but no mechanic is telling the truth. Please help solving this issue thanks in advance -
0
Dashlight dimmer
I scored a nice fairly low kms 1992 toyota starlet as a run about for work,my problem is at nighttime the dashlights are very dim and the clock is almost non existant,ive searched the dash from top to bottom and cant find a knob,switch or anything else to do with adjusting the dashlights...can anyone help me with this problem?
-


Recommended Posts
Join the conversation
You can post now and register later. If you have an account, sign in now to post with your account.