

ImPulse
-
Posts
161 -
Joined
-
Last visited
Content Type
Profiles
Forums
Events
Gallery
Tutorials
News & Articles
Videos
Everything posted by ImPulse
-
Haha nah I'm kinda over the whole 'gauges on A pillar' thing, but yours did look good - a very clean install. At the moment I've just got it perched on the dash top. Le sighs... DIYing always leads to issues. For anyone who considers these gauges - the Apexi TEMPERATURE gauges are a M12 x 1.25P plug, while most sandwich plates (that sit under the oil filter) have 1/8 NPT fittings. So while the oil pressure sensor fits fine, I'm currently waiting on a local auto store to get back to me on whether they can get me an adapter. Apparently ENZED does things like these too? So gauges are currently reading nothing :/
-
Anfyy - yeh mine are a bit tight too, apply petroleum jelly to the sliders (you'll know where to as there is already a bit of grease there) and it should fix it up a bit =]
-
Haha, haven't had the chance to fully try her out - have another skidpan day booked with mates for hopefully mid June. I figure there's not too much point chasing power out of my daily so I'll just try to make that daily commute as fun as possible :P I must say though, the Bride recliner makes a world of difference - just gives you that extra confidence to throw her into corners without having to worry about the bum sliding everywhere over the leather.
-
Debadged rear and replaced it with a Camry Sportivo badge. A bit smaller but for $3.75 who can complain? :D Work RS-R locknut [open ended type]
-
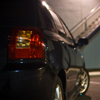
More photos: Rear 19mm sway and front upper strut (tower) bar Low as fvck! haha Rear lower bar Front strut And the Apex-i gauges are in there, not connected so purely RICE at the moment >.<
-
I ended up mounting them on top of the dash - not ideal because the dash is so high, but I cannot for the life of me figure out where else to put them haha.. Well a massive update now, just because I've been lazy. I have fitted a whole heap of ultra racing braces. Front 3 point lower and rear lower bar Looks decent build Bride CUGA is finally in That's it for now. Haven't installed the rear sway as of yet so will do that before going for a run up in the hills :D Cheers Alf
-
Considered the TWM one? Quite a few people on here seem to be running that too. Alf
-
Black facelifted 'stivo with rims, low, angel eyes and JDM tail light mod on Nicholson road, cannington today. Anyone from here? Sweet ride.
-
Thanks for the comments guys, always nice to have something to read when I recheck this haha. The Bride has been put on hold as I'm waiting for the rails to come in from Japan. Combination of the Easter long weekend for us and the Golden Week holiday for Japan... They won't even be sent until 8th of May =( In the meantime, these arrived: Usefulish for a bit of rice. And also to keep an eye on the engine on the track days. Alf
-
Nice shots man, may I ask where the underground carpark is? The white light looks beautiful - different from the normal yellow lighting you find in underground parking lots.
-
So just a quick update, to keep this 'blog' going. I've been stuffing around for almost 3 weeks now trying to get the Bride to fit. Tried to do it the 'cheap' way, so I sourced universal aftermarket rails to bolt them to a custom fabricated frame which would then mount to the bottom of the car. This was purchased off another member, but unfortunately after all the modification I had to do (new holes - and in 3mm steel this isn't as easy as it may sound), the seat was left sitting much too far backwards and low for my height. So in the end, I ended up purchasing genuine Type RO rails from Perfectrun.com. Thanks to members Dennis and Guni for their help in obtaining the correct part number. Moral of the story? Do it once, do it right. I spent half the cost of the rails trying to stuff around with custom work. Will update once the rails arrive =) Alf Just for reference: BRIDE RO-type Seat Rail R/H driver’s side (Part Number: T187RO)
-
Can someone confirm the DRIVER'S side number? I've emailed Perfectrun and they've quoted "If you are after the one for right-hand side drive model, T187RO is the one for driver’s side. T188RO is for left-hand side seat (passenger side in Australia)."
-

BC BR Coilovers Knocking Issue
ImPulse replied to danstar's topic in Corolla / Corolla Sportivo Club
No worries, go drive over a few bumps and hopefully she'll be ok =) Alf -
Thanks for the replies guys, I've been spending the past week trying to modify Andy's old rails, no show. Might have to just bite the bullet and get the genuine bride ones. Thanks in advance Alf
-
BC BR Coilovers Knocking Issue
ImPulse replied to danstar's topic in Corolla / Corolla Sportivo Club
Try tightening the bolt (silver one) that sits just under the stifness adjustment knob. I found that when that was loose some knocking occurred. Let us know how it goes, Alf -
Essentially any sort of lowering is going to compromise the ride to some extent, its just to what extent will you tolerate? I believe Tein SSs are the best in terms of ride, but they do cost a lot more than the Taiwanese branded stuff out there.
-
Hey all, Just wondering where I'm able to source seat rails (bride or recaro) to fit the driver's side for a ZZE chassis Sportivo? I'm having major difficulties at the moment. If it matters the seat is a BRIDE CUGA. Has anyone else done this? I realise theres a set for sale in Vic at the moment, but I don't really need the pair... Thanks in advance Alf
-
I think thats quite normal depending on your head unit, see if you can find a setting to change this. My alpine allows me to control each individually, a benefit of having more than 1 RCA preout. let me know how it goes.
-
Essentially, yes.
-
I'm not 100% clear on what you mean, i chose to not use the speaker outs from the head unit, rather ran the RCA cable to the amp, and then ran the speaker cables from the amp back to the rear of the head unit (under the door sills) and reconnected it all there. My splits branched off to the midwoofer/tweeter inside the door itself. Hope I haven't confused you more :P Cheers Alf
-
Too easy man :) Its good to see some progress shots - the MDF mounts look beautiful considering its your first time doing them! I've personally installed them in about 4 cars so far (mates and so on) My first ones didn't look anything like that! Start a build thread in the members section so we can see your modding progress? And how'd you go with that speaker 'lip'? Did it fit flush in the end? Cos it looks pretty neat in the photos. Might I suggest you trim some of that wire that I see you've shoved into the door frame? Looks like a mess of spaghetti there, don't want it bouncing around or interfering with the window mechanism. Otherwise top stuff man! Go buy yourself something else with the money you saved by DIY-ing :D
-
THIS. Its all good, a learning process. Its good to start with audio, nothing TOO major can go wrong. Make sure you disconnect your battery before starting. Basically, instead of using the rear/front left/right outs on the deck, you use the RCA output, and that sends audio data to your amp. From the amp, you run speaker cable (left/right front/rear) from the amp to the speakers. So the direction of audio flow goes: HEAD UNIT > AMP > SPEAKERS. Again, let me know if that doesnt make any sense :P Alf
-
No worries, happy to lend some sort of assistance :) I believe if you screw them in via the 4x holes, they would still sit properly. The lip should protrude 'upwards' from the MDF, rather than 'under' the speaker. (sorry that's a bit hard to understand..) - just mount them and see how they sit. They should be flush without problems. You want them to sit as flush as possible against the MDF for the best possible sound quality (or so i've heard). But now some advice from a personal perspective, if you save up a bit more, get a set of Splits (or component speakers) for your front, you'd be hard pressed to find much difference between your stock setup (which is actually not too bad!) and the 3 way pioneer's you have bought. You really need that extra (separate) tweeter to bring out more of your music. What do you do with these ones if you decide to get splits? Just put them in your rear door :) Alf Edit: if you want a bit more detail on how to install them, check out my build thread.
-
I personally chose to build new mounts out of 16mm MDF wood. Trace around the stock cards as templates then cut them using a jigsaw Then insert like so:

