

Squalled
-
Posts
582 -
Joined
-
Last visited
-
Days Won
39
Content Type
Profiles
Forums
Events
Gallery
Tutorials
News & Articles
Videos
Everything posted by Squalled
-
This is something I've needed for a while that's for sure. Definitely going to invest in one of these before my next service!
-
New to Toyota - 2005 Corolla Sportivo!
Squalled replied to Squalled's topic in Corolla / Corolla Sportivo Club
Very very lucky I am, I have a great bunch of mates and we all help each other when we can but these mates definitely help me a lot more especially with tyre needs and what not. I may not need the stands since my mate actually mentioned if I need a rotation I can take it to their shop after I finish work and they can quickly do it 🙂 It's only a slightly longer trip to get there but well worth the time saved in having to do it at home. It really is! I definitely don't want to do another set, no matter how much someone would offer me to do it, never again! 😂 After the first I really learned a lot about the whole process so I wanted to prove that I could do it, and I did thankfully. I really can't get over how changing headlights makes such a huge difference to the appearance. The Mother CMX seems to be doing quite well also, seems to be quite durable and has a nice slick feel too. Should be re-applying it sometime next month just to keep it protected. -
I've seen a lot of great things about the PPE 2ZZ MR-S swap header. Other than that, you'd have to go a custom set which would likely be a lot more pricey but with the current exchange rate with the USD, it could end up costing the same.
-
New to Toyota - 2005 Corolla Sportivo!
Squalled replied to Squalled's topic in Corolla / Corolla Sportivo Club
Minor update Happy to report after a rather cooler night that my passenger side headlight has no more condensation inside! After checking before sunrise this morning, all of the moisture was on the outside. -
New to Toyota - 2005 Corolla Sportivo!
Squalled replied to Squalled's topic in Corolla / Corolla Sportivo Club
Yeah good point, I mean I probably won't change anything anytime soon and MAF is still connected but if there's an issue with it I guess it won't have a serious impact. -
New to Toyota - 2005 Corolla Sportivo!
Squalled replied to Squalled's topic in Corolla / Corolla Sportivo Club
So last Friday after the horrid weather that battered NSW and QLD, the newest addition has been basically finished. For some time, I've had the V-Manage and was planning to run an E-Manage with it to compliment the adjusted VVT and lift with the appropriate fueling and timing to match. After a few hiccups and a bit of a discussion, I eventually went down different route. This had been in the pipeline for some time and I wasn't entirely sure on occasions if I should but I thought why not. A sample image here but, I've now moved onto an Adaptronic E420D ECU, which has all the features of an E-Manage and a V-Manage combined with a whole lot more to offer, along with being at least 10+ years newer than the Greddy units. Adam had been running this in his car for some time with great success and found an E440D unit which was originally intended for my car but I suggested he use it since it had features that would benefit his build in the future to which he agreed. The endeavor began Friday 2 weeks ago when we wired in the new unit and removed the V-Manage. It was much easier to remove the entire harness out of the car so it could be worked on sitting down rather than on the floor in a cramped passenger side footwell. Now, this was a very very late night. We began around 8pm or so and I arrived home at 5am before getting up at 7am to get my tyres in my previous post so safe to say I was completely knackered. Adam was able to get everything wired in properly and triple checked absolutely everything before the harness went back into the car and a few remaining wires were patched in. Along with the new ECU, it required a new O2 sensor and also requires a wideband. Adam having this ECU working in his car with very few issues, I went with an identical setup with a new Bosch O2, Spartan 2 Lambda controller and a Just Race Parts AFR gauge. Initially the gauge I received was faulty but Just Race Parts were super helpful and sent me a replacement after contacting them about the issue, thankfully it was an uncommon but known issue to them. I spent the time while Adam was wiring the harness removing the old O2, replacing it with the new one and setting up the AFR gauge. We got the first fire up at 4am and after a slightly longer crank time it started with no issues. We did a few laps around to make sure all was working and Adam removed a heap of timing just so it was super conservative until we could tune it correctly. Since I work quite close to home and with the horrid weather incoming the week after I didn't do all too much driving. Now to last Friday, we got started with replacing the faulty gauge with the new one and also doing some wire clean up on both the ECU side and also on the AFR gauge side. There are 2 more wires that will be required in the future, not entirely necessary currently but they will be added soon enough. Once that was all complete, we went out for logging and tuning. After 2 hours or so, with a lot of logging, constant adjustments and listening for any pinging, the car was completed. It's like a whole new car now. The powerband is now 100% usable, the low end feels amazing, the transition into lift is super smooth and strong and the powerband now feels linear with no flat spots! The ECU also removes the need for a MAF sensor which I may look into in the future by going a complete 3" intake. Even minor changes like the stable idle and cold start idle are awesome. The car consistently cold starts around 2000 RPM and once warm drops to 1000 RPM and holds the idle perfectly! After such many hours invested by Adam in not only his own car but mine, I owe him a lot for everything he put into to get this unit working on a Sportivo. It's miles better than the Greddy units not only in the tune but the entire package with the software and interface that are used with it, it's really brought a new lease of life to the car. In the mean time, I'm keeping an eye on AFRs just to be sure everything is 100% and if any touch ups are needed. Now with such a positive, comes a little negative. Last Friday I found while I was out that my passenger side headlight had begun getting moisture inside which was a real shame seeing as I quite thorough with the seal job I did when I put them back together after painting them. Once the sunny days returned, I constantly removed the dust covers at work for the moisture to escape and one afternoon I did seal up some spots I could see on top that didn't look 100% but I also found some other suspect spots which I'd need to look at properly by removing the light. This morning I spent a good chunk of time looking over the light and found quite a large gap near the high beam section that was roughly 5mm long where there was no sealant even covering it. Along with that and a heap of other spots along the edge of the light, I applied additional sealant to cover any potential gaps. The car has since been put back together and I left the dust caps off once again while the moisture is evaporated. I also place a silica gel bag in the light in the hope it would absorb any moisture I couldn't see. I have just removed it and placed the caps back on so hopefully after tonight I'll see if the seal issues stop the moisture inside 🤞 If not, I have a feeling it could potentially be the dust cover seals themselves seeing as the drivers side light has had no issues what so ever. Stay tuned for more to come! -
New to Toyota - 2005 Corolla Sportivo!
Squalled replied to Squalled's topic in Corolla / Corolla Sportivo Club
Had a super late night doing some new modifications, a new post will come with further details later on once everything is completed 100%. For the moment the car is still running and drivable but does need a little tidying up and some checks as not everything with this mod is 100% perfect as of yet. Anyway onto the main update for the moment. While Alec was doing my engine mounts he noticed that my front tyres were quite worn, in particular my driver side tyre had some serious camber wear and was likely going to have wires popping through at any point. My passenger side tyre worn but no where near as bad along with a chewed through rear tyre as I bought them with the rims at the time, I thought why not replace all of them. My brand new Hankook RS-4s, the same tyres I had on already. I've found them to be quite durable, super grippy for a semi-slick in all conditions and with 15" rims that are 8" wide, there aren't too many viable options. Soon enough, I will be buying a 2nd set of jack stands and an impact gun so I can rotate the wheels each service as this was likely the cause of the premature wearing. Although, I'm sure I actually clocked a fair amount of kms with the tyres so I think I will be able to further extend the new ones even further. Car getting aligned with the fresh rubber. A huge thank you to my mate Kyle for helping me out with the tyres and giving me and awesome price for everything. Super happy! Stay tuned for more! -
Only way to find out is if you take the valve cover off and inspect the head. With those mods, I'm highly doubtful it would make 174kw atw let alone N/A. Most I've seen one make on a high reading dyno was 147kw and that was with MWR Stage 3 cams, upgraded valves and valve springs along with all the supporting mods around it along with an aftermarket ECU and tune.
-
New to Toyota - 2005 Corolla Sportivo!
Squalled replied to Squalled's topic in Corolla / Corolla Sportivo Club
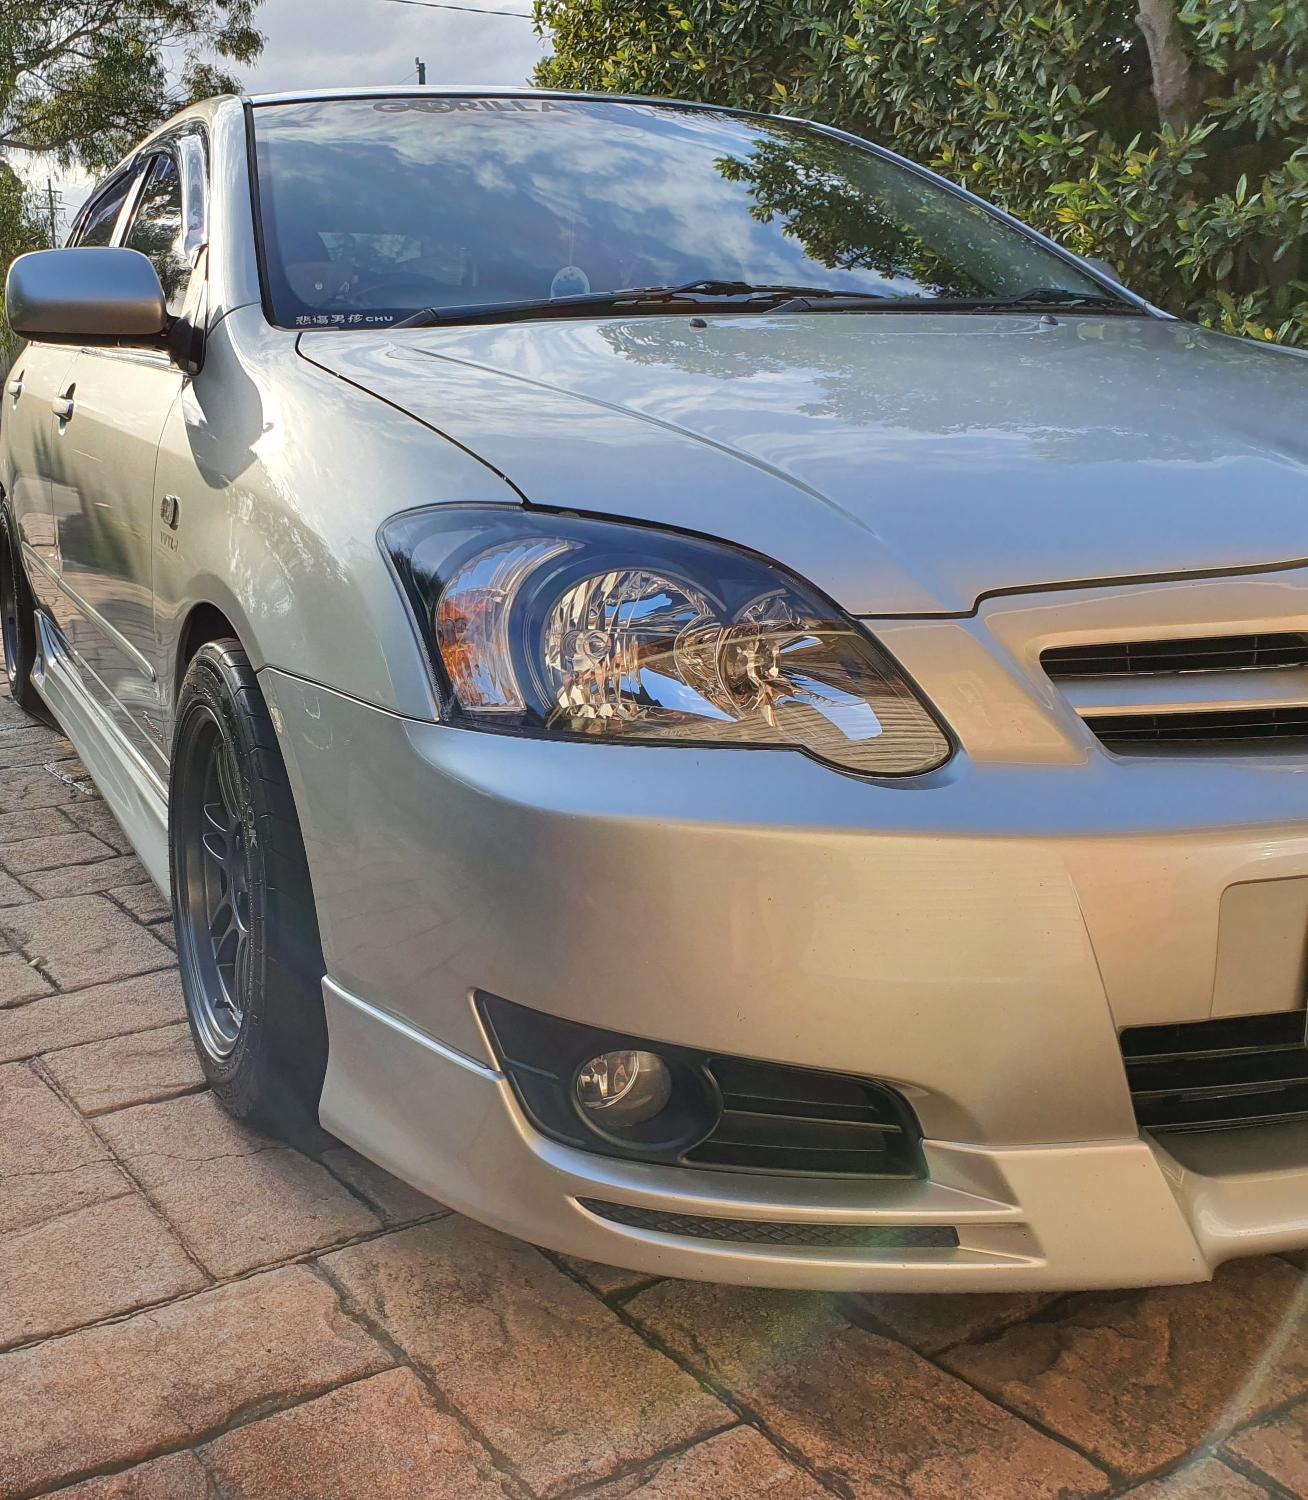
So after a few weeks of subpar weather, being busy most weekends and giving plenty of time for them set properly, well and truly I have finally made the biggest exterior change for a long time. Here are the lights that I had modified and fitted about 3 years ago in their current state. The lenses are in poor condition with a whole heap of cracking on both lenses on the inside and outside along with a horrible seal job that I completed at the time. What a difference a day of hard work and a bit of coin makes! The new ones were originally how I wanted the first set to turn out with the indicator section remaining chrome and reflective but I didn't tape the spot properly and ended up painting the inside black which I didn't mind at the time. Now it was fitment time. Even after fitting the drivers side, what a huge difference excellent condition lights make! Now it was time for the passenger side. As I noted before, the light plug is stuck and rather than potentially causing serious damage it is actually easier to thread the harness out of the light and thread it through another one. Although it's more time consuming, this time around I managed to get it done in half the time so I was pretty happy. I also gave the pod filter a quick clean while I had easy access to it. Now for the final result... Honestly super stoked with how they came out and look on the car. It's really made it look like a totally different car. The seal job is nowhere near as visible and horrible like the last set, the fitment is much better than the first set and there's honestly no issues with rubbing or bending of the housing like the previous set. Seeing as the weather eventually cleared later in the day I decided to give the car a good wash. This also tested the seal and sealant applied and to my surprise firstly, NO LEAKS OR CONDENSATION! The lights seem to be perfectly sealed and the ceramic coating applied feels super slick and has a nice beading effect as well. I also took the time to apply Bowden's Happy Ending as the previous coating had worn off and it also meant another coating of sealant on the lights so hopefully in the long run they won't ever turn yellow or fade! Well, that's all for now. Stay tuned! -
Huge difference man. Shifting feels a lot more direct and has a lot less of the "sloppy" feel from the rubber bushings. It's honestly a night and day difference, a really worth while mod. If you going through MWR, I'd highly suggest getting the shifter base bushings also. I installed them on mine before the cable bushings and both of them combined make for awesome shifts and shift feel. https://www.monkeywrenchracing.com/product/mwr-shifter-base-bushings-toyota-celicamr2-scorollamatrixvibe/
-
Hey mate, you can go for the first set. I went for the same set and just had them recently installed on my car. No issues so far. Alternatively, you can also use ABEC-5 skateboard bearings also which will yield the same results as far as I know.
-
New to Toyota - 2005 Corolla Sportivo!
Squalled replied to Squalled's topic in Corolla / Corolla Sportivo Club
Minor update. Looked into the recommendations provided from @Tony Prodigy and after having previous experience with some, in particular Meguiar's Hybrid Ceramic, and reading/watching reviews of all the products, I opted for the Mothers CMX Ceramic Spray to apply to my headlights. Seeing as it was on sale and I had some store credit for SCA, I ended up getting it cheaper than listed. As soon as I got home I applied the first coat to both the headlights following the instructions on the bottle. It was simple and easy to apply and had no real downfalls that I've noticed so far. I waited for over a day and have since applied a 2nd coat to both the lights to ensure they will be protected for as long as possible between any coating top ups. I've gone over the headlights again visually and can't seem to find any spots I've missed with the sealant so once the weather is nicer one weekend, they'll be replacing the crummy old yellowed units I currently have. More to come.... -
Thanks a lot Tony. You read my thoughts exactly, I have seen plenty of threads on the UK Toyota forums as they can the mounts a lot easier than anyone in Australia can but I haven't really seen a complete write up of them anywhere so I thought why not. It's an excellent product and BRD deserve the extra business if people come across the thread 🙂
-
G'Day TOCA, Recently installed the BRD engine mounts (front and rear only) in my Corolla Sportivo and thought I'd make a separate thread with what's required, my opinions etc. Before I begin, for further information on BRD or their products, please visit https://www.facebook.com/Brooks.BRD or https://www.brooks-brd.co.uk/index.html. Before I begin, if you are unsure of how to complete this work on your own (like myself 😝) please consult a mechanic. Installation/Modification Unlike the Speed Source engine mount inserts commonly used (my previous setup before BRD), these inserts completely remove the need for the original rubber insert making this mount quite a tedious exercise if you choose to pursue this path. Unlike the inserts which require some type of bracket or washer to hold them in, these mounts will never suffer the same issue being a complete replacement for the rubber insert. The best possible method on doing the mounts is buying used or destroyed stock engine mounts since the rubber needs to be removed anyway. In my case I just used my existing mounts as I was unfortunately unable to find another set at the time. Once the mounts are ready for the work, the rubber inserts will need to be pressed out. In my case a machine press was used by my mate. Once removed, the rear engine mount doesn't require too much additional work before the new insert can go in. However, the front engine mount will require modification to remove excess metal no longer required and that will also block the new insert from fitting. It's easier to see in images what is required to be grinded down and/or away and it was made easier on the outer parts by the old inserts I had which left marks of where they were which is where the BRD mounts will also extend out to as you can see in the first image before the metal is removed from the front mount. Once completed, it's good practice to spray the grinded surface to prevent any future rusting. After that they're practically ready to go back in the car! Review/Opinion So I went for the red mounts as they are more suited to street with occasional track use. There is the harder yellow option which is the opposite and will be a lot more intrusive in terms of NVH (noise, vibration, and harshness) so if you can't stand any NVH, I'd highly suggest not going towards the yellows. Back on topic, the mounts are honestly the perfect upgrade for the Corolla Sportivo, reducing the engine movement under throttle and throttle blipping that they're quite known for. After my first drive I immediately noticed very little movement between clutch releases and throttle changes compared to stock engine mounts and mounts with Speed Source inserts. It makes for easier launches and makes shifting a lot smoother and easier with the lack of movement interrupting as it was before. In terms of NVH, I personally have no issues with a little extra noise and vibration as I've always had older model cars which have always had higher NVH to start off with but the red BRD mounts do tend to vibrate a little on warm idle with the dash vibrating the most, the steering has a small amount which is nothing crazy and I have also felt the vibration through the accelerator pedal but haven't noticed this as much after the first few drives around. In all honesty, compared to the Speed Source inserts I had, which had actually popped out on the rear, these mounts are actually nicer to deal with in my experience so far. I've found the vibrations to be not as bad as the Speed Source inserts which was on thing I was surprised with. In all honesty, the mounts are quite pricey compared to the Speed Source inserts, and are quite a lot harder to install compared to them also but the additional cost and labour required are totally worth it. If you plan on keeping your Sportivo for a long time, invest in BRD engine mounts and you'll never have to replace a front or rear engine mount again. BRD has indeed made a product that was definitely needed for the ZZE12x chassis and I have 0 complaints or issues with it.
-
New to Toyota - 2005 Corolla Sportivo!
Squalled replied to Squalled's topic in Corolla / Corolla Sportivo Club
Awesome! Thank you once again Tony, really appreciate the information and tips. -
New to Toyota - 2005 Corolla Sportivo!
Squalled replied to Squalled's topic in Corolla / Corolla Sportivo Club
Second update time! So as of last night, the second mod that I mentioned in my previous has now been completed and installed. In a post about a year ago or so, I was part of group buy to get BRD engine mounts. Me being me, it took a few years before the mod actually got installed 😂 When Alec came over last week, along with doing my shifter cable bushings he also removed my old engine mounts and gave me a spare rear mount so I could move the car around if need be while it didn't have the front engine mount in. I was extremely careful with the clutch and accelerator to not cause the engine to move back and forth too much. Thankfully while I was on leave I didn't need to go anywhere and my parents kindly let me use the garage for the time which worked out perfectly. Anyway, back to the mod. The original engine mounts require the original rubber inserts to be removed with a machine press. Once the rubber inserts are removed, the front engine mount requires some work to remove excess metal that will initially block the mount from fitting in, as you can see below in the before and after. Once the front mount was completed, the rear mount doesn't require all too much work other than placing the insert in the mount. The front mount received a coat of paint to prevent any rusting. Now both of the mounts are ready to receive the BRD inserts. Both engine mounts now ready to go in. I went with the red option as this is more suited to street with the occasional track use where as the yellow inserts are the reverse are a lot stiffer. Out with the old, the Speed Source mount inserts served their purpose, unfortunately the rear popped out due to not having a bracket of washer to keep them in which was a real pain, a problem that won't occur with the new BRD units. Car was jacked up and ready for Alec to do his work. In quite literally 20 minutes, the temporary mount was out and the new mounts were in and the car was back on the ground ready to roll once again! Now time for the test drive with the new shifter bushings and engine mounts. Speed Source Solid Shifter Cable Bushings: Definitely a must have for anyone. Shifting feels so much better, more direct, smoother while driving and there is literally no slop. I also have the shifter base bushings which aid this also but the cable bushings really liven up the shifting. I've yet to do any highway pulls and gear changes but so far a massive improvement. This mod can also be achieved cheaper by using skateboard bearings of a specific size, there are a few forum posts around the Web that will lead you in the right direction. BRD Engine Mount Inserts: No movement! Exactly what I need, the engine does move a tiny bit when blipping the throttle but my god they make the old inserts feel useless. Although a lot more work is required to fit them, they will honestly outlast the car. The vibration even while they are settling in is quite minimal, the only time I've noticed it is when idling while warm and the dashboard vibrates a little but nothing crazy and when accelerating at certain RPMs I can feel the vibration through the accelerator pedal. The vibrations are an awesome trade off for long lasting solid engine mounts. For those in the know, most Sportivo owners know the pain of going through the weak stock engine mounts regularly. I'd highly recommend the mounts for anyone, if you can get a few people together the price will work out cheaper as they are more expensive shipped than the Speed Source inserts from MWR but are totally worth the investment. Oddly, I've noticed some rattles seem to have disappeared compared to the previous engine mounts I had but we'll soon find in the coming days once the mounts settle in if they return. I'd like to say a massive thank you to Alec once again for doing all the hard work while I basically stand and chat 99% of the time and for doing everything so quickly in his time, travelling to me and making the car feel new again. Other than that, I also applied some touch up sealant over any gaps I found on the new headlights last night so I will await for them to cure before installing them. I may install them next weekend as it's set to rain and I'd rather do it on a nice day seeing as my passenger side plug remains stuck and I will need to thread the headlight harness through the light. Stay tuned, still more to come! -
New to Toyota - 2005 Corolla Sportivo!
Squalled replied to Squalled's topic in Corolla / Corolla Sportivo Club
Thank you for the feedback Tony, really appreciate it. I have ordered the Mother CMX after reading various reviews and watching videos of all the options you sent. Mothers just seemed to edge out the rest in my opinion although I have seen the Meguiars in action and it works a treat. I guess when it comes to the headlights, the application would be no different as if I was applying to my paint right? -
Hi Ray, with the airbag light, to clear it you will require a form of code reader which for our year model Corolla's are a bit finicky to find that will 100% work. I myself had the airbag light come on randomly one night on a drive. I literally went over a small dip in the road and it came on. The simplest option would be to get Toyota to clear it, even more of a bonus if you haven't done the airbag re-call as of yet. I will double check with some of my mates as I think one of them may have a working model code scanner.
-
New to Toyota - 2005 Corolla Sportivo!
Squalled replied to Squalled's topic in Corolla / Corolla Sportivo Club
Thanks a lot Tony. Awesome, I'd much rather invest in a better alternative than making them look horrible again. Seeing the new ones with my current ones side by side is honestly a night and day difference. For the spray solutions, what would you recommend? Always up for some new detailing gear for the collection 😃 -
New to Toyota - 2005 Corolla Sportivo!
Squalled replied to Squalled's topic in Corolla / Corolla Sportivo Club
Finally some long awaited updates. Heading into the last few days of my fortnight off work. Have had plenty of relaxation time with my partner last week and this week getting right into the thick of it with work on the car. Sadly I won't have the chance to do the full interior detail since it hasn't been hot enough for my seats to dry so that will have to wait unfortunately. Starting off nice and easy, gave the car a wash about a week ago before heading down the coast for a day out at the beach. The following day, Alec installed my Speed Source shifter cable bushings I've had for that long I forgot I even had them some days. Can see them, just, in the image below. They do stand out in my very dusty engine bay. They feel quite nice so far, very notchy and direct and we also found that one of my rubber bushings had actually ovaled and would've needed replacement at some point. He also helped with another mod to be fitted very soon so the car is out of action currently in the garage but I don't need to go out anyway so it's no biggy, more to come on the mod in another post soon. Today was a very very successful day to say the least. Although I'm in great pain at the moment, I'm honestly over the moon with how everything turned out today and don't think I could've done it on just an ordinary weekend. Starting off today with some TYC OEM style replacement headlights which I had got some time ago. After many discussions with a few mates of lights, techniques and tips I settled for the TYC replacements as they are much newer and cheaper compared to the OEM Toyota lights along with been much easier to crack open for inserts. I gathered all my gear together like the last time and cracked both lights open. The first one took me roughly 40 minutes and the second took not even 20 minutes after figuring out how to get them off in the quickest and easiest manner. Unlike last time, I learnt that I should tape over the indicator lens that pops out on the facelift model which was 100 times easier than trying to tape over the gap it leaves which caused the paint to go into the area and I compromised and painted them to make them look complete. Did a single coat of primer filler as per last time and while it was drying this is when I cracked open the second headlight. Once both had dried enough I applied the coat of black. This time, I used a high temp gloss black as my current set actually have bubbling in some spots that photo's don't always show so I wanted to try and reduce any issues with having that happen again. After 3 coats of paint, I let them set for 3 hours before been able to handle them and seal the lights back up. The moment of truth came when removing the tape and to my surprise and enjoyment, no black paint got through! Now it was time for the worst part of this entire endeavor, sealing them back up. This part I did a horrible job on the first time and I was really disappointed when it rained and the lights leaked and fogged up, especially in cold weather. I heated up both the headlight housing and lens and basically squeezed them together in position as hard as possible to get the seal done as best as possible before additional sealant was applied. Once all sealed up, I let the lights cool down for a period before placing all the required screws back in to mate the lens to the housing before getting the sealant out. This time I managed to get the right colour sealant which should also last a lot longer too as it's more weather and water resistant. After another hour of time, a massive mess and sticking to everything I touch, I am left with these beauties. Super happy with the results despite the stress and pain. I will be going over them tomorrow once they have cured to make sure there are no gaps anywhere in the sealant before they eventually go in. I do also have a lens clear coat spray to go on to prevent them from yellowing so fast but that will wait until everything is 100%. If I ever have to do this again, I'd rather pay someone else to do it 🤣🤣 I'd like to thank Adam, Alec, Andrew, and Blake, the guys that gave me the information and tips I needed to get the job done after slowly loosing my confidence a little with this job last time. Stay tuned, more to come.. -
Sportivo - Tyre Recommendations
Squalled replied to layzie's topic in Corolla / Corolla Sportivo Club
Ah great choice mate. From memory I ran them anywhere between around 36-38 psi, can't really re-call too much as I had a puncture repair done and they filled them with nitrogen which I didn't want -_- -
A few of the ZZE12x owners go for the 86 headunits since they also have the option for GPS and I believe they're a direct plug and play, as far as I was told anyway from one of my mates that had one.
-
New to Toyota - 2005 Corolla Sportivo!
Squalled replied to Squalled's topic in Corolla / Corolla Sportivo Club
Yeah I gave them a good clean as well afterwards. Yeap W.A., not sure if they have one themselves in Sydney but maybe another detailing shop sells their gear for them and what not. The foam cannon is a really nice addition, it feels top notch and it doesn't topple over or anything. I'm pretty happy with it all round. Thanks Tony! -
New to Toyota - 2005 Corolla Sportivo!
Squalled replied to Squalled's topic in Corolla / Corolla Sportivo Club
After weeks of what seemed like endless showers and storms, they cleared at the right time for the weekend and I finally got to wash the beast. FINALLY! Started off with the wheel cleaner, I tend to only use it when I haven't washed the car for a long time since my brake pads generally don't give off a lot of brake dust so it's usually pointless during the weekly wash times to use it. This time around, I got the most intense reaction I've seen on the front wheels. Usually I get little bits here and there but this time there was plenty of purple liquid about. I let it sit for a bit before using some left over snow foam in a cannon that had been sitting around for a few weeks to rinse it off each wheel along with giving the underside of the rear a good spray to clean and any loose rubbish off. I was mostly trying to get rid of it since I had some new gear I wanted to test. Last year I managed to get some Bowden's Own Yellow Snow and I also purchased a new foam cannon from Refract Car Care in W.A. as an alternative to my Bowden's one seeing as at the time it was pretty cheap. Safe to say, super happy with the consistency and easy of use. It is just under 1L in capacity but is enough for my car and also my Mum's stinger which I washed late last year. The new formula is super thick, it is honestly like shaving cream when it first gets onto the car which I love. I know foam thickness is very personal preference but for anyone wanting a thick foam, Yellow Snow ticks that box with ease. From the pictures, it had basically sat on the car for a few minutes or so. Once I finished the wash, I added some spray on sealant to the bonnet, roof and rear bar and boot lid since they had lost some of the protection from the last wash compared to other parts. Very happy now and the weather looks clear for the rest of the week so at least I can enjoy it clean and hopefully clean it weekly again while I can. Before the end of the year, a mate of mine released a new product and it was honestly too good to pass up. Thankfully my 2nd gear is fully functional. Stay tuned. -
Part# for Engine Oil Level Sensor - Corolla Sportivo
Squalled replied to layzie's topic in Corolla / Corolla Sportivo Club
I wonder if the the South African based cars have it like ours which would make some sense too seeing as the Sportivo's were being assembled there.


