Jump to content


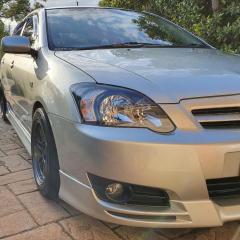
New to Toyota - 2005 Corolla Sportivo!


Squalled

Recommended Posts

7 minutes ago, Chain said:

>raising the car to a more suitable height
mate if you can get over curbs whats the point in existing ;)

Hahaha. I love the look but, I've recently scraped the side skirts and a mechanic scraped the side of my front lip (Don't really now how but yeah)

Link to comment
Share on other sites

Yeah i've got a few scrapes on the side skirt thanks to the previous owner, isn't took bad though so i'm not worried hey.
Front scrapes underneath the lip is pretty normal tbh, luckily i've got a new one ready to go on after a nice coat of paint and polish.  Find a height that suits you best i suppose, i'm 80mm off the ground and its a reasonable height tbh and i wouldn't go any lower.

Link to comment
Share on other sites

  • 2 weeks later...

UPDATE TIME

Great news, just this week the gearbox has been rebuilt as I mentioned by one of local mechanical shops. He did it for an awesome price and the end result is amazing. It definitely feels like a different car when changing gears now. I have some photos from the mechanic and also some additional photos to be added to the thread later.

So, what was done:

- 2nd, 3rd and 4th gear synchros replaced

- All seals replaced

- Input shaft bearing replaced

- Speed Source extended push rod installs

- Penrite gearbox fluid used to top off the rebuild

I've only been for a quick drive so far but it feels great driving it again after almost a week. It will now last a long time with the main gear synchros replaced.

Pictures will hopefully come in the next few days or so, stay tuned!

Link to comment
Share on other sites


Happy for you man, if you get the chance let me know on FB how much you got the rebuild for, would be keen on one day getting my gearbox done aswell just for prevention.
 

Link to comment
Share on other sites

Little Update

Just thought I'd add a little update here. No photos just yet, have been really busy recently to upload them or take them but I'll definitely be adding them here next week. I have photos of the complete gear sets and also I have the synchros that were replaced to take photos of.

Not long after getting the car back, all is going well. Car feels a lot nicer to drive, gears were quite notchy at first but there getting better now. Really do miss getting into lift but patience is key. On Monday, 6th gear began to pop out and became unusable. Luckily all other gears were all good. I took it back to the shop and it turned out the C clip for 6th had too much play causing it pop out of gear. 

Car is back on the road again and running great, having to take it very easy on the gears at the moment but enjoying the driving experience now.

Will update soon!

Link to comment
Share on other sites

  • 2 weeks later...

Sorry for the late updated - Another busy week for me!

Finally have the chance to upload some photos of the gearbox parts. My mechanic was kind enough to take some photos of the gear sets for me too as I was quite curious what condition mine were in.

gMjb1Jb.jpg

6mfDqLK.jpg

So, as mentioned I had the synchros from 2nd - 4th replaced as they were giving me the most grief. 

nJtoB0m.jpg

08HEJPc.jpg

2nd - Definitely my main concern for a long time. Crunched on downshift anytime above 20km/h and became hard to shift up on some occasions. 

ljSSmW1.jpg

3rd - Started becoming an issue when downshifting on some occasions and cruching when cold. Doesn't look all to bad though although there are some teeth worn a bit more than others.

00sAvJF.jpg

4th - Getting blocked out sometimes when downshifting when cold and at operating temperature and also crunching when cold. Looks a little worse than 3rd.

So far I've done roughly 500 or so kilometers with the new synchros and it's definitely feeling a lot nicer now then when I first got the car back. Taking it very easy and shifting gently to get them worn in nicely. Great to have no more leaks from the gearbox anymore either!

Anyway, I'll keep this updated as much as I can!

Edited by Squalled
Link to comment
Share on other sites

  • 1 month later...

UPDATE TIME

Thought I'd update the thread after a bit. I have done over 3000 kms on the new synchros and they honestly feel awesome. Feels great now after taking it very easy on the gears for the last few weeks. I've yet to give a bit to see how it goes.

I've been fairly busy in recent weeks and with the unpredictable Sydney weather, the car hasn't had a good clean for a month or so now. Hoping I can get it cleaned up again this weekend.

I've had a bit of assistance with getting information about installation of the new engine mount inserts and I'm hoping to get this done ASAP along with fixing my oil leak which is becoming more of an issue.

Haven't taken any recent photos but nothing has really changed in recent time.

Will keep this updated!

Link to comment
Share on other sites

  • 1 month later...

UPDATES!

Has been quite a bit of time since my last update and glad to say that more work has been done to the car in recent times. So not long after my last post, I placed an order for some new OEM parts from Toyota purely on the maintenance side of things.

GTdFpRe.jpg

A massive shout out to forum member Blacksheep for his help in getting the parts for me! The parts ordered include new lift bolts, center console spring, new spark plugs (since given to a mate for his service), OCV filters, front and rear engine mounts. Leaving the lift bolts and OCV filters until my major service later this year or earlier next year.

Once I had the parts, I firstly attempted to fix the center console as guided by another member on social media. The trick was to bend the 90 degree angle till it was almost straight and place it into the bigger hole on the center console flap to allow it to work. See below for what I mean for the spring. This is definitely a nice little fix to make the storage usable and works quite well.

NzpyiKf.jpg

I finally got the chance to get in contact with my local mechanic, who also did my gearbox rebuild. They installed the new engine mounts with inserts, fixed the oil leak from the sump area and also did an oil change. I've been extremely happy with their work and prices since going to them mid this year. So happy to finally not leave oil drops where I park anymore.

Here are the engine mounts with Energy Suspension inserts. I was able to just fit my arm from the top to measure the rear engine mount with insert to make sure it would fit within the bracket.

C5z6lDs.jpg

Front, also note the extended pushord.

Xw5MD0P.jpg

Rear

Now, after driving with them for almost a week, here is a nicer in depth review on them. The inserts are definitely a must have for anyone looking for less engine movement, reduced axle tramp/hop and also been able to put power down efficiently. When cold idling, the vibration is not noticeable other than when starting the engine initially. Once at warm idle, it is quite noticeable and you'll generally feel it through the steering wheel along with hearing the dash area vibrate. If you don't like vibrations, I wouldn't recommend them although they will ease down over time. The vibration is also more noticeable between 3000-4000 RPM and along with that there is a more noticeable growl from the intake compared to my previous mounts. While driving it's a lot more nicer to change up and down gears (also seems to feel more direct) and it also seems to be able to put down power a lot easier too. On some lower RPMs and the occasional shift, it can be a little rocky which doesn't really bother me. For the money, I'd definitely say it's worth while but, if you have a pre-facelift you will need custom made washers to keep the inserts from popping out. I may get these later if I have issues but none so far!

I've still got an on-going list of things to do and fix on the car. I will soon need to get some new tyres and I'm leaning towards Michelin Pilot Sport 4's. The car still needs to be raised and a few other parts need to be installed or modified to reach my end goal.

I've got some more updates which I will keep for another post as they're in progress and also have some goodies arriving soon from Japan. Here are some of the latest clean photo's I've taken. Due to all the dew in the cold mornings, it makes it hard to keep the car clean.

preV0xp.jpg

HbrWIms.jpg

Uj62T0F.jpg

DguwBb6.jpg

My blue engine cover has broken so I now don't have one covering the valve cover for now.

The most recent photo's are from a Toymods meet and cruise last week, was great to meet some new people and have a nice drive through the Old Pacific Highway. I've never had so much attention on my car from other people before which something new for me.

vPqDbIW.jpg

I definitely think Toyota out did Honda with the moon landing vehicle styled FN2 Type R

fEKcgIY.jpg

Also parked next to a nice AE92 SX before the cruise, complete with a turbo 4AGE 16V making well over 200KW ATW.

That's all from me for now, stay tuned for new updates!

Edited by Squalled
Link to comment
Share on other sites

  • 1 month later...

NEW POST!

Has been a little too long since my last update but I've been really busy recently with life really. So, the parts that were ordered from Japan were a set of Bride RO type rails for both drive and passenger seats. I ordered them through RHDJapan when the AUD to Yen wasn't too bad and ended up getting the best deal compared to Nengun, PerfectRun and a few other sites. Would highly recommend them and happy to answer any questions about ordering through them if anyone is curious.

In other news, I've been getting a lot better fuel economy as of recently. Used to run Vortex 98 but for nearly a year now have switched to BP Ultimate 98 which gets better kms for me and runs a bit nicer. I drive it a lot more these days and I haven't seen kms this high for well over 9 months.

D3q0NAF.jpg

For about a 2-3 weeks, I also had an air bag light come on. While on a drive with some mates down to Wollongong, we parked and an hour later we returned and when I started my car it randomly came on. Luckily enough it was fixed when the car went in for it's passenger air bag recall. The guys at my local Toyota were very keen to see a Sportivo with one of the older team members falling in love with it! He said "We rarely see cars like this come in to the shop" :tongue: While it was in, I also got a new key cut and programmed for an amazing deal as I only had one car when I got the car. The older team member told me it would be over $3000 if I was to lose my key!! :blink::blink:

When my engine mounts were changed, an oil leak was also fixed but sadly a week later oil was continuing to leak. The car went back to my local mechanic where it was discovered to be the valve cover. It has since not left any leaks so fingers crossed it stays like that :biggrin: While in the shop, they were also able to raise the car just enough so it doesn't scrape everywhere I go. Safe to say it's much nicer to drive day to day now.

My local mechanics are absolute legends to say the least, even managing to get a photo of the engine while the valve cover was off. Anyone want to play a game of guess the kms?

Qst9ysx.jpg

Now for reference, here was the old height which I managed to daily for over a year and a half. I definitely know it probably wasn't legal. Took these when I decided to give it some TLC at the car wash. Safe to say it was cleanest it had been for a long time!

NQkqxEv.jpg

yIvGWx5.jpg

Here's how it currently sits at the new height, haven't done the coke can test just yet so I will compare for the next post. Height all round is now much more daily friendly without looking too high. To be honest, I don't really notice a major difference in the way it looks anyway!

ext9m1S.jpg

IPu0k3H.jpg

The most recent work done was last Saturday when I decided to address something hard to see in my shots. The windows and mirrors had water marks all over them when I purchased the car. I thought the car was just dirty at the time but after the first wash I realised it was an issue. I used the Rain-X Xtreme Clean on all windows and mirrors along with Rain-X water repellent once all the marks were removed. I also thought it would be a good time to replace the window visors with some ordered late last year so that was done after all the windows were done.

It took me about 6 hours all up and turned out amazing! It feels a lot cleaner and visibility is a lot better now too. A massive shout out to my mate Jacob for letting me borrow his buffer and tape to use for the job. Definitely couldn't do it by hand alone. Here's some before and after pictures, a little hard to get the marks on camera but in person they were very noticeable.

ENXA8U6.jpg

KDaOiIS.jpg

Imagine those marks, on every window and mirror!

Progress shot:

LXZ2P8s.jpg

Final results:

yWVKOS3.jpg

fOWKbxH.jpg

h7suUgI.jpg

Other then that, that's how the car sits today. I recently got a knock off TRD duracon gear knob from eBay pretty cheap and it's actually a really nice gear knob. Still in the process of finding seats for the rails and have looked at about 5-6 different sets with none been just right for me yet. Oh well, better waiting for something anyway. Still have a lot to do before I can finally say it's done, then again project cars are never done! 

Will keep this updated!

Edited by Squalled
Link to comment
Share on other sites

  • 4 weeks later...

great automobile Squalled

love these to be classic sportivo rollas. love them to bits, closest thing to an asian version of RenaultSport Clio3s. your car looks the goods, and love the updated front bumpers before the MY06/07 corollas.

judging from the final pic above ^^^ you should get some trim protectant, use a paint brush and paint the protectant on your bottom window surroundings before the rubber start cracking (since you spent all that effort on detailing the windows). You could go to the wreakers and get some in good nick.

EDIT: Oh, should also paint your rear mud flaps. I reckon it adds an extra touch from the rear.

Edited by Wixy
Link to comment
Share on other sites

57 minutes ago, Wixy said:

great automobile Squalled

love these to be classic sportivo rollas. love them to bits, closest thing to an asian version of RenaultSport Clio3s. your car looks the goods, and love the updated front bumpers before the MY06/07 corollas.

judging from the final pic above ^^^ you should get some trim protectant, use a paint brush and paint the protectant on your bottom window surroundings before the rubber start cracking (since you spent all that effort on detailing the windows). You could go to the wreakers and get some in good nick.

EDIT: Oh, should also paint your rear mud flaps. I reckon it adds an extra touch from the rear.

Thanks a lot Wixy! Really appreciate it mate.

Yeah, I definitely wanted the face lift version just because of all the little additions over 03/04 (all auto windows, interior trim) and I preferred to more aggressive look as well.

Yeah it's definitely something I really need to fix up on it but have never known what to get to fix it. Do you have any suggestions for the trim protectant? I actually like the black mud flaps to be honest. I think it's breaks it up a little although I've had temptations to paint them but I really like them the way they are for now.

Link to comment
Share on other sites

2 hours ago, Squalled said:

Thanks a lot Wixy! Really appreciate it mate.

Yeah, I definitely wanted the face lift version just because of all the little additions over 03/04 (all auto windows, interior trim) and I preferred to more aggressive look as well.

Yeah it's definitely something I really need to fix up on it but have never known what to get to fix it. Do you have any suggestions for the trim protectant? I actually like the black mud flaps to be honest. I think it's breaks it up a little although I've had temptations to paint them but I really like them the way they are for now.

RE trim protectant, there are millions of people recommending millions of the brands they trust, but in the end, we drive quite regular cars.

I would say get ANYTHING (within reason i.e. not too cheap and not too expensive) when your auto retailers have 30%+ off sale.

i tried Mothers back to black, and because that's more of a liquid form, it was nowhere as durable as Meguiar's Ultimate Protectant (not to be confused with the regular Meguiar's classic and natural shine protectants). If Meg's UP is at 30% off, it's the best bang for buck. Thick durable cream and lasts in the aussie sun when it's 35+ degrees. The trick is to let the cream dissolve overnight into the plastics. Works great on your unpainted plastics like mud-flaps, front windscreen bottom plastic guard, rear wipers, top antenna and all the plastics in your engine bay. Using a paintbrush is the best as it's not wasteful while creating uniform coats.

Have fun!

  • Thanks 1
Link to comment
Share on other sites

5 minutes ago, Wixy said:

RE trim protectant, there are millions of people recommending millions of the brands they trust, but in the end, we drive quite regular cars.

I would say get ANYTHING (within reason i.e. not too cheap and not too expensive) when your auto retailers have 30%+ off sale.

i tried Mothers back to black, and because that's more of a liquid form, it was nowhere as durable as Meguiar's Ultimate Protectant (not to be confused with the regular Meguiar's classic and natural shine protectants). If Meg's UP is at 30% off, it's the best bang for buck. Thick durable cream and lasts in the aussie sun when it's 35+ degrees. The trick is to let the cream dissolve overnight into the plastics. Works great on your unpainted plastics like mud-flaps, front windscreen bottom plastic guard, rear wipers, top antenna and all the plastics in your engine bay. Using a paintbrush is the best as it's not wasteful while creating uniform coats.

Have fun!

Thanks for that Wixy, will definitely give that a go sometime soon hopefully!

Link to comment
Share on other sites

  • 2 weeks later...

Update time.

So today marks 2 years of ownership of the Sportivo. Safe to say it has been an awesome car since then racking up nearly 50000 kilometers since I purchased it. It's definitely safe to say I drive it a lot other than to and from work. Despite some of the annoying issues I've had like the oil leaks that don't seem to stop and especially having to rebuild the gearbox, I have still enjoyed the car every step of the way. It may not be the fastest car in the world but, it's enough to put a smile on my face hearing the unique note of the 2ZZ, been able to keep up with quicker cars in the twisties and also having complete practicality and amazing fuel economy.

I bought the car stock standard from a gentleman in his mid to early 30's who purchased from the first owner, a female based not to far away from my home suburb. Since purchasing, I saw plenty of potential to make it more enjoyable and practical for my needs. I've done all the basics which can be seen in my signature but, since I'll be keeping the beast for sometime I thought I'd go a few steps further with the type of modifications to be done.

Here is the latest update.

Recently I ordered some new DBA T2 brake discs to go in soon as mine are on the worn side along the QFM HPX brake pads. These will be going in later this year and I'll more than likely paint the brake calipers while doing so. Just need to decide on the colour I'd like really.

So, as an early birthday present for myself I wanted to get some Recaro seats as I had purchased Bride RO type rails in late June. I've been interested in changing the seats since I purchased the car 2 years ago but never thought I'd ever get the chance too. I was primarily looking into black SR3 and SR4 Recaros along with Lancer Evolution Recaros for the last 3 months, found some good ones which I was too late to get or found some very worn ones. I finally got my hands on these.

bUBe8Ov.jpg

Lancer Evolution 8 MR Recaros. They have some usual wear and tear but were the best ones I found after months of searching.

They are quite dirty as you can see which is where I returned back to my Honda roots for assistance. After a bit of research I decided to hire a steam cleaner from Bunnings and also perform the "Softly Method" (Basic mixing 6 parts water to 1 part softly, spraying on the seat, massaging in by hand, clean it out with a wet cloth/towel the using a vacuum to get the seats a bit dryer). It definitely worked a treat as it got most of the stains out and cleared out a lot the dirt and as MCM would say, "human slime".

xqMm7XU.jpg

This is just after the first seat was completed. I only used warm water with the steam cleaner as I didn't want to risk damaging the seat material.

LU7FvrN.jpg

Here's the first seat cleaned with just the steam cleaner.

BvLTfDH.jpg

q2kfZvt.jpg

This was the end result on both seats after a steam and softly clean. They're still wet here so I had to let them dry over night. Also note the steam cleaning water after both seats were cleaned and also when the vacuum was used to get some so water out of the seats.

LvZvnGn.jpg

Here's the results the next day after they dried out over night. The pictures don't show it all to well but they really did get a good clean with the methods used.

Now the most annoying task was to remove the old rails and place the new Bride rails. The old rails had hex bolts which were nearly impossible to remove as my mates and I later found loctite was used to keep them in. After a few hours of working, researching, scratching our heads and using a few choice words we managed to get the old rails off.

After we had the chance to mount the drivers seat, I removed the old leather seat, removed the seat belt and attached it to the new rails before moving it into the car. Without the help of my close mates and also my mates partners Dad, this wouldn't have been done as quickly as possible so a massive shout out to them. I definitely owe a few cases for this one that's for sure.

2uIMNYN.jpg

Here's the drivers side seat installed. Passenger seat will be in later this week. Currently, I'm the only ZZE12# chassis I know of running Evolution 8 MR Recaro's in the world!

The driving feel is amazing. The seats really hold you in and gives the car such a different feel from the leather seats. If you're interested in pushing the Sportivo through it's paces in twisties or on circuits, I highly recommend getting any sort of racing seat. It honestly feels like a different car to be in now.

Other than that, just have a few little mods to get done and a bit of maintenance coming up. Also preparing the car for Toyotafest in the coming weeks so I'm fairly excited as it's my first year going and I've got my ticket for my car to be on show.

Will keep this updated!

Link to comment
Share on other sites

very nice, have fun at the toyotafest. I went to the Melbourne one, great collection of classics, but I only saw one rolla sportivo there.

Can I ask where you got your Bride RO Rails from? standard auto stores? hehehehehe i need to get myself some bucketseats just for fun. though I don't think I would be getting recaros unless it is relatively cheap (my car has done 275,000kms)


Link to comment
Share on other sites

32 minutes ago, Wixy said:

very nice, have fun at the toyotafest. I went to the Melbourne one, great collection of classics, but I only saw one rolla sportivo there.

Can I ask where you got your Bride RO Rails from? standard auto stores? hehehehehe i need to get myself some bucketseats just for fun. though I don't think I would be getting recaros unless it is relatively cheap (my car has done 275,000kms)


I will definitely. I have a few Sportivo friends coming along so it should be good.

I ordered them through a site called RHDJapan. They were the cheapest to order from by a long shot and were awesome to deal with. Highly recommend ordering items through them. The rails are also made to order too and should fit most SR type Recaros and also Brides (If you get the RO type that is). Definitely worth it if you can get a set nice and cheap (Evo 7 and Evo 8 GSR seats go fairly cheap these days).

Link to comment
Share on other sites

Alrighty, with Toyotafest fast approaching and heaps of things I wanted to do before hand, it's been a few weekends and week nights getting everything ready before hand. Some of the things should have been done a long time ago but with other more important things happening in life, I've had to put them on hold.

I finally had the chance to do the headlight inserts on another set of lights I purchased. I originally purchased a set from members on the forum but they were in pretty bad condition. It only took about 10-20 minutes to pull apart the lights and get the insert out. I prepped them with wax and grease remover and used a plastic primer and filler before applying the paint. After 3 coats of black I decided it was more than enough and put them back together along with using automotive Sikaflex to seal them as best as possible.

LouOsc4.jpg

DBmtfqN.jpg

They're currently not on the car as I'm making sure that the sealant has filled any and all of the gaps. I'll be putting them in this weekend and my good mate will give them a wet sand and buff as the lens isn't in the best condition at the moment.

As of last night, I've finally put the passenger side seat in completing the interior. Safe to say I'm extremely happy with how it turned out.

Nc5As0n.jpg

x6T8Om9.jpg

Other than that, it's going to be another busy week for me with prepping the car. Will keep the thread updated!


Link to comment
Share on other sites

Great work! I've always had a soft spot for the Corolla Sportivo's so really enjoyed reading this and seeing all the good stuff you've done so far. On a slightly different topic, well done on the photos too, crisp, clear and colourful.  

Link to comment
Share on other sites

2 hours ago, MR2Bathurst said:

Great work! I've always had a soft spot for the Corolla Sportivo's so really enjoyed reading this and seeing all the good stuff you've done so far. On a slightly different topic, well done on the photos too, crisp, clear and colourful.  

Thanks a lot Marcus, really appreciate it. It's taken a while to get it where I want it.

In regards to camera, as much as I hate to say 99% of the photos are just taken on either my old Samsung Galaxy S5 or my newer Galaxy S7.

Link to comment
Share on other sites

39 minutes ago, Blacksheep said:

Car is looking great Squalled.  Those recaros almost look factory in the interior.  Did you put the headlights in the oven to heat them up when removing the lenses?

Thanks Blacksheep, got to bring around again soon! That's the look I was going for and it turned out exactly how I wanted. I just used a heat gun we've had laying around for years to get them apart. Isn't too hard with gun, just need to make sure all the screws are out beforehand and make sure you don't hold it around the same spot for a long time. Only needs to be enough to melt the glue really.

Link to comment
Share on other sites

  • 4 weeks later...

Update time!

It's been really busy for me in the last month or so, and one of the busiest weeks was the week for Toyotafest. I was in a big rush to get a lot work done and finished on the car in preparation. A week before the event, my window visors were stolen over night and they managed to break one and leave a piece (karma!). Luckily enough I ordered new ones which arrived quickly.

The day before Toyotafest, I attempted to swap over the black housing lights for a polish and in preparation for the car wash that night.

Sadly, I wasn't able to remove the lights. The main harness plug is quite literally stuck and will not budge. My mate and I tried screw drivers, grips, pliers, parts cleaner, you name it and they just would not budge. I think the only way I will be able to fit them is the cut the plug connected, and reconnect a new plug. I was left with the car looking like this for some time.

fePotnT.jpg

In the afternoon, after taking Wixy's advise I had purchased Meguiars Ultimate Protect and applied it to all window trims, roof trims, and other plastics excluding the front bar. It came out great and is still looking after almost a month.

That night I went to the car wash to give it a nice solid clean both inside and out. The tri-colour foam I specifically wanted to make the car really pop wasn't working. It really wasn't my day trying to get the car ready. Other than that, the car came out nice and clean.

RjT3gdA.jpg

YPtTjO2.jpg

I was up nice and early the following morning so I could meet up with a group of friends I've met before at other meets. We then cruised up the motorway where we saw a few of the other attendee's. It was nice cruise up and no one got lost on the way which was nice bonus.

I met up with my mate in his 04 Sportivo and met his friends driving a nice ZRE182 and also a supercharged Toyota Echo which was one of the most unique cars of the event.

PvOQKZa.jpg

ojz7Km8.jpg

Upon arriving and parking on the 2nd floor of Castle Hill Toyota, I found out I managed to get a stomach bug which in turn ruined the day for me really. I managed to get some photos of the cars around the parking area and a few of the group I cruised up with.

rTj7d67.jpg

gxD4G3q.jpg

Other than having the stomach bug, it was great day and seeing so many different Toyota's. I ended up having to get one of my parents to drive my car home as I had no energy from not eating all day.

Since Toyotafest, not too many new things have happened but I have much planned for the end of this year and early next year so I'll keep this updated.


Edited by Squalled
Link to comment
Share on other sites

Join the conversation

You can post now and register later. If you have an account, sign in now to post with your account.

Guest
Reply to this topic...

×   Pasted as rich text.   Paste as plain text instead

  Only 75 emoji are allowed.

×   Your link has been automatically embedded.   Display as a link instead

×   Your previous content has been restored.   Clear editor

×   You cannot paste images directly. Upload or insert images from URL.


×
×
  • Create New...

Forums


News


Membership