Jump to content

Recommended Posts

Posted

Hey everyone,

I'm new to this forum, but have been reading through the Aurion topic for the past few weeks while I've been waiting to get my Aurion on the road. I thought I would just make a post to express my satisfaction for my new purchase. This will probably turn out to be a bit of writing, but it has been a rather long journey to get where it is today (felt really long due to my impatience).

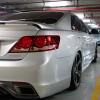
Back on the 18th of March, ManheimFowles here in Brisbane were auctioning off some flood damaged vehicles. There was a Wildfire 2007 Sportivo SX6 there that had travelled only 24,000 kms and barely had signs of water damage. The engine bay was completely clean with no signs of water getting past the guards at the bottom, and the inside had only the faintest smell of dampness. What was even more surprising is that when it came time for bidding, towards the end there was barely anyone around and I was able to snap it up at just under $20k including administration fees and whatnot.

So now came the fun part of taking it all apart to clean it up. With a little help of the service diagrams, the interior came out pretty easily and the carpet was then taken out and given a good wash. The car was given a good clean inside then left out to air for a few days which completely got rid of any smells (photos included of it with the interior out). Also, since the air bag light didn't turn off after the car was turned on, the air bag module was checked. It appeared to have some corrosion on the terminals, so that was replaced. Quite surprising as well, the air bag control module only cost $137 which was 1/4 of the cost that I was expecting. It even surprised the guys at Southside Toyota when they had to look the part up. I swapped it over and the system self tested fine after that.

While the interior was in pieces, I also took the chance to run cables for my sub/amp which I was to put in once I put it all back together. So once all that was done and the carpet was clean, I layed down some new under-felt (which I was able to obtain free of charge), put the carpet back in and re-assembled the interior. It was just like a new car again. I got a safety certificate on it and then booked it in for a Written-Off Vehicle Inspection; and what a wait that was. There were so many cars that they had to inspect so I had to wait 1 and half weeks just to get it inspected, followed by the 48 hour minimum inspection time. It was so hard having it in the garage and not being able to drive it.

So anyways, that's the story of my car. I am quite impressed with how it all turned out. It is just like a new car again, and for the price I was able to pick it up for, it is perfect. After driving a '91 Camry for the past 3.5 years ever since I got my license, the Aurion is quite a change. I have to get used to parallel parking all over again and get used to going easy on the accelerator, but it's all fun. With the Camry, I would be giving the accelerator quite a workout, but on the Aurion, I just have to lightly push on it. There are even some situations when putting my foot down in the Aurion just scares me and I would back off pretty quick. It's certainly a different feeling.

So far, all I've done to my Aurion is change all the interior bulbs and number plate bulbs to white LED's, installed a set of 8000k HID's, installed an amp and subwoofer in the boot, and put some personalised plates on it. I was going to change the parker bulbs to LED's but gave up for the time being when trying to remove the wheel arches. The last thing I want to do to it is get a dark tint for the windows just to complete it. That's about all I plan on doing with it, as I like to have a stock feel about it.

Next I have to book it in with Fulcrum and get that alignment issue sorted out. The pulling to the left issue is now starting to bug me and is the only thing about that car that I'm having a problem with right now. If you managed to make it though that post, thank you for reading. After waiting for a little over 3 weeks to get it on the road, I'm quite excited.

Daryl K

post-7685-1208080893_thumb.jpg

post-7685-1208080902_thumb.jpg

post-7685-1208080910_thumb.jpg


Posted

wow.. good on ya for having the time and dedication and patients to do all that work! :o

i know i sure as hell couldnt have been bothered!!! :lol:

Posted

Well done m8 ... good buy for a good car you have done well. Looking good and driving well huh?


Posted
wow.. good on ya for having the time and dedication and patients to do all that work! :o

i know i sure as hell couldnt have been bothered!!! :lol:

It was a long process but I guess it made it that little bit more exciting to drive it in the end.

Just looked at your avatar. I passed your TRD in the underground carpark at Southbank last night. Such a beautiful sight that was.

Well done m8 ... good buy for a good car you have done well. Looking good and driving well huh?

I absolutely love it. It is such a smooth drive as well. It's so much more comfortable cruising around with minimal noise enterer the car and without feeling every single bump with a huge shock.

Posted
wow.. good on ya for having the time and dedication and patients to do all that work! :o

i know i sure as hell couldnt have been bothered!!! :lol:

It was a long process but I guess it made it that little bit more exciting to drive it in the end.

Just looked at your avatar. I passed your TRD in the underground carpark at Southbank last night. Such a beautiful sight that was.

thanks mate...

i'm always there most nights at my mates coffee shop...

so now that you've taken the whole interior out... how hard is it to get to the wiring behind the stereo? lol

was it a pain in the *****?

I wouldn't say it's that hard. It all depends on how good you are with taking things apart carefully. I have been working on car interiors for ages installing electronics so this stuff is rather easy for me. In regards to accessing the wiring behind the stereo, it is actually much simpler than taking everything apart like I had to. The audio/visual and instrument panel service manual which can be downloaded from sticky has a perfect step by step guide to taking it all out. But in general, all you have to do is:

1) Put the gear shift into drive (for access) and unscrew the gear shift knob

2) Remove the center console sub-assembly. It is only clipped in and has no screws. This part is mainly all the silver trim in the centre that extends from the bottom of the AC controls to the front of the centre console box. This part can actually be removed by hand by gripping the black edges on the side of the siver trim and pulling up (you can see where it joins on the side next to the seat).

3) Remove the AC Vent and clock assembly. It is simply clipped in and pulls out by pulling off straight forward (after prying off with a screwdriver)

4) Remove two bolts at the top of the stereo, and two bolts at the bottom of the stereo.

5) Pull the stereo straight out; it has clips on it as well.

Suprisingly, you only have four bolts to undo. Everything else is held together by clips. The good thing though is that the clips are plastic on plastic which means they come out rather smoothly and don't break off like some of the metal variety. Overall, I'd estimate about 10-15 minutes of work if you want to take it slowly.

Posted

Great job on getting her back on the road!! :toast:

Posted

thanks for the write up!!! really appreciated...

i'm going to attempt to do this speed sensor wire thingy for the sat nav so that it will trick the sat nav to think that i'm still parked...

the write up on that is also pretty good... so wish me luck... :)

Posted (edited)

Very happy to see your $20k car. I am a camera tech, if i was you i will open all electrical connectors and spray them with INOX and also do a rust guard all over the internal body an the under carriage and all doors to prevent any rust. Also if you want you can install electronic rust protection.

Edited by jacko16
Posted
Very happy to see your $20k car. I am a camera tech, if i was you i will open all electrical connectors and spray them with INOX and also do a rust guard all over the internal body an the under carriage and all doors to prevent any rust. Also if you want you can install electronic rust protection.

Thanks for the advice. Since I'm in the electronics industry myself, I had a can of CRC CO Contact Cleaner and Switch Cleaner Lubricant handy and used those to clean out and protect all the connectors that had to be disconnected when taking the inside apart. The exception was the air bag module plug where I just used the CO Contact Cleaner; better to be on the safe side with those electronics. The body of the car underneath all the carpet was already well coated in paint, but after scrubbing everything up, I did put on a light coat of anti-rust. Next time I get a chance to head over to my mate's workshop, I will hoist the car up and give the underbody a clean and coat just to be on the safe side.

Create an account or sign in to comment

You need to be a member in order to leave a comment

Create an account

Sign up for a new account in our community. It's easy!

Register a new account

Sign in

Already have an account? Sign in here.

Sign In Now


  • Join The Club

    Join the Toyota Owners Club and be part of the Community. It's FREE!

  • Latest Postings

    1. 18

      High idling on the 2zzge even when warm (solved!)

    2. 5

      High RPM Idle after the engine warm up.

    3. 0

      Tow bar

    4. 3

      Disconnecting winch, lightbar and UHF

    5. 0

      2011 Land Cruiser 1VD-FTV Engine Won't Start After Overhaul

    6. 3

      Disconnecting winch, lightbar and UHF

    7. 3

      Disconnecting winch, lightbar and UHF

    8. 3

      Disconnecting winch, lightbar and UHF

    9. 1

      Snapping wheel and axle studs

    10. 0

      2zz idle / roughness when accelerating past 3k

×
×
  • Create New...

Forums


News


Membership