

-
Latest Postings
-
4
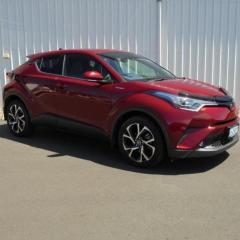
Auto door locking on new 2024 C-HR?
Thanks for that Martin. Placed an order for a GR Sport on Friday. Supposedly due for delivery in about three weeks with a manufacturing date of December. -
0
Has anyone found 200 Series Rear Screen Delete Cover in AUS
Hi, just curious if anyone has had any success removing their Back of seat DVD screens and replacing with an Australian made cover. -
11
Low Fuel Warning Light Flashing
Hi Neil (bully109), I would love the photo of the unit that needs to be taken out if you could send it though, I have the same issues as everyone else and have had no luck getting it fixed. Thanks, Mark -
1
2007 - floor mats
Hi Ed, Hmm that's a tough one mate ..short of going to Toyota to get genuine and no I doubt they would laugh at you as it's a sale and money is tight right now. I am not sure if you are on Facebook or not but I have seen an advert on there for what looks like superb floor mat sets that do seem excellent quality and a wide range but like most things now they are not cheapish. My best advice is source some good quality ones and search online for someone who offers embroidery as some do tradie shirts and logos on clothing it may be worth a phone call to those sort of places as I know a local one to me does all sorts of work on many things related to embroidery or an alternative choice is the online sites like Temu... EBay etc Let us know how you get on mate good luck. KAA -
0
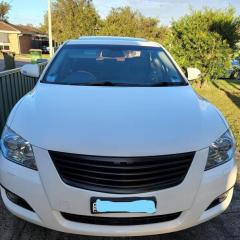
2001 Toyota Camry wagon passenger side locks not working
Gday, I've got a 2001 Camry wagon which has been having locking issues for a while now, just started occurring out of the blue. There is no fob so we manually unlock and lock from the driver side door, however the rear and front passenger doors consistently have issues. Either when we unlock one or both doors don't unlock and must be unlocked from inside the car, or when we lock it one or both don't lock and the car beeps. To fix that, we open the door, lock it from the inside, the lift up the handle and close the door before releasing the handle. That fixes the locking issue. When testing the locks from inside the car, I can see that they partially lock and unlock, so I'm wondering if they need to be replaced entirely or if there's some other way to fix it. Cheers -
0
2002 Hilux Engine Replacement
I have a 2002 Hilux that is meant to have a 5le engine but i think it was replaced with a new engine with a turbo before i bought it. Its a different engine compared to what is in the manual - eg the alternator is at the bottom not the top as per the manual. The engine is seized - tried roll starting downhill and wheels just locked up. I cant find what the engine is. Any ideas on where I would find it? Also 5LE engines are hard to find - any ideas on what else i could put in? Does a 1KZ fit? -
3
Engine conversion
I have a 2002 Hilux that is meant to have a 5le engine but i think it was upgraded to a turbo version before i bought it. Its a different engine compared to what is in the manual - eg the alternator is at the bottom not the top as per the manual. The engine is seized - tried roll starting downhill and wheels just locked up. I cant find what the engine is. Any ideas on where I would find it? Also 5LE engines are hard to find - any ideas on what else i could put in? -
0
Po299
Low boost it happens highway 112kmph po299 low boost limp mode gear won't pass 4th even on sports mode when I reset complete normal my engine was rebuilt done 20000km new turbo injector check and good working order I use penrite egr and cat cleaner there was a improvement I didn't get a chance to do over 100 kmph is it fuel air ratio related or valve o2 cat egr map sensor or map filter related? Any thoughts ? -
0
Boot Dimensions?
Hi All, Greetings from the UK. I wondered if any kind folk could help me out. I am trying to get hold of some measurements for the boot/trunk of later model Fortuners. Does any know the height, min width (between the stowed 3rd seats) and the min depth from the 2nd row seat backs to the tailgate? Trying to work out if I can get all my luggage on board before I travel. Hope someone can help. Cheers KP -
1
2007 - Floor mat
Original mats but in sandstone colour but you could possibly get them dyed a different colour. https://www.nunawadingtoyotaparts.com.au/toyota-camry-sandstone-carpet-mats-set-from-2006-t
-


Recommended Posts
Join the conversation
You can post now and register later. If you have an account, sign in now to post with your account.