Jump to content


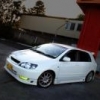
tiet's sportivo a work in progress :)


tiet

Recommended Posts

well heres just a few new pic's was taken before some of the mods done lol

car1.jpgcar2.jpg

ok hers my new updates,

i chose to go with the 7" Clarion MAX686BT

deck1.jpg

i have 4 6.5" JBL Splits in the front and rears (don't have pictures)

I have two Kenwood 12" Subs :)

sub1.jpg

and i have a cheap soundstorm amp powering the sub and a response amp powering the speakers :)

oh and i couldn't help myself but i got my C-One Wingtips DIY Sprayed and Mounted (colour was abit off)

wingtip1.jpgwingtip2.jpg

my next update will be JDM Style Rear Taillights with the extra lights, though i've gotten my grasp on some 2005 Corolla Taillights so ill be using them :)

Edited by tiet
Link to comment
Share on other sites

looking good, your gona love the Clarion unit, i got the same. Although let me know if you have troubles with the Bluetooth pairing dropping out, and if you can send all your contacts to the unit. What sort of phone are you using?

Ye facelift the rear of ur pre-facelift. Will look awsome.

thanks mate, yeah i've had the system installed for over two weeks, bluetooth doesn't drop out at all for me, but for some reason it tends to cut out for a split second after say 30seconds of playing a song off my phone and then everything else is fine.

i didn't even know i could send my contacts over? lol everytime someone would call it would say unknown, ill try tomorrow.

as for what phone, i am using the nokia N95 8GB.

This is my first time with clarion and i am quite shocked that theres not much options to tune from the deck

very nice! All the best with installing the facelift taillights (if you re using the facelift bulb holder plate)

thanks :)

so the prefacelift bulb holder plate wont fit in the facelift taillight?

in that case i have to tinkle with it and play mad doctor again, like with the rest of my mods

Edited by tiet
Link to comment
Share on other sites


  • 3 weeks later...

i am not sure but i think i am the first to have JDM Stlye 05 Rear Taillights with Brake and Parkers :) (correct me if i am wrong sorry xD) all thanks to my friend flek, tracy, yang and sam (i dropped the tail light nut into the land of no return. This was the section inside the rear bumper. He stuck his hand down there and found the nut lol)

it was suprisingly easy to change my prefacelift taillights to the facelift ones, the wires pop out of the plug as clips and clip right into the new one :o and the wires pretty much match up so horray for me xD

light7.jpg

Lights Off

light3.jpg

light6.jpg

Parkers

light1.jpg

light5.jpg

Brakes

light2.jpg

light4.jpg

Though it is not the safest wire up and took some modification to the bulb plate holder xD future modifications will be done for the extra light, i will need to make a new set of conductors for the extra light

Edited by tiet
Link to comment
Share on other sites

i am not sure but i think i am the first to have JDM Stlye 05 Rear Taillights with Brake and Parkers :) (correct me if i am wrong sorry xD) all thanks to my friend flek, tracy, yang and sam (i dropped the tail light nut into the land of no return. This was the section inside the rear bumper. He stuck his hand down there and found the nut lol)

it was suprisingly easy to change my prefacelift taillights to the facelift ones, the wires pop out of the plug as clips and clip right into the new one :o and the wires pretty much match up so horray for me xD

light7.jpg

Lights Off

light3.jpg

light6.jpg

Parkers

light1.jpg

light5.jpg

Brakes

light2.jpg

light4.jpg

Though it is not the safest wire up and took some modification to the bulb plate holder xD future modifications will be done for the extra light, i will need to make a new set of conductors for the extra light

Well done! Yeah you must the first to post it on the forum. Please write up a howto on it.

Link to comment
Share on other sites

lol i would write up how to do it? but i don't think it was the best way xD i intend to fix it up in the future though

@ Brad-dreama - i went with a clarion 7" touch, with twin 12" kewood subs, a reponse and soundstorm amp, and 4 6 1/2" JBL Splits for each door, the speakers were on special

Link to comment
Share on other sites

Hey Tiet could you please write how you at least connected it up?. I'm assuming you tapped a conductor, but which one??? Would really like to know..

Link to comment
Share on other sites

Hey Tiet could you please write how you at least connected it up?. I'm assuming you tapped a conductor, but which one??? Would really like to know..

is it simply wiring the parker light wire to the third conductor of the dual filament bulb? probably have to drill a hole behind the empty socket to feed in the parker wire.

post-8229-1231650983_thumb.jpg

Link to comment
Share on other sites

how did you get them fitted in the rear?

id rather not cut tbh!

have you seen the rear doors yet? at first i tried to re-modify the black pods on the door, i just siliconed the bracket plate onto it, but found out we were not able to fit the trim back on.

so basically we took off the pods by drilling into the pop rivets, bought a wood spacer, put it in place, drilled new holes and put the speakers in lol

if you don't really want to do this then stick with 5.25"

Hey Tiet could you please write how you at least connected it up?. I'm assuming you tapped a conductor, but which one??? Would really like to know..

first i just want to say this is only for now until i get time to create a proper conductor+clip and i would not recommend this i just really wanted brake+parks lol, if you choose to copy this then it is at your own free will and i do not hold any responsibilities for any damages or problems it may cause. sorry about the bad pictures they looked better on my phone when i had taken them.

at first my friend tried to bend the original conductor to the side, since it sat in the middle, but we found out it bent it too much and was not touching the bulb, it was getting dark and we just wanted to get it done, so here is what we done, i won't put this in the work submission section since its pretty bodgey but still looks good in the end lol xD

first we found out a 21/5w i think it was would not clip in so my friend melted slits in each side to lock/hold the bulb in.

plate3.jpg

my friend did the same like the others and connected wires to the brake and park he then melted a hole in the back of the extra bulb section and pulled the wires through.

plate5.jpg

if you try im pretty sure you could bend the conductor to sit in the right position, but we just soldered the wires straight onto the bulb, i am aware this would make it annoying to change the bulb, as im pretty sure i would get flamed for doing

plate4.jpg

then i just taped everything together and was ready to put it back in

plate1.jpgplate2.jpg

again this is what i chose to do, i do not recommend this method, i would rather you add a second conductor and sit it in place beside the conductor already there

please don't flame at me for this method of choice lol >_<

Edited by tiet
Link to comment
Share on other sites

Hey Tiet could you please write how you at least connected it up?. I'm assuming you tapped a conductor, but which one??? Would really like to know..

is it simply wiring the parker light wire to the third conductor of the dual filament bulb? probably have to drill a hole behind the empty socket to feed in the parker wire.

post-8229-1231650983_thumb.jpg

lol chicken pretty much spot on with that, but we just wired it up from the other conductor, at first we were thinking about wiring it up from the plug then realised it would be annoying to take it out, and realised it would be so much easier to wire it to the pre-existing conductor

and im pretty sure i could of made it heaps cleaner and neater, by shorterning wires and smoothing the plastic down

Edited by tiet
Link to comment
Share on other sites

yeah i was thinking of doing it this way when i did mine, but didnt want to drill housing and also connecting straight to bulb can make it fun when replacing.....good work though.........i think i actually prefer it working with just the brake aspect....especially at night it is really vivid to ppl behind you that you have applied the brake, you go from 2 dull lines (parkers) to 4 strong lines and your rear spoiler light.....definently let ppl know your braking

good job mate.....

Link to comment
Share on other sites

hehe thanks, ah fair point :) but then again my stock tail lights and facelift stock tail lights were the same only two park lights on the outer sides, hit brake they go brighter + spoiler brake light

Edited by tiet
Link to comment
Share on other sites

  • 2 months later...

finally got the tein super wagons in :) took us 4 hours -_- spent 2 of those hours trying to figure out how to make the car higher/lower lol

here are some blurry pics, clean pics will be added soon..

lower1.pnglower2.png

im so so happy :D

Edited by tiet
Link to comment
Share on other sites

AWESOME! really well done! your car is coming along nicely, get some pics tomorrow morning and post them up. Im keen to see the height!

Link to comment
Share on other sites

lol will get better pics soon :) have to re-adjust the fronts first, its like a inch higher, had to put the wheels on to see what height it was at, then i was lazy to jack the car back up, take the wheel off to re-adjust it (well my friend was, since he did most of the work)

Edited by tiet
Link to comment
Share on other sites

lols i shall see this car in the flesh soon. :lol:

slammed !

lol see how higher the front is. i came out this morning and it looked like my car was hitting lift and the front end was lifting up

Link to comment
Share on other sites

Join the conversation

You can post now and register later. If you have an account, sign in now to post with your account.

Guest
Reply to this topic...

×   Pasted as rich text.   Paste as plain text instead

  Only 75 emoji are allowed.

×   Your link has been automatically embedded.   Display as a link instead

×   Your previous content has been restored.   Clear editor

×   You cannot paste images directly. Upload or insert images from URL.


×
×
  • Create New...

Forums


News


Membership