DJKOR
-
Posts
8,819 -
Joined
-
Last visited
-
Days Won
28
Content Type
Profiles
Forums
Events
Gallery
Tutorials
News & Articles
Videos
Everything posted by DJKOR
-
Suspension of surveillance eh? Anything in particular that the dealer doesn't want you to see? Hehehe.
-
+ 1 for stone chips... though mine are all isolated to the front bumper. Man the front bumper on these cars aren't the best at deflecting stuff like that. I have all these little white spots on my front bumper. They are doing a lot of work on the side of the Centenary Highway over here and I am trying to avoid it as much as I can. There are always trucks everywhere and I'm guessing that a majority of the stone chips I have are from them. A car bra would be great, but damn they ruin the look.
-
Nah, I wish though. I love music but lack the creativity to create it and/or mix it. DJKOR just forms my name; Daryl Jon KORvemaa.
-
I imagine that it would plug straight in, however there could be a minor issue. The electronic climate control utilises both a separate control circuit for the dual zone separation, as well as a temperature sensor mounted to the right of the steering wheel. I would say that you definitely need to have that temperature sensor (which isn't present on the models without the climate control) otherwise it would not be able to set the temperature. More than likely, the display will just give an error code/flash due to its self-diagnostics, and not work. Should you manage to install a temperature sensor, the unit may work while disregarding the lacking dual zone components, however the whole error code thing may still get in the way, preventing it from working.
-
Sure do. LOL. The flexibility of being a student and working part-time I guess. All my week is concentrated around Thursday, Friday, Saturday, and Sunday. Gives me lots of time during the week to lounge around and recover enough to survive another long weekend of fun.
-
It's funny how now with time, we are starting to see people who say with just city driving 20 min trips from suburb to suburb that they are averaging 14-15L/100km. If that had been the case, when I started this thread I wouldn't have been too concerned something was wrong with my car. I must say, I've learned a lesson about 6 cylinder cars and city driving. Too bad with fuel prices the way they are, they are now saying when it comes time to offload your Commodore, Falcon, Aurion, 380, we'll all get next to nothing for them. I'm not surprised with a higher fuel consumption for driving with shorter trips and with less distance travelled. However I reckon that you may probably get a lower real life figure when you manually calculate it. As well, when you calculate it over multiple tanks, you can get a better average figure. But as 'Pumped' said, the dash display is good for providing comparison figures between each other and I reckon it's useful to gauge how hard you are driving it. It would just be interesting to see more realistic figures when you want to know what it is really costing to drive. As for the whole 6 cylinder thing; you don't buy an Aurion to save on fuel costs. You buy it because it is a great car. I don't care that is costing me such and such per week in fuel. The car looks hot and is a pleasure to drive and that's all I care about :D
-
No worries. Glad to help whenever I can. I have managed to get that whole procedure down to an art now that pulling it apart doesn't seem like any effort at all. Kinda scary when you have the thought that someone can completely remove your stereo in under 1.5 minutes... which is how long I can take it out if I absolutely had to. So lets count up the times I've performed that procedure: 1) When I first got the car to cover the bright LED's in the stock head unit. 2) To test to see how the steering wheel controls interact with the stock head unit. 3) To install the new head unit. 4) To remove the transit screws on the new head unit. I tested the unit before reassembling the console, but failed to try the DVD until it was reassembled. 5) To plug in the reverse camera and TV antenna which I chose to install a few days after installing the head unit itself. 6) To try to see if removing power for an hour would solve the problem I had about a month ago. 7) To unplug the unit overnight to see if that would help. 8) To try unplugging the unit again overnight the following day. 9) To take those photos I've posted above. And this is for removing everything all the way to the head unit. I have removed the centre trim (photos 2-5) about the same amount of times in addition to that listed above because just about every time, I reassemble everything and forget to plug cable in for the A/C controls.
-
11) Remove the two bolts on the underside of the unit circled in red: 12) With one hand on the top of the head unit and one hand at the bottom of the A/C controls, pull forward to release the clips. Unit comes out as shown: That's really all you need to know. Unplugging the unit at the back is a no-brainer (I didn't go that far because I have settings I don't want to lose at the moment). Then if you need to remove the head unit from the A/C controls, just undo the screws on the side of the head unit. Just reverse everything to put it all back together. Edit: Might be my connection but, my last photo isn't displaying. Here is a direct link.
-
Okay, the guide is a bit rough, but it demonstrates the key points. Tools needed are a flat blade screwdriver and a 10mm socket or spanner. If your hands and fingers are small like mine, you only will need the shifter. 1) Firstly put the shifter into neutral and open the centre console box: 2) Then you need to unclip the top section of the centre trim. You can use the screwdriver to pry it apart, or your fingers: 3) Unplug the two connectors that I have circled in red: 4) Go to the front of the trim and using your fingers, pull back and away from the A/C controls to release the clips. Repeat for the other side: 5) Unplug the cigarette lighter power connector as circled in red: 6) About 1 inch in, insert the screwdriver (or other flat object), and pull away from the dash horizontally until the clip pops out. Repeat on the other side: 7) Pull the whole clock/vent assembly forward to release the remaining clips. Gripping the unit as shown seems to be the easiest way: 8) Unplug the lower connector for the hazard light switch. You may unplug the clock connector as well, but remember that it will reset if you do so: 9) If you just unplug the hazard light switch, you can place the unit on the dash as shown: 10) Remove the two bolts at the top of the unit circled in red: [image limit reached - continued below]
-
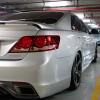
Wildfire Sportivo. Feels more special now that the Sportivos aren't available in that colour.
-
You know what... give me about 15 minutes and I will take some photos for you. The process is so easy (plus I've taken that apart so many times) that I am willing to take mine out for you.
-
That one certainly looks interesting. It has similar styling to the one that we were talking about here just with some minor differences. It appears that it has an external GPS unit as you can see in the product photo. It would be interesting to see what its GUI looks like since they have failed to show that in the product listing. It would be a little bit of a risk buying it though unless you could find others that have the same unit. But I guess ther eis always gonna be someone to take the risk. Just like DKzr6 was one of the first ones here to take the plunge and get the Auspack unit.
-
That is correct. The map needs to be in the 'Content>Map' folder. Does your map file end in the extension 'fbl'? For example, my map file is 'Australia8_R14_071017.fbl'. As well, when I obtained my map, I downloaded a 'DEM' file. Beats me what it does (it maybe 3D terrain from what I have gathered) but that goes in the 'Content>Dem' folder. I don't know if that makes any difference to whether the map will work.
-
Well I guess I will jump in first. If it involved pulling something apart, I am willing to try. I pulled my door trim and mirror off (now I can add those to the list of things I've done to the car) and have taken some photos and measurements while I was at it. For accessibility, when referring to photo number 2; in order from left to right on the car side (lower wiring), the colours are: White, Green, Orange, Pink, Aqua. and the mirror side (upper wiring), the colours are: Yellow, Yellow, Brown, Black, White. Here are my measurements for the wiring on the car side: White and Green are for the indicator only. The Orange & Aqua pair form the mirror HORIZONTAL control, and the Orange & Pink pair form the mirror VERTICAL control. Indicator off - White = GND, Green = GND Indicator on - White = GND, Green = +12v (only when light is lit up) Mirror up - Orange = GND, Pink = +12v Mirror down - Orange = +12v, Pink = GND Mirror left - Orange = GND, Aqua = +12v Mirror right - Orange = +12v, Aqua = GND So on the mirror harness, the two yellow wires are the indicator, Brown is the common for the mirror control, Black is the VERTICAL control, and White is the HORIZONTAL control. It all makes sense when you say your mirror has two extra yellow wires since those are for the indicator which your Camry didn't originally have on the mirror. Just simply connect the two yellow wires to the nearest indicator wiring. Polarity doesn't matter because it's only a bulb. With this colour reference shown above, you will be able to wire your mirror up without stuffing the direction control up.
-
That's how I did mine at first. Except I plugged into the connector using the crimp spade terminals (got all kinds of electrical stuff because of my industry). That method provided the most secure connection. I am a really picky person though and I couldn't stand having a gap in the position where the bulb holder goes so I put the holder back in and shove the spade terminals into that. Even if it could never really be seen, I couldn't stand the though of it being out of place. Speaking of fuses; man those miniature fuses the Aurion uses are something different. I have a blown fuse, which was there when I got the car, so I borrowed one form the spares in the engine fuse box. What annoys me though is the size of the fuses. Now I have seen blade fuses and mini blade fuses, but what on earth does the Aurion use. It's like a micro blade fuse and personally, I have not come across those fuses ever before. Everyone only really stocks the blade and mini blade fuses. I guess I will stop in at Toyota and talk to them about it. Unless one of you guys have seen them before and could suggest where to find some.
-
Closest you will find on this forum is Darius who has put Varex Cannons on his: - Exhaust system - Toyota Aurion with Varex Mufflers Some guy over in the US has put some HKS Hi-Power exhaust on his V6 Camry. That muffler is a form of cannon, but not the fart cannon/tin can variety. I don't think anyone would be stupid enough to go that cheap for their Aurion/Camry V6. A couple of YouTube videos for you: - 2007 Toyota Camry V6 W/HKS Hi-Power Exhaust - 2007 Toyota Camry V6 W/HKS Hi-Power Exhaust Outside Clip
-
Sure did. With two thin spade crimp connectors, there was no need to cut into any existing wiring. Should I need to return the light back to normal; just unplug the LED light and insert a T10 bulb into the lamp base.
-
I think we can call him 'Lord of Aurion' too. If you see alot of his posts and knowledge about aurion, I feel like he is from one of the toyota development ppl. LOL. You guys are so nice. My knowledge is mainly from playing with my own car and skimming through the service manual. If I get a question in regards to something, I will curiously seek the answer, even if it means pulling something apart on my own Aurion. I just like to pull stuff apart and learn from there.
-
Road was very wet tonight, was going about 40km/h so i pushed the foot right down & it dropped back 2 gears, held wheel spin for about 5 seconds then shuddered & I let off the gas. Speaking of yet weather, I'm always extremely conscious about accelerating in the wet with my Sportivo. The wheel hop on it is horrible.
-
Nothing too it really, but here are some photos of how mine is set up. I didn't even cut the 2 metres of power cable that it came with. I just tucked it into one of the spaces there in the boot (you can see where in the fifth photo). All I needed was a couple of crimp connectors and a 1.5mm drill bit to drill two pilot holes for the screws. With 21 LED's that cover a good length of the boot, this is one useful light to have. Jaycar - 12VDC Flexible 21 LED Lights
-
Just a single 5W T10 bulb. Quite pathetic eh?
-
Correct. The torque converter is just a type of fluid coupling. Having the engine side running at a much faster speed than the driven side will create a bit of heat. If this was to be cooled well though, the harmful effects of cooking the transmission fluid would be reduced. From the sounds of things, the TRD is already one step ahead with a transmission cooler. Probably not sufficient for some serious thrashing, but it's bound to provide some advantage there.
-
For me, the 92 degree viewing angle seems sufficient. It depends on how you want to use your camera. The main purpose of mine is to let me park properly. I always reverse park and prior to the camera, I would always have to open the door and stick my head out to gauge the distance. The camera had make it many times easier now. If you need to to make sure you don't hit any kids behind the car, you will find that whatever the camera doesn't see, your side mirrors will. So with that combination, a 92 degree field of view seems fairly sufficient. I was going to reverse out onto the street and set up some makers and take photos to give an idea of what the camera can see, but I just dried it after washing it... and it's raining. I'm quite fussy about having a clean car. Edit: Here are a couple of photos to show how close a small object on the ground needs to be to the rear of the car to be seen. Of course you can see objects that are closer to the car, so long as they are taller.
-
If you choose to go for camera '167', this is what my installation was like. My camera installation required drilling one hole in the boot lid and quite a lot of hacking at the plastic trim that covers it. The opening for my camera is about 2 times larger than what it could have been, which was due to my chunky personalised plate. I needed to mount it further back which required more plastic to be trimmed away to give it a good field of view. With a normal number plate, the camera can be mounted such that it sticks out further which will mean the resulting hole in the plastic only needs to be large enough to fit the camera through. I had to pull mine all apart today to trim more plastic to fix some blind spots and to add some silicone to water seal it, so I took the opportunity to take some photos. The hole drilled into the boot lid: The camera mounted with some silicone to water seal it. Was quite a mess to do: This is what the cut out in the plastic trim ended up looking like. It's a pretty big hole, but there was nothing I could do because of my number plate: The end result: This is what the camera can see. As well I have taken a photo with my digital camera positioned in the same spot as the reverse camera:
-
Gotta turn the car off then on again to turn TC back on. It will always activate when the car is turned on as a failsafe.