Jump to content


Reverse camera


DJKOR

Recommended Posts

Hi,

I've recently received a Nav unit that has the reverse camera functionality. I just need to mount the camera now but was wondering if any of you out there that have the reverse camera fitted (factory or aftermarket) could upload a picture of the mounting position for your camera.

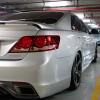
I just want to get an overall idea of the possible mounting points before I go ahead and drill a hole in my boot. I was really wanting a symmetrical look by mounting above the number plate, but my personalised plate is in a rather bulky frame which prevents me from doing so. The area I'm thinking of now is to the right of the number plate. I've already got a camera as shown in the attached picture, but this would be best installed flush with the boot lid on the same pane as the number plate, hence being more visible. My other option is to get another camera from eBay and to mount it so that it 'sticks down' (on the same pane as the number plate lights) and is less visible.

I was just hoping to get some ideas as to what other people may have.

Thanks.

66a3bb86a6.gif

Link to comment
Share on other sites

right above the car plate, that is my idea of where my reversing camera is..

which i will be getting when my sister reach 18 and start driving my aurion..

also, i remember that is the place MOST car factory/aftermarket puts..

Link to comment
Share on other sites

Yeah, I do realise that for this car (and probably every other car), the best fit would be above the number plate in the centre. The only reason why I am avoiding this is because of the design of my number plate and in my opinion, would not look so great. You can see in the attached photo just how close the plate is to the top, not to mention that the plate is about 1cm thick due to its frame. I was just wondering if anyone else has a camera mounted differently and if so, where it was mounted.

Click to enlarge:

th.31f157cfb4.jpg

Link to comment
Share on other sites


Yeah, I do realise that for this car (and probably every other car), the best fit would be above the number plate in the centre. .....

I've got my photo elsewhere in this forum, can not find it - You may want to look at this THREAD

Thanks for the nice highlighting. I have already seen that thread, and was well aware of Aurion ZR6's installation since he first posted it. I am also aware that he has done a HID installation writeup as well as a writeup on reversing the gear selector around. I have pretty much been through all posts on the Aurion forum. Anyways, I did say that: "I just want to get an overall idea of the possible mounting points before I was to drill any holes. I stated that I was trying to steer away from the centre of the number plate hence why I have asked: "to get some ideas as to what other people may have". This also left the topic open for any suggestions since I have mentioned my idea of mounting next to the number plate.

There may be someone that has experienced a different installation point. It was a simple question that's all.

Link to comment
Share on other sites

Okay. All good now. After some careful measurements, I managed to barely fit the camera in above the number plate. That way I have now used the camera that was provided as well as having night vision as well. Bit of a hassle to install, but I got there in the end.

Click to enlarge:

th.8f2eb21762.jpg

Link to comment
Share on other sites

Okay. All good now. After some careful measurements, I managed to barely fit the camera in above the number plate. That way I have now used the camera that was provided as well as having night vision as well. Bit of a hassle to install, but I got there in the end.

Nice job!

Been looking at installing mine for my SX6 also, so no factory mounting hole - but you can see the spot where it should go. Was it just a matter of drilling there with the provided holesaw or something else obvious?

Might install mine this weekend :-)

Thanks,

bok

For actually mounting the camera, it truly was as easy as using the included holesaw then mounting the camera. If you have the camera like mine, you can actually see the included angle cut sleeve to angle the camera higher for a better field of view. Then you need to create a cutout in the plastic part where the number plate mounts on. To do this, I used the holesaw then used a file and sandpaper to enlarge the hole so that the camera has an unobstructed view. Actually, there are two little edges that can be seen on my display but that is because of the way my camera is mounted and I didn't want to cut the plastic any further. I originally had the camera mounted so that it stuck out another 5mm, in which case it was an unobstructed view, but thanks to my chunky number plate, I had to move it back so it didn't stick out as much. Also, because of that, you can also see part of my number plate at the bottom of the display.

Edit: Here are a couple of photos. This camera isn't the greatest if you want the widest field of view, but for me, I only put the camera in because a) it came with the head unit and B) it will save me from sticking my head out the door to gauge if I am parked sufficiently.

Click to enlarge:

th.bfdab13b9b.jpg th.0594998bc5.jpg th.fe9e129145.jpg

One thing to notice as well (the picture doesntt do any justice) but the camera can actually see in a straight line back from the height that the camera is mounted at. The reason why you can only see driveway in the second pic is because my driveway is on a slope. You can see the top of the driveway in the picture, which lines up with the same height as the camera.

If you weren't really looking it's not that easy to notice the camera. I'm quite satisfied with the install. Like I already said, I've just got it there because it would be an unused feature otherwise, so it's not extremely critical for me to have the widest field of view. i will still probably take the panel off again later and see if I can improve the vision, but right now I have an assignment I need to finish.

Edited by DJKOR
Link to comment
Share on other sites

I was asked about the wiring so I thought I would post it here so others can see as well. For the reverse light, I connected the pink wire (Auspack unit) to the wiring that leads to the reverse lights. This can be found on the passenger side kick panel as shown:

th.76c232ee73.jpg

The connector you are after is the one that I've circled in red. The wire on this that tests +12v when reverse is selected is the red wire that is located in between the black and the grey wire as shown (if you position the connector so it is facing you like in the pic, the cable is the one in the middle closed to you):

th.90f34d1bea.jpg

As for powering the reverse camera, I simply connected it to the reverse light on the left hand side. Nothing special there, just the red with black trace for positive, and white with black trace for ground. My connections look bulky, but thats because I use bullet connectors to enable me to easily remove any modifications to factory wiring that I may have done.

th.a7383a4276.jpg

That's about all that I can think of that was required. Apart from that it is just the running of cables. However how you want to do that is up to you.

Link to comment
Share on other sites

thanks for the pics,, have been playing around today with mine and found the same thing with the obstruction,,will cut the plastic away more tommorrow,,had to go to toyota to get replacement white clips for reattstching the plastic garnish/trim..did you break yours?seem very brittle.

Yeah, I broke all four clips as well. Was quite the opposite of happy when one, then two, then three and four broke. It was more annoying trying to shake the broken plastic out the boot lid. I'm guessing probably due to the fact that it wasn't intended to be removed, they used a more solid clip. I couldn't be bothered to get replacement clips so I placed some silicon in the holes and the remaining center part of the clip was enough to hold to the silicon.

Link to comment
Share on other sites

Join the conversation

You can post now and register later. If you have an account, sign in now to post with your account.

Guest
Reply to this topic...

×   Pasted as rich text.   Paste as plain text instead

  Only 75 emoji are allowed.

×   Your link has been automatically embedded.   Display as a link instead

×   Your previous content has been restored.   Clear editor

×   You cannot paste images directly. Upload or insert images from URL.


×
×
  • Create New...

Forums


News


Membership