Jump to content


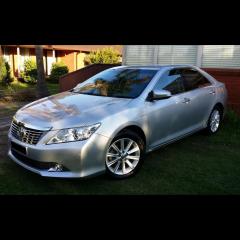
Aurion Wash Day


Recommended Posts

G'day Gents,

I woke up yesterday morning and took a stroll outside and saw a very sad looking Aurion. A feeling of guilt overwhelmed me as I hadn't washed it in God knows how long. My life has been quite hectic and I'm either busy or tired.
It just had to wait, but that morning, it was go time. I mustered all my energy, pulled out the gear and started at around 7am.

20230422_070942(4)-Copy.thumb.jpg.a2de8516d718a3b6e90736fe043694ef.jpg20230422_070958(2)-Copy.thumb.jpg.cf71a13b38b36a4b2bc55e9fb4b0b15c.jpg


20230422_071008(2)-Copy.thumb.jpg.9454f506698bcff5275d1a0adacd2dfe.jpg


20230422_071013(2)-Copy.thumb.jpg.4cea978395994721801d10aafb8acfb6.jpg


20230422_071018(2)-Copy.thumb.jpg.9df87e7664a6ccb0bf8ce956d234ecb7.jpg


20230422_071027(3)-Copy.thumb.jpg.953bc0635e1ea1bbc201fa5d974b7170.jpg20230422_084537(2)-Copy.thumb.jpg.8bda76290161529c15c54a5fcfdc38a7.jpg


20230422_084550(2)-Copy.thumb.jpg.cf7e4162eaa92959be591707d90ad256.jpg


20230422_084553(2)-Copy.thumb.jpg.be41236cc4bd343f156b96a9a40f3125.jpg


20230422_084640(2)-Copy.thumb.jpg.8760f3e79348f00244cb4b652bf8474a.jpg                               20230422_084611(2)-Copy.thumb.jpg.1665aa997762e3481470edd7cd1fd9de.jpg


20230422_084619(2).thumb.jpg.35b6c92b1ffe8262688c3f828bbee7d8.jpg


20230422_084628(2)-Copy.thumb.jpg.10235d4ef9628f587de678943a7379c5.jpg                         20230422_084647(2)-Copy.thumb.jpg.492134384dde3d0435bf7a5d00d6e0fb.jpg


20230422_084557(2)-Copy.thumb.jpg.fb29cb11e214de6e97a34b5bffa7c59c.jpg


20230422_084657(2)-Copy.thumb.jpg.8d32c225e31adf2118d655e43b41b664.jpg


20230422_084849(2)-Copy.thumb.jpg.34c030deee9a79e4f4df3f11f4188275.jpg


20230422_084851(2)-Copy.thumb.jpg.520aa51c8d3e0e93e9c061581b118996.jpg


20230422_084855(2)-Copy.thumb.jpg.42f4ce4af80ea8784e54ced5fe855db8.jpg


20230422_084946(2)-Copy.thumb.jpg.221a176fbab5edb0b949f13ec65d852d.jpg

I didn't go to town this time, but I gave it a thorough clean inside and out.

First order of business was to remove everything from the inside so I could give it a deep vacuum. After a thorough vacuum, I got the compressed air blower gun out and blew any hard to reach debris under the seats and in between the seats and centre console. The parcel shelf also got a serving. There are those nooks and crannies that even your vacuum's crevice attachment can never reach. So off with their heads with the blower.
I then followed this up with a final vacuum. Vacuumed the floor mats and the 3D mats which sit under these. Wiped over dash and steering wheel with a microfibre towel dipped in hot water. Also cleaned all the inside surfaces of the glass, windscreen too. Best way I found to clean them is with is a microfiber cloth dipped in hot water. No streaks and no smears. The hot water takes care of all that.

Used some Sonax interior cleaner spray for the hard plastics and the seats. It also leaves a nice fragrance too.

20230423_123006.thumb.jpg.9ab5eee1270654c0c9669077903ff053.jpg

Once the inside was buttoned up, I got cracking on the outside. Mind you, this wash wasn't intended to be like a previous epic wash I did a few years back where I pulled the wheels and did the underside sections too. Too be honest, I didn't have the time nor the energy to do that this time, but there will come another epic wash and detail in the future. For now It was to just give it a decent clean without going overboard.

I usually like to tackle the wheels first. I spray two wheels at a time  with my favourite wheel cleaner to allow dwell time. Front wheels were pretty bad, so I had to do those twice. I cleaned the front inner plastic wheels liners as far as I could reach, so they look pretty decent from the outside. Suspension etc have to wait till next time.

20230422_091335(2)-Copy.thumb.jpg.dc5bdb260e04c86803bc99af27dbbff1.jpg


20230422_091342(2)-Copy.thumb.jpg.cbb070ea2bd3e62211f61bce2822f984.jpg


20230422_091358(2)-Copy.thumb.jpg.a93002525a30649e48fc373dbdcd8ab7.jpg


20230422_091401(2)-Copy.thumb.jpg.8f0b9b36457a607ebac198623cb32e14.jpg


After the wheels were sorted,  I applied some iron remover to the top sections of the car to asses how bad the contamination was and it was bad. Many months had accumulated so much fallout, that this will have to be addressed on the next major detail. I didn't want to waste what little product I had left and figured it's going to be done next time anyway, so I didn't go nuts here either. Then. I got to washing. Usual practice, pressure rinse, then foam canon, the rinse, followed up with a hand wash.

20230422_094455(3)-Copy.thumb.jpg.1d0a08e425ac96d9cb3d04e6e3a9b956.jpg


20230422_094511(2)-Copy.thumb.jpg.8baa544dc9758a37239d539cdc867d9c.jpg


20230422_094526(2)-Copy.thumb.jpg.17131e7ebbe87bbed9072d37f6f47f54.jpg


20230422_094842(2)-Copy.thumb.jpg.af12e60ae019e5582118dcf991005a13.jpg


20230422_094858(2)-Copy.thumb.jpg.01c106b815973a571af9c3a06a48fb37.jpg


20230422_094910(2)-Copy.thumb.jpg.0baa8c9a9b189080b8ba61f831592288.jpg


20230422_101407(2)-Copy.thumb.jpg.8c297e031649a6408d453ed39e1e8617.jpg


20230422_101420(2)-Copy.thumb.jpg.a26fa07c97bbcfb7a45e7eef19308cc5.jpg


20230422_101426(2)-Copy.thumb.jpg.e87e0c744f7fd45ab3a4cfb71d5846ea.jpg


20230422_101446-Copy.thumb.jpg.ad5789da1ad858a8afacb23ea3a286bf.jpg


Engine bay got a similar treatment too. Removed engine cover to reveal more dirt. I covered the alternator properly with a plastic bag. Be careful with these. Keep them dry and protected so your wash products don't get inside.


 After car was done, I turned my attention to the headlights. The right side headlight was a bit more yellowed than the left as this part of the car tends to get more sun than the left where it's parked at Wifey's workplace.

20230422_115412(2)-Copy.thumb.jpg.d3dc22ad3c73f6d3054ae3cbb24be148.jpg

20230422_135459(2)-Copy.thumb.jpg.303141f79d9563090c4ccc9d8501744e.jpg


20230422_115420(2)-Copy.thumb.jpg.e2482453dfe21040d993545081c91c24.jpg

20230422_135505(2)-Copy.thumb.jpg.e12771794c1cefee42d38f949f504053.jpg


I got my Flex buffer machine out and proceeded to cut and polish both headlights. I then took to doing some spot buffing to remove some incidental marks here and there. Gave the top section of the doors, quarters and front guards a hit too just to clean up the upper boat line. After a nice wipe down, I applied a generous coating of Turtle Wax's Flex Wax. 
I gave the bonnet and headlights 3 coats as it's the area which cops the most abuse.
This should keep it protected for some time. The next time I visit this, I'm going to machine polish the entire car and apply a dedicated ceramic coating for extra longevity.

Once this was done, I applied the Rain-X treatment to the glass. Two coats on the windscreen. Also apply some to the wiper blades too.

Tire dressing applied.

With the car completed, I packed away all the gear, took it outside for some beauty shots.


20230422_135451 (2) - Copy.jpg

20230422_135517 (2) - Copy.jpg

20230422_135537 (2) - Copy.jpg

20230422_135543 (2) - Copy.jpg

20230422_135602 (2) - Copy.jpg

20230422_135616 (2) - Copy.jpg

20230422_135633 (2) - Copy.jpg

20230422_140106 (2) - Copy.jpg

20230422_140112 (2) - Copy.jpg

20230422_140117 (2) - Copy.jpg

20230422_140123 (2) - Copy.jpg

20230423_110141 (2).jpg

20230423_110148 (2).jpg

20230423_110155 (2).jpg

20230423_110201 (2).jpg

20230423_110212 (2).jpg

She's good as new !

Thanks for reading guys. Till next time....


Edited by Tony Prodigy
  • Like 1
Link to comment
Share on other sites

Far out! I wish you lived in QLD so I could pay you to wash mine like that! haha. The comparisons are amazing. Great job!
What did you use for your wheels?

I'll definitely try the hot water for the windscreen next time! I always end up swearing and getting angry that the 'No Streaks' window cleaner I use leaves...streaks... So I'll definitely give that a shoot next time I clean her!

Link to comment
Share on other sites


30 minutes ago, Twixter said:

Far out! I wish you lived in QLD so I could pay you to wash mine like that! haha. The comparisons are amazing. Great job!
What did you use for your wheels?

Thanks for the compliment mate. If I did live up there, I'd gladly help everyone.

For the wheel cleaner. I have three different products at the moment. The one I used here was a P&S product called "Brake Buster" but I still have some Nextzett left and a bit of Duragloss all wheel cleaner. All three have been my main staple for wheel cleaners. All three are PH neutral and safe to use. Just make sure to give the wheels a good rinse to get all the residue off. 

1 Gallon / 3.79Lt of P&S is around $50. Excellent value as you can also dilute it down to suit, but I like to use it neat.|

Brake-Buster-Main.thumb.webp.3116547e430fb6affc9548242294aed7.webp


1 Gallon / 3.78 Lt of Duragloss is around $75, is a good product and cleans really well. Middle of the range price tag.


1_2.thumb.jpg.8e7f62f8ff94857ed12792a9e59e0485.jpg


5Lt of Nextzett is around $124. The most expensive and aimed at the commercial end of detailing shops. Very effective cleaner but a bit too expensive for the DIYer. I'd still use it again, but I find better value with the P&S product.

113012-colourtec-wheel-cleaner-5l_1.thumb.jpg.d0643b17f1d3b5beec0def141a8c8be6.jpg

Another form of Nextzett is one that has a colour changing formula. On that changes colour as it dissolves iron fallout. Same product as the above 5Lt variant where the 5Lt one doesn't colour indicate. Both do exactly the same job in terms of performance. I've used both.

113011-colourtec-iron-wheel-cleaner-500ml_2.thumb.jpg.6d65d7f088b6381e9a3f14e25606d80b.jpg

The green colour you noticed on my wheels was a combination of using both P&S and Duragloss. I thought I'd do a Frankenstein approach and see if they play well together. They did, but I got that green slimy colour for whatever reason, but no harm done. Wheels came up pretty schmick. I also used a wheel brush to get inside the barrels too. I cannot stand looking at a wheel if it's only  had the face done. You have to get inside the barrels too for a proper job. The wheel cleaner makes this very easy. Try and spray the inside barrel whilst coating the face, or even better, to remove the wheel completely and do them off the car for best results. I'm fussy so I like to just try and do my best with them on the car. When I do an epic wash, I remove all four wheels and do the underside, suspension, inner liners and inner wheel barrels.

34 minutes ago, Twixter said:

I'll definitely try the hot water for the windscreen next time! I always end up swearing and getting angry that the 'No Streaks' window cleaner I use leaves...streaks... So I'll definitely give that a shoot next time I clean her!

You never need to clean the inside of the glass with chemicals. I learned that trick from a mate of mine many years ago and as simple as it looked and sounded, it made perfect sense. Try it and you see. 

What happens is the hot water on the cloth acts to dissolve any grime and because it's hot after the glass has been wiped, any water traces left quickly evaporate leaving the glass streak free. Just make sure you use either a new cloth or one that has been washed well so it's not contaminated. Dip it back into the bucket of hot water for each window. For the windscreen, I usually do it in three sections, then one final sweep from left to right to blend it over.


1_1_1.jpg

  • Like 2
Link to comment
Share on other sites

  • 2 weeks later...

There's something therapeutic about watching someone else work on an interesting subject like car detailing, a professional job Tony, nice 👍

  • Thanks 1
Link to comment
Share on other sites


2 minutes ago, ZZT86 said:

There's something therapeutic about watching someone else work on an interesting subject like car detailing, a professional job Tony, nice 👍

Thanks mate. It is in itself a form of therapy "cleaning" the car. Once I'm all set up, it's ok. You just need to find the right day, time and have plenty of energy. This job took around 6 hrs.

  • Like 1
Link to comment
Share on other sites

Join the conversation

You can post now and register later. If you have an account, sign in now to post with your account.

Guest
Reply to this topic...

×   Pasted as rich text.   Paste as plain text instead

  Only 75 emoji are allowed.

×   Your link has been automatically embedded.   Display as a link instead

×   Your previous content has been restored.   Clear editor

×   You cannot paste images directly. Upload or insert images from URL.


  • Join The Club

    Join the Toyota Owners Club and be part of the Community. It's FREE!

  • Latest Postings

    1. 1

      2001 Toyota Camry wagon passenger side locks not working

    2. 4

      Auto door locking on new 2024 C-HR?

    3. 0

      Has anyone found 200 Series Rear Screen Delete Cover in AUS

    4. 11

      Low Fuel Warning Light Flashing

    5. 1

      2007 - floor mats

    6. 1

      2001 Toyota Camry wagon passenger side locks not working

    7. 0

      2002 Hilux Engine Replacement

    8. 3

      Engine conversion

    9. 0

      Po299

    10. 0

      Boot Dimensions?

×
×
  • Create New...

Forums


News


Membership