Steven
-
Posts
1,945 -
Joined
-
Last visited
-
Days Won
13
Content Type
Profiles
Forums
Events
Gallery
Tutorials
News & Articles
Videos
Everything posted by Steven
-
A few months have passed so I figure I might as well update this thread. I succeeded in bolting on the Gen3 Twin pistons using the above bracket and using 320x28mm Lexus RX330 rotors. Under pressure these brakes perform very well but need to be paired with a decent pad to get the most out of them. I have been running these for about 3 months now and haven't had any issues. They have a very good feel but are a bit "touchier" than standard, but only slightly. In the last few days I have obtained a new lead for a brake upgrade from Viking Dave, who suggested that the 2007+ Toyota Kluger front brakes might be a direct bolt on. <removed due to new information being found> The calipers are a twin piston design, which uses a brake pad with almost as much surface contact area as the TRD brake pads but are a very different shape. Kluger (DB2004) 167 x 59 x 17 mm TRD Aurion (7599) 184 x 63 x 14 mm Camry Gen3 Twin Piston (DB1209) 141 x 63 x 17 mm It also appears the 07+ Kluger and the Lexus RX350 might share the same brake caliper, however I've only found suggestions of a 4-piston design on the Lexus and yet some diagrams show a very similar twin-piston design so this is unconfirmed. Based on the above it's very possible the Kluger front brakes will be a direct bolt on to the Aurion and also most Camrys, however I can't guarantee this until I can locate a Kluger brake caliper to experiment with. I've sent off requests to several wreckers hoping for a hit and if the price is right I'll likely attempt this mod. Pic below is of the caliper on the 07+ Kluger (shamefully nicked off the forum)

-

Ticking nose from exhaust after longish drive
Steven replied to Silver-Aurion's topic in Aurion / TRD Aurion Club
That's the new "anti-hoon" device if I'm not mistaken -
updated the instructions re: disassembling the switch.
-
Car's back from the exhaust fitter and working great. I also have a decent exhaust now (although it does have some drone at highway speeds) Turns out the worst had happened and the varex internal "flange" had fully snapped off and been forced to the rear of the muffler, effectively blocking it completely regardless of how the motor sat. I suspect it's been snapped off for a very long time now due to no difference when using the remote, but it probably still let the exhaust flow through in the "closed" position. This explains my ****ty 1/4 mile times and my unusually bad fuel economy. Below diagram gives a basic idea of the problem. I replaced it with a straight through pipe as I can always easily throw in another muffler down the track if I choose. Big cheers to DJKOR though as without his help I wouldn't have been able to diagnose it so quickly
-
I think we misread the readings yesterday. Where the calc load value is over 40%, there is another value called "absolute load value" much further down which actually reads around 20% (this was with the exhaust dropped though). I wish I had noticed it with the exhaust attached but that can't be helped. Here's hoping the car actually drives properly now. EDIT YES she feels considerably better when taking her for a spin. Sounds like a huge vacuum, but the power feels like it's mostly back. Now I just need to find a shop to do the final adjustments this morning.
-
Date - Saturday 29th October 2011 Time - 9am at the Loop (see Brisbane Thursday meets thread for location if unsure) Cruise - From the Loop DJKOR will be leading the cruise to Jolly's Lookout on Mt Nebo where I'll have set up a sausage sizzle (gold coin donation is appreciated but not compulsory) but BYO drinks. Should be pretty quiet at that time of day so parking won't be a problem. After we've filled out stomachs we'll continue on towards Mt Glorious and Wivenhoe Dam and stop for some pictures along the way so clean your car if you want some professional snaps for your album. After pictures the return route is the Warrego Highway and we'll peel off on our own ways back from there. On the night before I'll be driving the route to scope out possible photoshoot locations and also identify any potential hazards, so check this thread early morning for any final updates. There won't be a heap of us but the pace WILL be set by the lead car (either DJKOR or myself), the road can be tricky in places and I don't want anyone getting into trouble whether with the law or mother nature. Hope to see you all there! Current list as of 8/10/11 - YES / NO (bold indicators confirmed) 1) Steven 2) DJKOR 3) Branno 4) GDUBB 5) EVO7 6) MoggillSX6 7) Mick.Wheelz 8) Matt-Starlet 9) KIRIUS
-
So essentially the only non-cosmetic damage is the windscreen? They want to scrap a car, contributing to landfill, due to a windscreen? I'd actually consider contacting major media outlets regarding this, as it seems to fly in the face of Government agencies trying to cut down on waste. You won't change the law, but you might suddenly get that exemption if it appears in the paper. On second though, I'd take that reasoning to the RTA and keep escalating it, with questions like "why is my vehicle no longer safe on the road if I get a $200 windscreen, a standard replacement item for cars everywhere? Why is the RTA keen on increasing landfill when the vehicle has no permanent structural damage or major defects?" Also state (once high enough up the chain) of your intentions to contact the media about this, and that you've documented every person you've spoken to and their responses to supply to the media. That regional manager is more likely to play ball if it keeps his name from being highlighted in a newspaper article for HIS bosses to read.
-
In before every nominates DJKOR
-
Driving up a small hill today and suddenly the car felt like someone dropped a caravan onto the non-existent tow bar. Most of the power seemed to completely disappear and she didn't want to rev anymore. No error lights or horrible noises, short of a slightly rougher idle (very slight). With the help of DJKOR we determined she was running 40% under load when in park (you want around 20%). Me thinking it was something to do with a blocked exhaust, I've dropped the exhaust after the cats. Found the varex muffler which I had long found to not make much difference whether open or closed, was actually jammed shut. The motor turned but the butterfly does not. Interesting to note with the exhaust dropped, engine load is actually 48% - go figure? So I know the varex was blocked but SHOULD still have flowed somewhat event with the butterfly shut due to how they're designed. I need to take her for a drive in the morning with the exhaust dropped ( ) to see if the lack of power still persists.
-
The exhaust manifolds are exactly the same, and can be found at wreckers however due to the included cat they sometimes ask a fair bit for them. Still far cheaper than genuine though
-
Possible to install a Supercharger to my ATX?
Steven replied to TRDATX's topic in Aurion / TRD Aurion Club
Is it possible? Yes, walk into a performance shop and drop 10g and if you're lucky that MIGHT get you the TRD set up. Many people suggest just swapping into a TRD, but if the power bug has bitten then it won't let go with just that and unfortunately the TRD is like the standard Aurion in that it's hard to get more power out of it. Plus just the swap alone (Especially from an ATX) it likely to be more than 10k, although you get more than just the power boost in that swap. I myself am looking for more power (if I stick with my sportivo) but know the only real way is via Turbocharging. It's been done and offers more power than the TRD, but hasn't yet been pioneered into an off the shelf kit. If you're dreaming, then leave it at that. If you're prepared to lay down the big bucks, then get into contact with well known performance shops. They'll direct you far better than anyone on a forum ever could. -
Goku can't fly in space, no oxygen. Just saiyan :P
-
I'm afraid you're simply over thinking it. The flickering was caused by a poor connection in the switch itself, due to the freeplay the switch has internally which causes the contacts to easily become sub-par. The contacts themselves upon inspection were perfectly clean, just very poorly aligned. This mod is about increasing the average surface area regardless of the free play within the switch, so it maintains a good contact. Further by "welding' the plastic on the exterior housing it does a bit towards removing a bit of the free play. The flickering most people notice occurs the instant you switch to LEDs. If you're theory was correct, then the flickering would take time to appear once changing to LEDs. In reality the "flickering" is always present, just less observable when using bulbs due to their lower sensitivity to voltage fluctuations.
-
What did you do to your car today?
Steven replied to JustinW's topic in General Toyota & Other Car Discussions
'bout time B) -
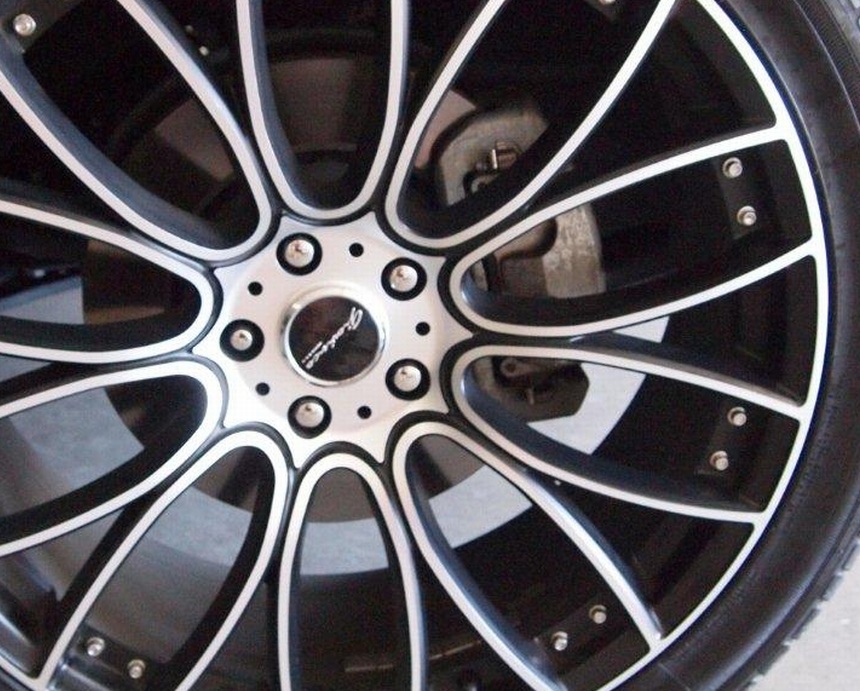
I also don't recall seeing those wheels the other night. Nice to see some work done on a TRD. Hopefully it might encourage certain other TRD owners on here. What's the little red button below the air con for?
-
What did you do to your car today?
Steven replied to JustinW's topic in General Toyota & Other Car Discussions
What are the dimensions of the rear brake by the way? -
What did you do to your car today?
Steven replied to JustinW's topic in General Toyota & Other Car Discussions
Removed both front door trims and went metal trying to remove every rattle and loose piece of trim in there. Also lubricated all the locks with bike lube which works surprisingly well Doors now feel like new, hopefully they creak less now when on the road. Also fixed the door courtesy lights flickering which has been a long term annoyance of mine. Completed an FAQ in the Aurion section on how I did it. -
Also best to clean the mounting screw when reinstalling. Toyota in all their wisdom decided to paint/coat the screw, which can affect the quality of earth you will get. A quick polish with a grinder/file will see if earthing that much better.
-
For many people here who've done LED upgrades to their interior, you'll probably find the door courtesy lights develop a random flickering effect after doing the swap to LEDs. The reason for this is the poor connection the door switches have to earth when open. The following is a method to fix this problem, however it's a bit involved and you can very easily bugger your switch if you're not careful so follow at your own risk. First of all you will need to remove the switch, which requires the removal of a T30 Torx screw. Once unscrewed simply pull out and unplug it. If you don't have enough slack you might need to unplug from inside the car. I found I had plenty of slack on the back seats, but for the fronts I needed to partially pry off the lower B Pillar trim panel and unplug from behind. Once free, remove the black weather proof cover. Now to disassemble the switch you can do it the proper way, or my way. If you know the proper way then that's fine. My way involved grabbing the steel mounting plate with my left hand, and pulling the back of the switch off with a pair of pliers. For me the switch came apart very easily and didn't cause it any permanent damage. NOTE - I just tried this method again and it resulted in the switch being damaged. I would suggest not to unclip it this way, but try to unhook the clips that hold the back half on. It's a bit more time consuming but it's far safer. Once apart you have the following parts. The first part of the fix involves reshaping one side of the metal flange that sits inside the "pin". The side you want to reshape is that which makes contact with the tab on the steel mounting plate part of the switch. Try to match the above shape as best you can. Essentially you are just making the contact area larger, but also longer as well. With a pair of needle nose pliers this is fairly straight forward. The second part of the fix requires you to make the long flange on the rear half of the switch a tad more inward, but still shaped so it flows back on itself. So if the flange is like this ------^ You want to shape it a bit more aggressively like this _______/`\ if you get what I mean Now that's sorted you can reassembled the switch. Test with a multimeter to ensure you have a circuit with the pin is fully extended, and no circuit when the pin is pushed fully in. The next part is optional, but I found it gave the best results as it removed the free play from the plastic switch housing and made it far more solid. Take a lighter or soldering iron to the seam between the 2 halves of the switch and melt them together. You don't need to melt it very much at all to make it very strong. Removing this extra play makes the switch contact stay that much more stable once reinstalled in the car. Reinstall is the reverse of removal. Hopefully you should now have a flick free door courtesy light. NOTE Please check to ensure the light does in turn off when you close the door fully. If it doesn't, then you'll need to drill a very small hole in the tip of the pin and insert a small screw. This will allow the door to push the switch in that tiny bit extra to ensure it turns off. I only had this problem when doing my back doors using a different method to the above.
-
NO! Don't get a job at Ford spare parts! You'll never have a moments peace! :P
-
I probably should mention I'm using the spring set for the 2007 Toyota Camry from the King's catalog. The rear springs are the same as the Aurion version, but the front's I believe are a tad lower, so make up for the implied lower front end weight (despite the fact they all use the same springs from factory).
-
Will they give you the time off to go do this? Wish I had that much leniency at my work
-
Camry and Aurion use the same springs, having the v6 up front did not change what springs were fitted at factory
-
I know what you were talking about! I was joking I can keep been salmon if that sounds better :P. What would be cool is getting you guys on TV, Ha..... Just wondering, how would being a loser affect your new job?
-
Whelp, I took her for a long semi-relaxing drive up Nebo this evening to get a feel of how she drives now. It was more about driving smoothly, so that meant preemptive gear changes, good lines through corners and minimal use of heavy braking. When around town the lowered springs can cause a semi-rough ride, around the mountain road it felt perfectly at home. With the wide tyres it just flows through the corners now and many times I couldn't believe how quick she was. The downside is that I've found it still has some scrubbing from the rear guards, which was partially the reason for the drive in the first place. On closer inspection back home it appears a bit more rolling and a teeny bit more of a flare is needed.