

Tony Prodigy
-
Posts
3,367 -
Joined
-
Last visited
-
Days Won
443
Content Type
Profiles
Forums
Events
Gallery
Tutorials
News & Articles
Videos
Everything posted by Tony Prodigy
-
HUH ??
-
I totally agree. How hard can it be ?
-
3K for a tailgate motor job is absolutely ludicrous. They fill these cars with all this junk and expect us to cough up an absurd amount when it fails prematurely ? Tell 'em they're dreamin'
-
Even if he doesn't get off the ship himself ?? Why would they quarantine a cargo ship, are they crazy ? Unload the ship and then they can P.O.Q. Simple.
-

Latest Electric Car News and Developments
Tony Prodigy replied to campbeam's topic in General Toyota & Other Car Discussions
Excellent videos Ash. I am a huge fan of recycling. The E-waste coming off of all the battery powered devices should prompt the responsible handling of these valuable resources to be able to take the burden off mining as such. Mining will and have to exist obviously, but we should not be reckless about it either. We've had too much risky behaviour from the Nuclear sector in the past and we really cannot afford to add another one to the mix. I'm sure they'll come up with improved solutions as we go forward and it will be exciting to see how they will handle the ever growing demand for lithium ion batteries. It's going to be huge, even after we're gone, the future generations will have a huge responsibility on their hands. It would be a great opportunity for the Australian Govt to get involved in these recycling programs here too and restart the manufacturing industry they killed off. We need our independence back as we move into uncertain times.. -
It's funny how far behind we are in terms of tech, but I think the gap is closing now. Back then it was shocking. I believe your Corolla and other Toyota variants of that era do have what looks like an OBD port but it's not OBD II compliant. I think it's a proprietary Toyota system and Toyota have the machines for these if I'm correct. It wasn't until 2006 when it was mandated across the board. Why did it take so long though ? The U.S had OBD II protocol in place in the mid 90s ! So I have no idea how you guys can read your codes unless you take it to the stealership. We had a similar question posted in the Avalon section regarding this very thing. Some guys have purchased OBD II readers and they don't work not realising what they actually have isn't OBD II despite it looking the same and the device fitting the socket ! Anyway, I hope you get your speedo sorted. Keep us posted Marco. Have a nice day
-
I'm wondering if the head gasket could be going bad. A compression test can confirm this. Also these below. Bad head gasket symptoms White smoke coming from the tailpipe. BUBBLING IN THE RADIATOR AND COOLANT RESERVOIR. unexplained coolant loss with no leaks. Milky white coloration in the oil. Engine overheating
-
Ok. Thanks for clearing that up. I did think that there was a possibility of it being a full mechanical, but then got thinking it's a 2000 model and electronics had been creeping in at this point and figured it could have an electrical plug from which the signal is delivered to the speedo via the mechanical/speed sensor device. I don't have a Corolla as such but most other models are pretty similar in nature. So were you able to see why the cable popped out ? You think someone's been fiddling back there ? I wonder if someone had tried to wind the kays back and fumbled their way through it and inadvertently messed up the calibration of the dial. It's also possible the cable could be damaged internally causing the erratic speedo or the speedo has an issue. I suppose you could pick up another cluster pretty cheaply no ? Those are the two scenarios I'd explore. It's good that you're handy and could attempt the work. Most would find it too daunting. I guess it's the only way to learn hey ?
-
Strange one Marco. I had a little time to dig into this a bit further and I don't believe the cable runs to the cluster mechanically. There is a speed sensor at the trans which converts the rotation into an electrical signal and then via the electrical plug that cable/wiring goes to a socket in to the back of the dash cluster. If yours has the mechanical/ speed sensor arrangement, it is possible the plastic drive gear may have broken inside the trans and has lodged itself somewhere. Watch this video and see if it compares to what you have. To remove the speed sensor is pretty easy. Just undo the 10mm bolt and it will slide straight out. You can then inspect the teeth on the sensor and possibly be able to peer down the hole for the other gear. Grab a bright LED light and take a look.
-
You're welcome Shazzy. I hope you have better luck getting it sorted. Let us know how you go. Cheers
-
Latest Electric Car News and Developments
Tony Prodigy replied to campbeam's topic in General Toyota & Other Car Discussions
I came across this video and it really opens your mind to the complexities and the perpetuation of a new kind of pollution. While the climate alarmists sound the siren on C02, they forget how dirty the process of mining and refining lithium is. Why aren't they crying about this too ? The statement being made is "How Green is you Electric Car" ? When they want to base the future on Lithium batteries, watch the video and see what you think. Me personally, I think Hydrogen would be the way to go as an alternative to fossil fuel because I can see us paying a heavy price for the pollution to come from lithium mining. The almighty dollar will rule, as always, while the rich keep poisoning our planet. Recklessness will have its consequences. Watch this. -
Hi Marco, Was the ticking noise from the dash cluster or from outside the car, presumably the transmission ? Sounds like you have a cable driven mechanical speedo and it's possible the gears may have stripped and deposited themselves somewhere inside the transmission. That is, if the ticking sound was at the trans. If you are able to locate the speedo cable to where it attaches to the gearbox, there should be a 10mm bolt holding the clamp for it. Undo it and try and pull the cable out to inspect the gear wheel. If it's missing a few teeth, then that would be the speedo issue. Not sure if this could have had an effect on the 4th gear not engaging, but it's a start. Have you ever changed the gearbox oil ? If not, maybe this would be a good opportunity to if you are handy. Drain the fluid and see if there is anything in it.
-
Glad to here it arrived. I suspect it has a steel deck and not aluminium. My Honda has a steel deck and it too is a bit hefty being 21", which is why it has the hydro transmission to do the heavy work for me. I cannot imagine trying to push it around without it. This is the part I love and look forward too. There's something strangely satisfying in lavishing some attention in the order of preservation. It's like an invisible barrier or force field. It will getting dirty and dusty, but the clean up will be a lot easier for sure as the dirt will not stick. Allow the machine to cool, soak it with all purpose cleaner to help loosen off the dust and dirt and then pressure wash. I'd even give it a sudsy hand wash if required too. Then just give it a wipe with a dry microfibre towel so you don't get those nasty water spots and she will look sharp for a long time. Re apply your sealant regularly to maintain the coating. Congratulations on your purchase.
-
My Epic Detailing Weekend ! Post Has been Updated
Tony Prodigy replied to Tony Prodigy's topic in Aurion / TRD Aurion Club
Ahh, you're too kind Robert. Thanks for your kind words too. I felt really bad letting it get to that stage and so it was necessary to spend the time to bring it back to a certain level. I can rest a bit easy now 😉 It's far from perfect but it's as good as it gets despite no paint correction as such. The next major detail will involve a 3 stage polish and a dedicated ceramic coating. There's really no point to apply a ceramic coating on paint that hasn't been polished to perfection. This will further enhance gloss levels. The main objective here was to remove all the stuck on contamination, give it a thorough clean and apply the sealant for protection. The Turtle Wax Ceramic wax is an awesome product and it feels really slick. Just this morning as I was leaving for work, I had a quick look around it as it has been raining here, and it's beading like crazy ! I had a grin on my face actually. Very satisfying stuff. Cheers mate -
Check that all pins in the connectors are making contact. After market parts tend to be a little wonky in the QA dept.
-
Hi Sharon and welcome to the forum. It's hard to say definitively what is going on but it's weird how the two front doors failed at the same time. Just wondering what test the auto electrician carried out to make the determination he did. Did he explain it to you ? Is it possible that there is some loose wiring perhaps in the main harness to the doors. Has any collision repair been done recently ? If you are able to get a second opinion, this may be of some value to you. Some shops are unashamedly over quoting to claw back money lost during covid and it's possible it may not be what it seems. If you need 2nd hand parts, I'd take the initiative and call a few wreckers in your area and get a feel for the pricing structure for your particular car. I can't see how two door lock solenoids can costs $670. That doesn't sound right. I'd guesstimate approx $100 each, maybe. Do you know anyone who is handy and has a multi meter. They can test the circuit and see if power is actually getting through to the door locks. If it's all too much for you, then perhaps just live without it until you can find someone who can help. Let us know how you go. Cheers
-
My Epic Detailing Weekend ! Post Has been Updated
Tony Prodigy replied to Tony Prodigy's topic in Aurion / TRD Aurion Club
Line 'em up lol.. I have since updated the post as the original post didn't work so well with the picture links. Sorry for any difficulties. It's all sorted now. Prep is 90% of the job really. You really need it to be squeaky clean before applying any sealants. This way the product will work better and last longer. Thanks for your post. -
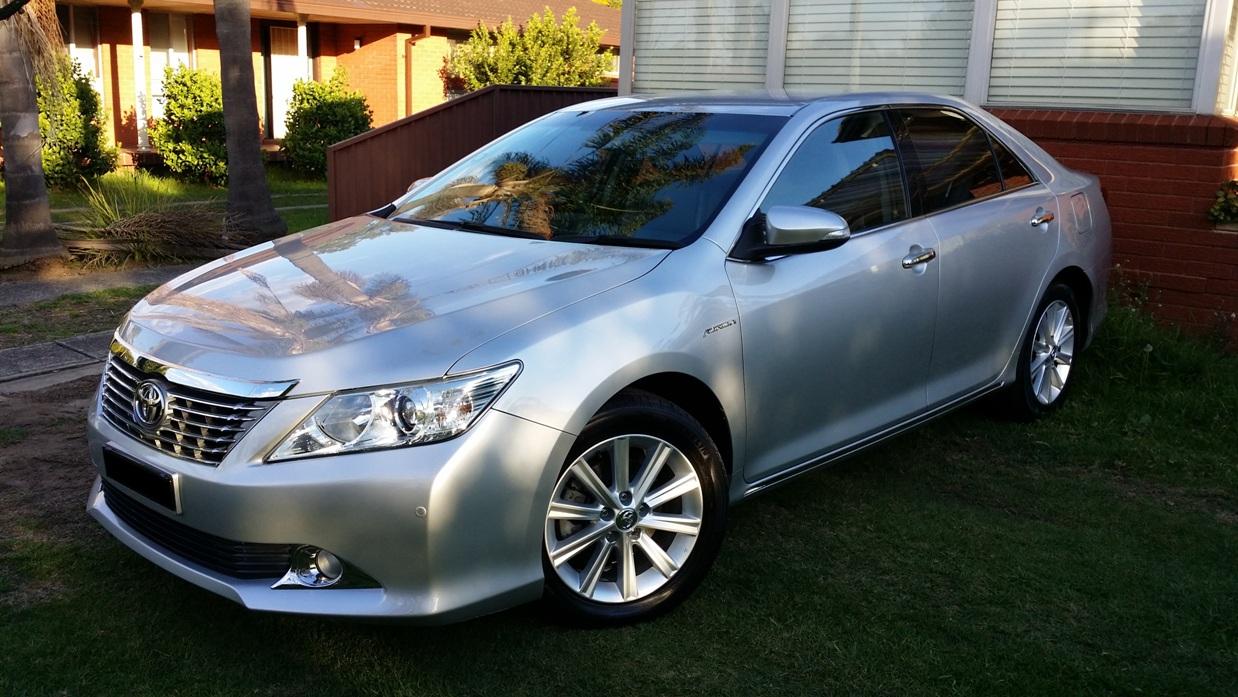
***My apologies for the original upload as the pictures didn't display the way I liked, so I've gone back in and redone the whole post. This should be much better guys. Howdy Gents. I had an appalling realization that I had not washed or cleaned the Aurion for like 6 months or so as my wife so kindly informed me. Wow ! Where does the time go ?? Admittedly, the car did look sad, even though it is mechanically sound, I had to make things right and make it happy again. So the plan was to spend the whole weekend and carry out the mother of all detailing. Mind you, this was only to bring it back to a level I’d be satisfied with even if it didn’t include a full paint correction and ceramic coating that I have been planning for some time. It was heavily contaminated. So wifey had the use of my Colorado while I set about, unfettered, to pursue my OCD level of perfection. This was the plan. 1. INTERIOR: Empty the cabin of all items. Booster seat permanently removed. Mats removed and washed separately. Vacuum interior. Wipe down all surfaces with interior cleaner. Wipe and clean interior sides of glass. 2. EXTERIOR: Decontaminate paint, glass and trim, including wheels/tyres. Clean engine bay, clean wheel wells. Polish Headlights and B-Pillar Plastics. Apply a durable sealant to paint, trim, glass and hard plastics. A quick walk around the car revealed the task ahead. It was going to be quite a work out, so I got cracking. Set up my pressure washer and lined up all the key products to be used and got to work. I decided to do the interior first, so I removed all the mats and pressure washed each mat and set aside to dry. Then came the vacuum, dug in deep and got the carpet sorted. Wiped over the dash and other hard surfaces with my Meguiars interior cleaner and microfibre cloth. It also leaves a nice fresh fragrance too. Once I was satisfied with the interior done, I moved to the next stage. Jacked up the front, placed axle stands underneath, removed front wheels and assessed the carnage inside the wheel wells. It was bad. There was mud, dirt, grime and oil spatter. Initially I suspected something was leaking from the engine, but after inspecting, found nothing. Wifey must’ve driven over something and it just happened to be of an oil consistency. I then, pre-soaked the engine bay and wheel wells/suspension parts in All Purpose Cleaner and let it dwell for a few minutes. Then after some agitation with my various brushes, pressure washed these areas and then proceed to give the whole car a rinse. It was covered in bird poo spots, fallout and other heavily ingrained grime. It was terrible. After a thorough rinse, I foam cannoned the whole car inside, out and underneath and let the soapy emulsion do its thing. My boy happened to see me with the foam cannon shooting the soap and thought he’d have a go too. It looks like fun to them. How can I resist ?. Then came the final rinse before the next stage of decontamination could begin. The paint had a rough feeling from all the embedded crud, so I then hit it with a spritz of Gyeon Iron to remove all the iron fallout and other contaminants. This is a colour indicating product, so as soon as it’s applied, it will change colour to purple indicating the presence of iron among other things. It’s a very satisfying thing to see. You don’t realise how dirty the paint is until you use iron remover from the paint. If you wish to apply paint sealant or polish, this is a very important step if you want your product to adhere and last. After Iron remover had time to percolate, it was time to rinse off. Then came time for the hand wash with two bucket process utilizing my microfibre wash mitt. Engine bay, under the wheel wells and suspension got another deep clean to ensure maximum cleanliness. I’m fussy if you recall, haha.. The headlights and B-Pillars needed attention too as the ravages of the weather had also taken its toll here too. Got my trusty little 3” polisher out and set to work correcting the sun beaten plastic covers on the B pillars and then onto the headlights. They both came up quite good. Also did a pass over the sun visors on the tops of the doors to clean up any spotting. Sponge Buff Pads are Lake Country where the microfibre cutting pad is Meguiars. High Quality Rag Company Edgeless Microfiber Cloths for the Application of the Sealant This is the B pillar before Polishing This is after Now for the Headlights. Driver's Side Before Shot Driver's Side After shot Passenger Side Headlight Before After Shot Next, It was time to do the Clay. Using my clay mitt and some ONR rinseless wash in a spray bottle for lubricant, I set about claying the entire car including the glass. You can feel the roughness of the surface as you move around and then the smoothness after several passes. This was the final step in the decontamination process. A final rinse was then done. The paint and glass now looked extremely clean and contamination free. Now it's time to apply the sealant. A quick wipe over with panel wipe will ensure a clean oil and residue free surface. Having recently purchased several items from the Hybrid range of Turtle Wax products, not the Flex wax, but a combination of “Ice” Seal and Shine, Ceramic Spray Coating Wax, and a bottle of Ceramic Wet Wax. The Wet Wax can be used as a Topper Coat for the Ceramic Spray Wax or any other Ceramic Coatings. Using It During the Drying Stage also acts as Drying Aid Adding Extra Slickness at the Same Time Maintaining the Foundation Layer. This Version of Ice is the Updated Formula and Can Be Used Over Any Of The Above Products. I only planned to use the Ceramic Spray Coating, put down a foundation coating and then on every subsequent maintenance wash, use the wet wax as the topper. You apply the latter product when the car is wet and you simply rinse off. Nice and easy but effective. This combination should keep it protected until the time comes for the fully fledged Ceramic Coating by Avalon King. Menzerna Top Inspection Panel Wipe. After I had dried the car, I gave the car a final wipe over with some surface prep spray and then I applied a couple of spritzes of Ceramic Spray Coating to each panel and worked it in with my Edgeless Eagle Microfibre cloth then buffed to perfection with a second cloth. I am stunned how good Turtle Wax products have become. The car looked amazing with just one simple coating. Then it was time to move to the glass. I had also planned to do a ceramic coating here too but the lack of shelter prevents me from doing it at this point. Ceramic coatings require a curing time and you don't want any contamination during this so it had me stick with the traditional Rain-X rain repellent glass sealant. Despite all this, the Rain-X product is extremely good for what it is and performs amazingly well in rain situations. I never have to use my wipers during the rain whilst driving. It is so hydrophobic the water beads just drift off the glass. I gave the windscreen a machine polish with my Flex and a microfibre cutting pad and some Menzerna FG400 heavy cut compound to full ensure cleanliness. The cleaner the surface, the better the product will work. After compounding, came a wipe down, then another pass with IPA to remove any polishing residues and oils. When it was literally squeaky clean, it was time to the application. Spray onto an applicator is the best way to apply it as opposed to spraying the product directly to avoid over spray where it isn’t wanted. After it flashes off, I like to spritz lightly with water and wipe off with a glass microfibre cloth. I use the Rag Company’s Black Diamond cloth as it doesn’t leave any lint. The moisture helps with the wipe off and you can buff it to a perfect shine. Did the rear windscreen and all door glass too. After this came the application of Cera Trim to the hard plastics such as inner fender liners and any other plastic items in the wheel wells. Also did the black plastic areas on the door mirrors as these are notorious on the 50 series for fading. Also did the lower plastic grille section in the bumper bar. I was also hoping to do the wiper scuttle cowl too, but this would’ve taken a lot of time with disassembly/reassembly and I didn’t really have that luxury all things considered. I will have to do this another time. Faded Mirror Bases A quick dab to see how it looks. Treated Mirror After I was satisfied with the inner wheel wells, I coated the inner barrels of the wheels with some left over “Ice” seal’n’shine from an outgoing bottle and then dressed the tyres inside and out. Fitted the front wheels and torqued nut to 78 ft/lbs. Gave the engine bay a wipe over, checked fluids and she was done. This took me all day Saturday and most of the day Sunday. So here she is in all it's Glory. The 50 series have such an elegant style to it. I never get bored of it. Thanks for reading.
-
Latest Electric Car News and Developments
Tony Prodigy replied to campbeam's topic in General Toyota & Other Car Discussions
Wow. I never imagined this would be. That's actually a master stroke by Tesla, hitching its wagon to Toyota's horses. This would alleviate many of the known complexities and hopefully streamline the entire manufacturing/delivery of the product. They can also learn about quality control too, something they've been lacking for a long time. The Japs are masters at making cars and I would have more confidence in the product knowing it came from one of their plants. -
Current Oil Specials
Tony Prodigy replied to campbeam's topic in General Toyota & Other Car Discussions
Your welcome mate. I didn't need any either, but I did grab a couple for my Dad's Aurion as it's nearing it's 80k service. I decided to just keep using the Nulon for my car and use the Penrite for Dad's. There were also times just recently where I could have also used some brake cleaner instead of degreaser but I wasn't going to pay 7 bucks a can for the stuff so thankfully this came at the right time. The beauty about brake cleaner is that it has the magical ability to clean soiled or oily surfaces by evaporating the grime without the need to degrease then rinse and have water everywhere. Great for those little DIY jobs where you just want to keep things simple. 10 cans will ensure I don't run out in a hurry. Don't you hate it when you really need something and it's either you don't have any or the last can you have has almost nothing left in it 🙄 -
Current Oil Specials
Tony Prodigy replied to campbeam's topic in General Toyota & Other Car Discussions
Supercheap are having a Club Sale. 40% off Penrite Full Synthetic oil among other things if you guys need anything. 400g Brake Cleaner spray are also $3.00 each. I also ordered 10 cans. Very handy stuff ! Normally around $7.30 a can. Excellent value. https://www.supercheapauto.com.au/club-specials?j=4776547&sfmc_sub=822401467&sub=206595815_SCA01_CRP&l=333_HTML&u=100786122&mid=6010680&jb=2082&utm_source=email-subscriber&utm_medium=email&utm_campaign=au-sca-2021-wk45-club-3dd -
Hi Warren, if it was a car yard purchase, then you should take it back to them under warranty. If it was a private sale then I'd do what Ashley has said and get the transmission/transfer case fluid done as the first measure and go from there.
-
Nice to have you on board Michael. Feel free to ask whatever question you have. There's plenty of help here. Cheers
-
Too many variables to make one definitive response to be honest. A whine could be transmission, power steering pump, dry idler pullies, alternator bearings, wheel bearings etc. Does the whine only occur while driving or can you reproduce the sound when revving the engine up from stand still ?
-
Yep, The 50 series Prodigy and Presara share the same 17" wheels actually and I have seen PS4 to suit 215/55R17, so shouldn't be a problem. Just have to dig around to get the best possible price. I hope this Covid crap hasn't added an extra tax to tyres too...


