

-
Latest Postings
-
1
Need Advice please
Suggest that you look at an online catalogue for struts/shock absorbers specifically for the Year and Model specification for your Camry. Easiest way to clean fuel injectors is to use a fuel additive together with decent quality fuel. -
1
What can cause 2x bolts Missing on break calipers?
For starters, you are referring to the BRAKE calipers. Missing bolts is highly probable that whoever last worked on the braking system did not properly tighten the bolts to the correct torque specification. Presumably, the brake pads were replaced approximately 6 months ago. -
1
What can cause 2x bolts Missing on break calipers?
Hi All, I have sent my car to a local mechanism shop as I heard a big scary clunk noise from the front left wheel part recently. And a huge surprise came back to me is, they told me that my break calipers has two bolts missing. I don’t think it is a common problem caused by daily routine driving. So really need to find out what was happened to that 2 bolts?! How lucky I was for driving nearly half a year without a tight break!! I even have kids on my car… can’t think more now. It’s terrifying 😱 -
10
Engine Immobiliser
Hi Chris, I would suggest getting a code scan as well mate as it could be something locking out the security starting process, and it may make tracking it down faster for you maybe worth the fee for a mobile mechanic who can do that for you as I doubt it will be a fuse or relay causing it sounds,like something in the security side of the process. I am sure if any others have ideas they will post it, these are just guesses on my part so I hope you get it sorted fast mate KAA -
1
Hello Toyota Club AU
Welcome to the forum Dan, I hope you can find your answers for your Yaris KAA -
0
Fuse boxes info
I have a Toyota tarago 2002 acr30. I'm trying to find out where I can get the contents list of all the items in the fuse boxes. I think it has 4. I only have one cover in the engine bay fuse box. The other three have no information anywhere. Need to know what the items ( fuses, relays ) are for ?? If anyone can help would be a nights sleep for me.. -
0
Rav4 Nightmare After Dodgy Mechanic
Hey everyone, hope you're doing well! Unlike me and my Toyota, which is currently in a bit of a mess, haha. I'm reaching out for some help, feeling pretty desperate, to be honest. My 2013 Rav4 2AD-FTV Turbo Diesel is on the verge of being a total loss thanks to a dodgy mechanic who really messed things up. My car's was pristine, but then it blew the head gasket. I acted quickly, called up a mechanic recommended by a friend, and he towed my car away promising to assess the damage. He later reported that the engine was still in great shape but needed the head gasket reshaped to fix the issue. Weeks turned into months, and despite numerous promises and missed deadlines, my car remained in the shop. The mechanic stopped answering my calls or messages, and when I finally tracked down my car, it was sitting outside another workshop, unable to start. Cut to now, after seeking help from a reputable diesel specialist, they've replaced seals, checked compression, swapped injectors, and pretty much everything possible. But my car still struggles to idle, and they suspect the previous mechanic may have messed up something electronic or electrical. I'm at my wit's end. No auto electrician seems willing to touch it, fearing it's a money pit with no guarantee of success. It's incredibly frustrating, especially considering I may lose the car. Any advice or suggestions would be greatly appreciated. Thanks in advance! -
0
Door seals - causing internal leak
Hi experts need some help. I have a 2004 Sahara 100series. With all this rain we are having my car has started leaking. It was my father in laws car. It’s leaking water down the pillar trim where the handle is inside front seats onto the dash, down the side of airbag and glovebox and dripping from corner foot area where dash ends and onto the floor. I can see the seal on the roof above the door has a gap in it. Could this be it? 1Q. Who would I get to look at this? 2Q. Anyone had this issue before? 3Q. Where do I begin. Thanks in advance, Sarah IMG_3589.mov -
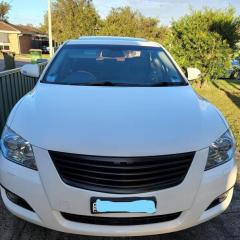
1
Need Advice please
Hi, can anyone tell me if the shocks from a camry 2011 fit a 2013 camry? Also my car surges while i accelerate, ive changed the fuel pump and filter still does it, im wondering it could be the fuel injectors? Are they easy to clean? -
19
FUEL WARNING MESSAGE
Kanga, You wouldn't believe it, I found a pump at a Victorian wrecker. He posted it to me but to the wrong address. It was 10 days before I found this out. I went to the wrong address and they said the didn't see it. Austpost is adamant it was delivered. The wrecker fortunately has another one. So, I haven't taken the old one out yet.
-


Recommended Posts
Join the conversation
You can post now and register later. If you have an account, sign in now to post with your account.